Showing posts with label do. Good Stitches. Show all posts

Saturday, January 6, 2018

Formulating a Quilting Plan

In my last post I made reference to joining in with Aby Quilts to complete an unfinished quilt each quarter. I'm actually hoping to complete three this first quarter - all of them for the Faith Circle of do. Good Stitches. Last year, with moving to our new home, I was able to coordinate the planning of these quilts from my circle, but not able to pull off getting them completed. Now that the new year is upon us I will be coordinating two quilts in 2018, so I need to get myself in gear and finish the 2017 quilts.

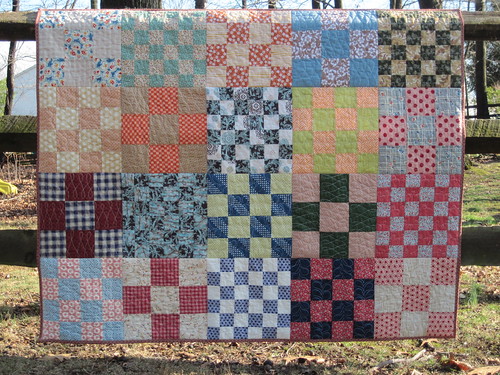
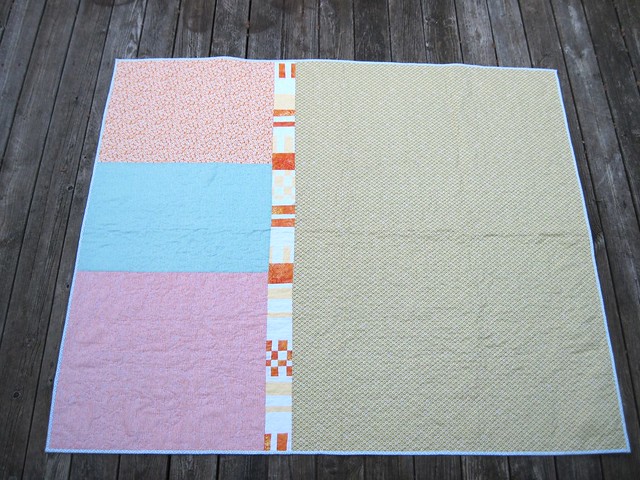
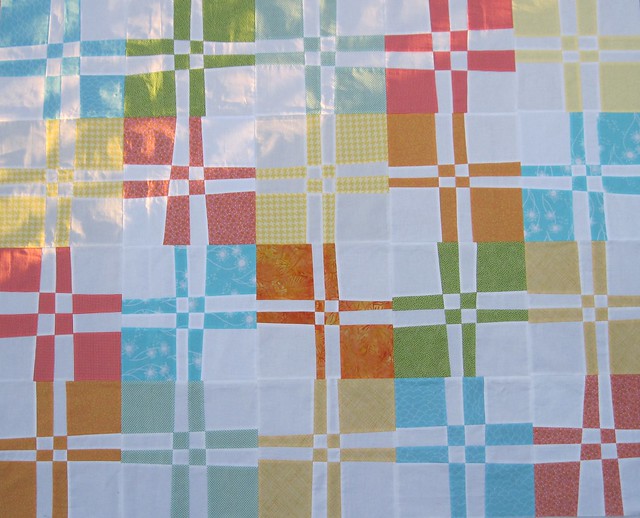
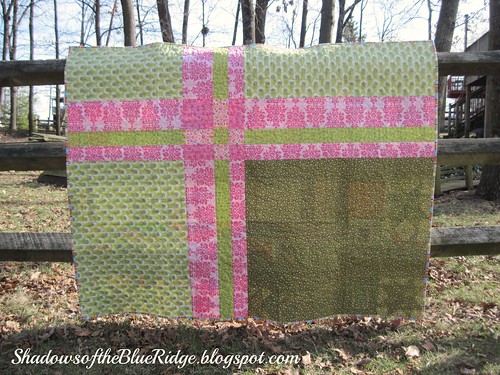
First up is the green and blue improv log cabin quilt. I am thrilled with how saturated the colors are in this quilt top. Yesterday I got it pin basted using a nice open space on the basement floor. It just took a little over an hour to baste this 48" square quilt. The challenge was to keep our dog from walking back and forth on it while I was working. At one point she even decided to lay down on it. Maybe that means it's snuggle worthy?

Sandwiching the quilt
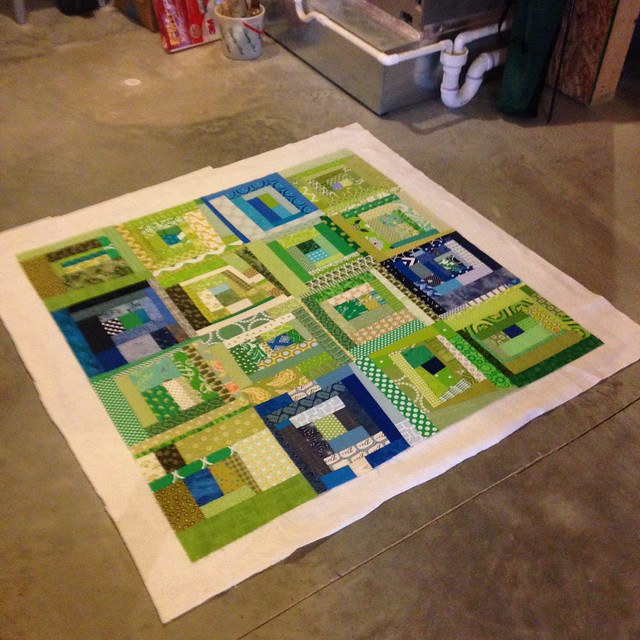
All smoothed out and ready to pin baste

As it was spread out on the floor I mulled over how I'd like to quilt it. Options considered include:
  • Edge to edge straight line quilting using painters tape as a guide
  • Grid quilting using painters tape as a guide
  • All over meander/stipple and possibly include loops
  • Flame/wood grain quilting the individual squares
It's been a while since I've done any free-motion quilting so I think it's time to give it some practice again. As I've written about before, I have a pretty small Janome domestic sewing machine. It can be a challenge to use it for quilting; however, for the most part I've been pretty happy with what I've been able to do with this machine. I decided to try the flame/wood grain design in each individual square. This saves me from having to feed large sections of the quilt through my machine as I will only be working on one square at a time. I'll start by stitching-in-the-ditch along the seams where the blocks are joined. This will stabilize the quilt sandwich, and allow me to stitch along this same line as I work back and forth in the wood grain design. 

Planning out the quilting design
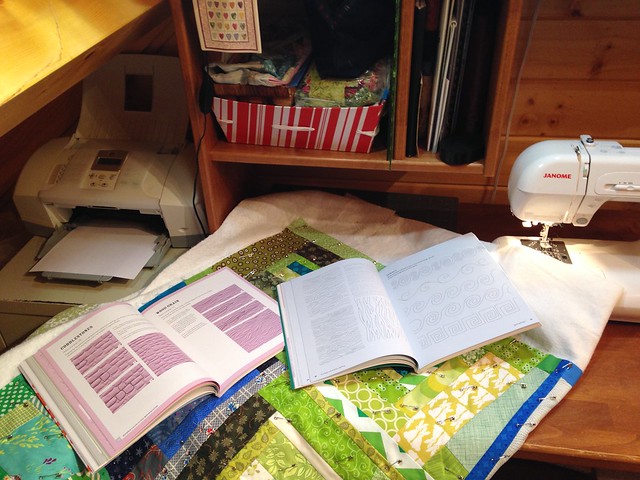
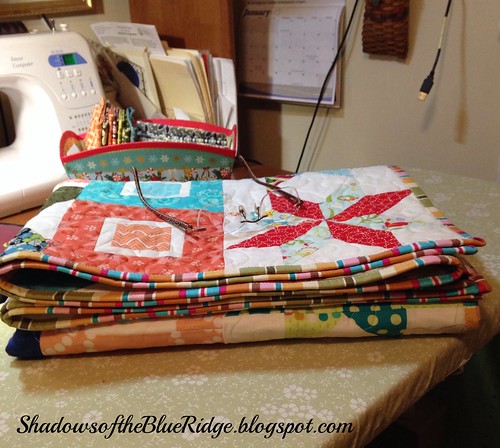
Searching for quilting options in my reference books

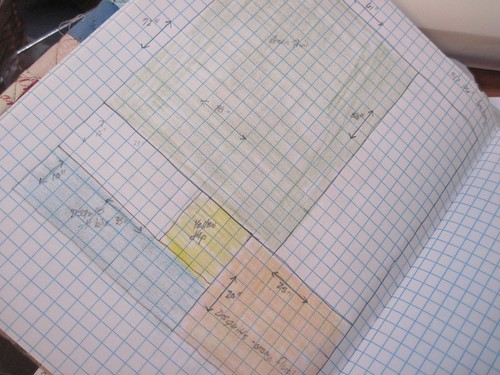
I have a couple of great books I've written about before that are so helpful with learning about developing the skills needed with free-motion quilting. I pulled them out along with an old composition book (left over from my son's schooling days!) and practiced sketching out the design.

Practicing my quilting design
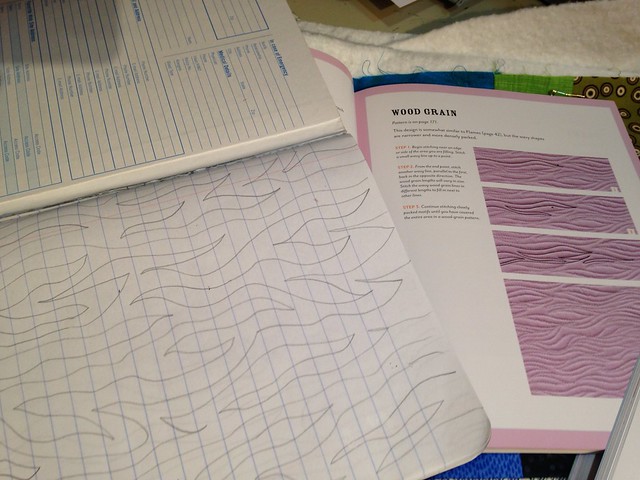
Sketching out the wood grain design


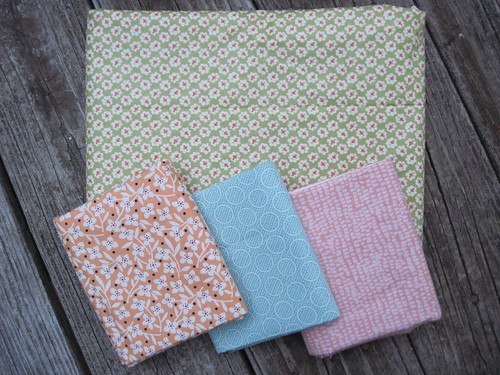
I'm thinking I will alternate the direction of the wood grain stitching from block to block. I also plan to use up various shades of blue and green thread I was gifted from a friend whose mother used to quilt. Here's to a good plan, now wish me luck as I get started! 


Wednesday, March 15, 2017

Quilt of Valor - Faith Circle

Twice a year I have the opportunity to select the quilt design and recipient for one of our Faith Circle quilts. Last fall I knew my turn was coming up, and I knew who I wanted to make a quilt for - a special soldier who fought for our country in Iraq. I have such respect for the Quilts of Valor Foundation as they strive to wrap in love members of our armed forces who have been touched by war.

Quilt of Valor - October 2016 quilt
Quilt of Valor

Quilts can often have a more feminine look to them, so I did quite a bit of looking to find a pattern/design with a more masculine appeal. As soon as I saw this quilt designed by the talented Ara Jane Olufson I knew it was the right one. She happily granted us permission to use her design for our quilt.

Quilt of Valor - October 2016 Faith Circle Quilt
A bit of breeze to add movement


The Faith Circle ladies were so wonderful to make extra blocks and send fabric squares so that our quilt would be of a nice size. It ended up at 64" x 80" before washing. Perfect size to snuggle up on the couch with!

Quilt of Valor - October 2016 Faith Circle Quilt
This picture shows off the nice texture added by the long arm quilting

The long arm quilting was graciously done by a local friend - we agreed that an all over star pattern was the best choice.  The Quilts of Valor Foundation has guidelines they request you follow for all quilts, and included in that is the label. I usually struggle with what to put on a label, so I found their guidelines to be very helpful.

Faith Circle Quilt Label
I used a Pentel Gel Roller for Fabric pen to make the label

This was a very satisfying quilt to work on and finish. I hope it will be a blessing to it's intended owner.

The Faith Circle is a virtual quilt group operating under the guidelines of do. Good Stitches. If you are interested in finding out more, or joining, you can do so here.

The mission of the Quilts of Valor Foundation is to cover service members and veterans touched by war with comforting and healing

Wednesday, December 30, 2015

Final Finish for 2015

Great grandmother's patchwork quilt - not the typical quilt you see me working on for the Faith Circle of do. Good Stitches.

Great Grandmother's Patchwork ~ a Faith Circle quilt

Early in 2015 it was my turn to choose the design for the month of March. I got it in my mind that I'd like to go with sweet and easy, but with a twist. Instead of all the blocks being the same I asked my circle mates to sew a mix of 9, 16, and 36 patch blocks. Here are the instructions I gave them:

This month I'm going to turn us temporarily away from our usual modern quilts and head, instead, in a "passed down through the generations" look. I'm calling it Great-Grandmother's Quilt. I've no idea how this will look actually made up, but we are going to give it a whirl and find out :o) ...please use fabrics with a tan/grayish undertone. 

Great Grandmother's Patchwork ~ a Faith Circle quilt
Beautiful old-timey quilt blocks

One of the circle members reflected that her blocks reminded her of the house dresses her Grandma used to wear - Perfect!! As you can see they did a great job on these blocks - a great way to practice that ever-important 1/4" quilt seam.

For this quilt I used the quilt-as-you-go method of assembly. This was a first for me and I'm going to write about it in a separate blog post soon so stay tuned.

For the quilt back and binding I used a couple of Thimbleberries prints that have lived in my stash for a while. This was the perfect project to put them to use. In addition, I had one extra block left from the front that I included...my motto: leave no blocks unused.

Great Grandmother's Patchwork ~ a Faith Circle quilt
Thimbleberries quilt fabric on the back

I am so happy to have this one finished and on it's way to Restore Innocence - an organization providing aid to the victims of human trafficking. I hope that as it is used it will bring comfort and perhaps a sense of endurance and grit passed down from those who came before us.

I'd also like to share two quilts made by my local quilt group, Winchester Modern Quilters. These quilts are also on their way to Restore Innocence. They were created from Quilto (Bingo) squares we used in one of our meetings. One of our members then took the squares and created these two cheerful quilts.

Bingo Quilts by Winchester Modern Quilters
Bingo square quilts - Winchester Modern Quilters

Hoping, as we transition to 2016, you enjoy a year of making meaningful gifts for those you love and hold dear. Happy New Year!

Friday, January 30, 2015

A Faith Circle Finish ~ A While in the Making

Wow! Sometimes there are those quilts that you just don't think are ever going to get finished - as much as you want them to. They sit neatly folded in your sewing room just taunting you. This appliqued wonky disappearing 4-patch is one such quilt.


Faith Circle Disappearing 4 Patch
Wonky disappearing 4-patch with applique borders

It started innocently enough with the selection of an easy quilt block, the disappearing 4-patch. I knew I wanted my Faith Circle partners to use a soft color palette to make these blocks, and to add a bit of whimsy, I wanted the blocks to be wonky. Thinking this might be a good opportunity to try my hand at writing a quilt block tutorial I snapped lots of pictures of the construction process and wrote up the directions. (Tutorial can be found here.) I like to point out that I did not create this quilt block, I only wrote up a tutorial for it.

Once the blocks arrived I just knew they were the perfect candidate for my first applique border. 


Applique border
Applique borders under construction

I combined pattern elements from several different sources to come up with a flowering vine to surround the quilt blocks. Whimsical flowers was the look I was after. Naively I figured it would take me about a month of sewing to get the borders all stitched down using machine applique. 

One flower stitched down. :)
Machine applique on whimsical floral borders

In reality it took me five months of stop and go work to get the borders complete. For some reason they just seemed to be an overwhelming task. Finally they were finished and the quilt top was assembled! Next up...how to quilt it. Over the summer months I had collected a few books on free motion quilting using your home sewing machine. I wrote up a blog post about my adventures in developing my quilting skills that can be found here.

As you can see in this picture the Loops and Poppies quilt design is so nice when the quilt is freshly washed and dried...there is just something so appealing about a nice, crinkly quilt :o)


Faith Circle Disappearing 4 Patch
Just look at this great texture!

Here's a look at the entire quilt all finished. It turned out exactly as I pictured in my head and I'm so happy with it!


Faith Circle Disappearing 4 Patch
Wonky disappearing 4-patch with applique borders
For the back I took two extra blocks that were not needed on the front, chopped them up, and created a ribbon. Then, I added large cuts of fabric on either side to finish out the scrappy back.

Faith Circle Disappearing 4 Patch
Quilt back

This quilt is on it's way to Restore Innocence where it will hopefully bring comfort and warmth to a young woman in need of it. I'll leave you with one final picture...I just discovered this great tree behind our fence - it makes a perfect quilt display!


Faith Circle Disappearing 4 Patch
Quilt in a tree


Saturday, September 27, 2014

Leave no blocks behind - In pursuit of a quilt back

Back in March I was the quilt designer for the Faith Circle quilt. For this quilt I asked the Faith Circle ladies to make wonky disappearing 4-patch blocks using a palette of soft colors. You can read more about the quilt design and find the block tutorial here. In my mind I had visions of a plaid center section surrounded by applique borders of whimsical flowers. 

image

After a few more months than I intended the finished quilt top finally emerged :o) These happy little flowers took longer than I expected to complete, but I am oh-so-happy with the finished top...it turned out exactly as I pictured it.

As often happens with our Faith Circle quilts there were a couple of blocks left over after the quilt top was assembled.


IMG_2743

I try to go by the motto, "Leave no blocks behind." In other words, when a quilt is completely finished (quilted and bound) I really don't want any orphan blocks left over. A good way to accomplish this is to use the extra blocks when making the quilt back. I have collected a few larger cuts of fabric to put together with the two blocks in a pieced back. I want the back to use the same soft colors as the quilt top.


IMG_2744

In my quilt notebook I've started to sketch out an idea...we'll see if it works out with the blocks and fabrics I've pulled. I hope to get the back pieced this weekend, and maybe get the quilt basted, too. 


IMG_2746

I'm excited to see this quilt progressing! 

Friday, May 2, 2014

May ALYoF Goal - Applique Flowered Borders

When making quilts for the Faith Circle of do. Good Stitches I find the quilt top usually needs to have borders added in order to be larger than just a small lap quilt. I like the finished quilt to be at least a throw size - covering the top of a bed, but not as large as a twin quilt.

I am currently in the process of assembling the March Wonky Disappearing 4 Patch quilt for our bee. The blocks are joined and are ready for borders...fun, flowering borders!

A couple years ago I purchased The New Applique Sampler by Piece O' Cake Designs. I highly recommend this book if you would like to learn needle turn applique...and you should because it's great fun!! This book contains patterns for fresh, whimsical flowers and I know they will be perfect for this quilt. However, I am going to use raw edge applique (fuse the applique pieces to the border fabric and machine stitch the edges.) 


Applique border 


So far I've cut out and fused down the flowering vine applique for one side of the quilt. It still needs to be machine stitched down.

My May "A Lovely Year of Finishes" goal is to complete the border for all four sides and attach them to the quilt top. I am linking to the May ALYoF Goal Party. I am entry No. 33!

In a previous post I showed the beautiful Wonky Disappearing 4 Patch blocks made by the sweet ladies of the Faith Circle. Here they are joined together:


Wonky Disappearing 4 Patch Top

I am really liking the softness of the these colors! My bee-mates chose such pretty fabrics :o) Can't you just picture how fun this is going to look encircled by a border of sweet, whimsical flowers?

Sunday, April 27, 2014

April - A Lovely Year of Finishes Goal Met

Here we are at the end of April...I can hardly believe it! I am happy to report that I met my April ALYoF goal and finished the pillow :o) But goodness...I'm not quite sure how to document it just yet. You see, it can't be shown until Wednesday when my blog participates in the Quiltmaker's 100 Blocks blog tour, because...well because it features my block!! So I guess until that time I'll just have to show you the pillow back so you know it's all finished, and then the reveal will come on Wednesday during the blog hop :o)  I'm linking up with the April Finishes Party and I'm entry No. 38. 


IMG_2544

In other news: I've been working on the March quilt for the Faith Circle of do. Good Stitches. The wonky disappearing 4 patch blocks are all sewn together and now I'm making a raw edge applique border to go around it. Here's a progress shot to show how it's coming together.  

IMG_2543

I am loving this quilt! When it's all done I think it will be so sweet :o) These wonky disappearing 4 patch blocks are made using my tutorial which can be found here. The flower and vine shapes come from The New Applique' Sampler by Piece O' Cake. This is a great book if you are looking to learn needle turn applique'. For this quilt I'm fusing the applique' pieces down and then will do raw edge stitching on my machine. 

Hope you will stop back by on Wednesday, April 30 when my blog is a stop on Quiltmaker's 100 Blocks blog hop! There will be a fun give-away with prizes :o) See you then!!


Saturday, March 1, 2014

Tutorial: Wonky Disappearing 4 Patch

For awhile now I've wanted to try my hand at writing a tutorial. This month I am the quilter for the Faith Circle March quilt which means I'm in charge of selecting the quilt block, the color scheme, directions, and once I receive everyone's blocks...final assembly of the quilt. So, this is a nice opportunity to try writing a tutorial. 

Tutorials are an important part of the Modern Quilt Movement. Sharing information with one another through social media has helped fuel the growth of modern quilting. Most of my quilting knowledge has been gained via the excellent tutorials I've followed on blogs. Two talented tutorial writers who come to mind are Anita @ Bloomin' Workshop, and Rachel @ Stitched in Color. I always learn something new about quilting when I follow along with their detailed instructions.

The block I chose for the Faith Circle March Quilt is a wonky block. Wonky can translate into lower stress quilting because there is not as much pressure to have everything match up just so. This tutorial will produce two matching Disappearing 4 Patch blocks.

Please note: I am not the creator of this fun block. I just wanted to try my hand at writing a tutorial and thought this would be a good opportunity since I needed to provide instructions to the Faith Circle for our March quilt.


Wonky Disappearing 4 Patch

Since it is almost Spring I want to use softer colors for the Faith Circle quilt to go along with the season. 

Color Palette

If you have a Kona Color Card here is a list of colors that match up with my fabric samples...sometimes it's hard to tell color shading on a computer screen.

Colors:

  • True white (please do not use off-white)
  • Salmon
  • Mango
  • Banana
  • Azure
  • Pistachio
The fabrics can have any scale for print size, but please do not use solids except for the white. Prints can be tone-on-tone or have small bits of other color, but overall the fabric should "read" as the colors shown/listed above.

Wonky Disappearing 4 Patch {D4P} - Tutorial

Fabric Squares
Materials

(4) White squares cut 7" x 7"

(4) Print squares cut 7" x 7"

(Note the squares can be cut to any size depending on your how large you want your final block. For this quilt the Faith Circle will be using 7" x 7" blocks.)


1. Sew one white square to each print using a 1/4" seam allowance. Press seams toward the darker fabric.

2. Take two of the sewn units and sew them together with the colored fabric rotated to opposite ends. Take care to match up the center seam.

Matching Seams

3. I like to pin generously. I find I get much better results from my sewing if I pin...especially when matching seams.

Ready to sew seams

After stitching I iron this seam open to reduce bulk at the intersection of the center seam. Now there are two 4-patch quilt blocks.

4. Lay the blocks out on a cutting mat, one on top of the other. However, rotate the top block 45 degrees so a white section is over top of a print section on the block below (see picture).

Rotating Blocks

Try to make sure the seams of the top block are lined up directly over top of the seams in the block below (both horizontally & vertically). Now we are ready to make some wonky cuts using a long ruler.

Measuring for cuts  

5. Using a long ruler measure over from the center seam. The cut will be a wonky one, not completely parallel with the seam. Do not go over more than 2" from the center seam, nor less than 1". A good tip to keep in mind is, "A little wonky goes a long way." So, I try have about a 1/4" difference between the top and bottom measurements on the ruler. 


Squares all cut

6. Make a total of two vertical cuts and two horizontal cuts.

Swap pieces

7. Now take the four pieces indicated with red arrows and pull the stitched unit from the bottom and put it on top. 

8. Stitch the rows of the block back together using a 1/4" seam. Iron the seams toward the darker fabric. Keep in mind that since the cuts we made are wonky the pieces will not align perfectly.

Aligning pieces

Line up the "inside" edge of each piece as best you can and allow the edge which will form the outside of the block to be off.

9. When working with the center sections I do pin to match up the seam at the center intersection as I think this makes the final block look neater once it is completely assembled. I iron these seams open to reduce bulk.

Matching seams

10. Once the three rows are joined then finish final assembly of the block. Iron these seams open to reduce bulk.

11. Once the blocks are reassembled they should look like "twins" however, the color placement will be opposite each other. Because the block construction is wonky the blocks will need to be trimmed down to the desired size. Use the horizontal and vertical seam to center your blocks as you square them up.

Faith Circle: please do not trim or square-up your finished blocks. Send them to me as is and I will trim as I construct the quilt top.

I hope you found this to be an easy, fun block to construct! Here is an example of what the layout for the Faith Circle quilt may be:

Finished Wonky D4P Blocks

I look forward to seeing some Wonky Disappearing 4 Patch blocks cropping up this Spring! Happy sewing :o)


Thursday, February 13, 2014

Clever?!

Do you ever marvel at the clever creations found all around us? It can be seen everywhere. For example, here is a fabulous succulent wreath from the Christmas display at Longwood Gardens in Pennsylvania. This wreath is so amazing because of the the precise placement of texture and color...so clever!


#longwoodgardens Succulent wreath

Debbie of A Quilters Table is the host for the February Faith Circle quilt. She selected the Vice Versa block by Gen X Quilters. This block design is just so clever! I love it :o) Here are the two I made for our bee quilt:


vice versa block

I look at things like this and I wonder...how did AnneMarie think of this? Was it a sudden inspiration or did she ponder, sketch, cross out, and finally arrive at this Vice Versa block? She says blocks for this series were studied for positive and negative space and the inverse relationship that can be created. Clever, clever, clever. 

In one of my previous posts I mentioned my desire to someday be a designer. I've tried a bit of designing while crocheting socks. I've combined toe, heel and cuff construction from various patterns, and used my favorite stitches for the foot and ankle/leg sections to make these socks. 


New Socks :o)
Socks I made for me :o)
Mean Green Hunting Socks
Socks made for my brother-in-law :o)
It's been fun (and at times frustrating) and takes me quite a while to get a finished product that actually fits. I find that one of the hardest parts of the design process is writing down what I did so I can actually replicate it again. I might call this mish-mash of sock parts a kind of franken-pattern for socks (taking from several different sources), but is it clever? I don't know. 

Back in the fall I started sketching out some ideas for my own quilt block design and then creating layout options for it. I've found that it take time, and it takes quiet. One of my layout options is pretty straight-forward and what might be expected of the block, but dare I say it...I think my second layout option just might be clever :o) It will be fun to make up these quilts and see just where they stand. 

Meanwhile, here are a couple of pictures from the huge snowstorm we had today. I just love snow and never tire of the beauty and wonder it creates in the world. Enjoy!


February snowstorm

February Snow


Monday, January 27, 2014

January Finish - A Lovely Year of Finishes

I'm happy to report that I have a finish for the month of January! My goal for the January 2014 Goal Party (link No. 79) was to complete the Row Quilt for the Faith Circle of do. Good Stitches. I am linking this post to the January Finish Party ;o)


Faith Circle Row Quilt

I asked each of the Faith Circle ladies to make a row using the block of their choice. Rows could be as basic or intricate as they desired and should be 4, 6, or 8" in height by 48" long. To add a bit of visual interest I set two rows perpendicular to the others. The quilting is an all-over meander except for the area around "hope."


Hope Row

A special part of our quilt is the "hope" row. I wanted it to be quilted just a bit different so I used yellow perle No. 8 cotton to hand quilt around each of the letters.


Quilt Back~Faith Circle Row Quilt

I'm happy with how the plaid looks on the quilt back...and thrilled to have used up several pieces of fabric that have lived in my stash for a couple of years now :o)

Striped binding

I am especially happy to have used this striped fabric for the quilt binding! I am often challenged for how to put large prints and stripes to use...especially one as bold as this. It really made for a nice binding and I think turned out to be a great use for this fabric.


Folded quilt

This quilt will soon be on it's way to Restore Innocence in Colorado. This wonderful non-profit group works to rebuild the lives of those rescued from human trafficking. 

Sunday, January 12, 2014

Exciting Big News...

Okay, okay...it's really little news, but may grow into something big :o)

For quite a while now I've been mulling over joining a quilt guild. Here, where I live, in the heart of Civil War country, modern quilting is really not the vogue. There are several traditional guilds in the area with lovely quilters which I am not opposed to joining. However, most of them meet on weekdays during the hours when I'm at school (I'm a teacher) so that makes involvement with them pretty much impossible. There is a modern quilt guild that meets about an hour+ from where I live (big Shout Out to the NOVA Modern Quilt Guild!) who is just now officially joining The Modern Quilt Guild...Exciting! But, distance can become an issue. 

I've so enjoyed getting involved in the online quilting community and finding my little niche through flickr, instagram, and do. Good Stitches.  But, I would love to get to know some quilters in my own community and enjoy some face-to-face camaraderie. So...here's where the exciting news comes in! 

Yesterday I was talking to my friend, Kelley, owner of The Scrappy Apple quilt shop and we discussed trying to begin a guild for local modern quilters! We are aiming for an inaugural meeting the third Thursday in February. I'll keep you posted!!

Now, since no blog post should be without picture, I'll include my latest picture of the Faith Circle Row Quilt for do. Good Stitches. 

Quilting is finished!


I just finished free motion quilting it in a meander stitch. I am happy to say I actually enjoyed free motion quilting this quilt! Hooray!! It's taken several quilts for me to reach this comfort level and I'm so happy to get to this point in my skills! Next up is some hand stitching around the word "hope" with yellow #8 perle cotton. After that just the binding is left.

Happy stitching!