Tuesday, December 30, 2014

Easy Free Motion Quilting?? Yes!!

Over the past year I've really felt a strong pull to grow my skills at quilting the quilts I make. I want to know that when I make a quilt I've not only made the quilt top, but quilted it, too, and can be proud of both.

It helps to take some time to learn about your sewing machine. In the five years I've had my machine I've learned a lot through trial and error. For instance: most of the free-motion quilting references say to lower your feed dogs. I never could get the tension to come out right on my machine when I did this. While researching tension problems I came across this post about feed dogs by Leah Day of the Free Motion Quilting Project, and it completely changed my experience with tension. On my Janome it is essential to leave the feed dogs up. If I put them down the tension is just a mess. I just have to set the stitch length to zero and all is well. I've also learned to get comfortable with the small harp space (it's about 6" wide and 5" tall) on my sewing machine, a Janome DC3018. This picture illustrates it pretty well, I think :o) Yes that is a grapefruit!
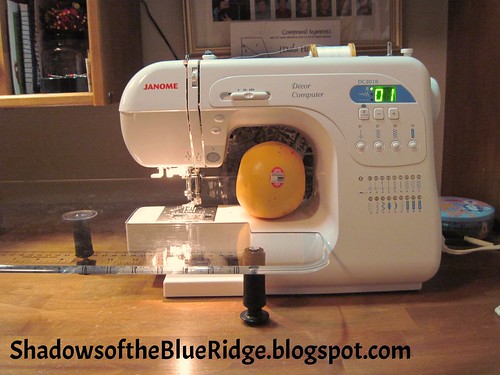

My Janome sewing machine
Janome DC3018
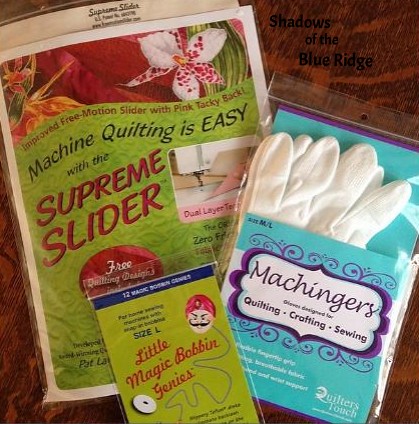
Back in March I ordered some supplies to seriously begin quilting practice. After reading recommendations from others I bought a Supreme Slider, a pair of Machingers gloves, and some Little Magic Bobbin Genies. They didn't see immediate action, but one by one I've started using them. 


Free Motion Quilting Supplies
Free-motion quilting supplies
I'm not certain my Janome likes the Little Magic Bobbin Genies. The bobbin holder is not very deep and it does raise the height of the bobbin...but I've continued using one anyway. I can say I like the Machingers gloves so much better than any other gloves I've tried-they are definitely worth investing in! They have a nice amount of grip to them, but are not heavy and hot. More recently I've been using the Supreme Slider - I like it a lot, too!

In addition, I used a few 40% off coupons at Joann Fabric to purchase several free-motion quilting books. 
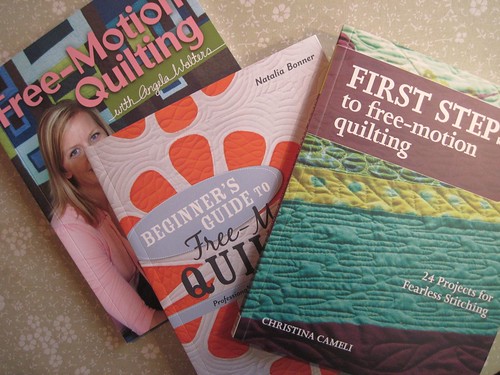

Free-motion quilting books

If you are like me, and are truly starting from square zero I found it helpful to read through more than one book. Each author is so encouraging and shares many helpful suggestions. Each of these books divide quilting designs into categories and show how to build on previously taught skills. I also took their suggestion to use paper and pencil and draw out the design I wanted to use so my muscles would get used to the flow of creating it. 

In the past I always thought that doing a stipple/meander design was where one should start when learning to free-motion quilt. I tried this on a few quilts with okay results, but just was not comfortable. Many times I would find myself backed into a corner - surrounded on all sides where I had already quilted and no way to get out. In Natalia Bonner's book, Beginner's Guide to Free-Motion Quilting, I selected a design called Loops and Poppies. It is similar to the stipple design, but just as the name implies it includes loops and flowers. 
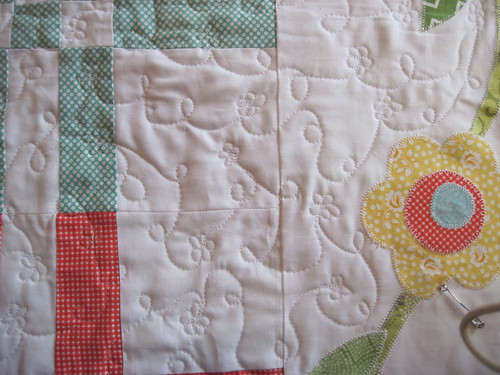

Loops and Poppies all-over quilting
Loops and Poppies design by Natalia Bonner
This pattern has really freed me to enjoy quilting! As I'm stitching along I no longer have to worry about my quilting being surrounded on all sides. If I get into a "road block" I simply stitch a poppy and come right back out on the same side of the flower where I stitched in. Wow!! As you can see from the picture above, my little poppy flowers are not perfect, but they look cute, anyway :o) Fun. Fun. Fun.

I'm stitching this on a pretty large scale and I find I'm not so good at using my hands to frame the area I'm stitching...as a matter of fact, my "technique" definitely needs some work. I'd like to practice on some smaller items like pillows or wall hangings where the scale of the quilting can be a lot tighter. I think doing this will allow me to improve my hand/arm position while quilting. I'm actually looking forward to it!

I hope this has encouraged you if, like me, you have felt overwhelmed by learning to free-motion quilt. Sequential building of skills (and a few of the right tools) make a big difference! I'd love to hear any tips you have to share with me...we can continue to learn this together! Happy quilting :o)
Monday, December 15, 2014

Snowflake Among the Stars

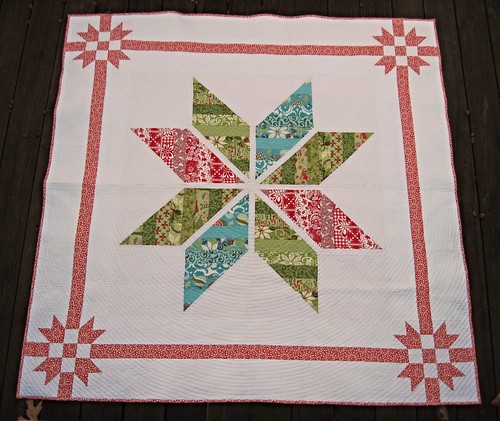
IMG_2790
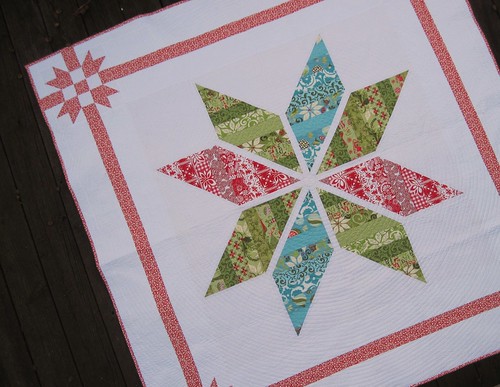
Photo taken between rain showers on a cold, windy day

Snowflake Among the Stars started out as many quilts do...with the announcement of an exciting life event. My dear friend, M, shared with me the news that her daughter {also an M} was going to be married! I've know this younger M since she was a precious little four year old :o)

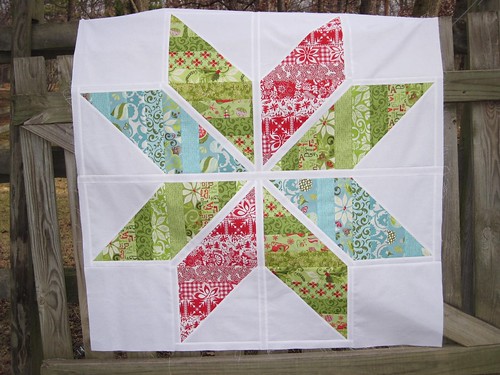
With a wedding date set for mid-December it was a fun opportunity to make a quilt that not only celebrated the marriage of this couple, but could be used each Christmas. The quilt started with this dynamic snowflake as a central medallion. This pattern, Snow-Kissed Star, is designed by Konda Luckau of Moose on the Porch Quilts, and was featured in the Nov/Dec 2011 issue of McCall's Quilting. It's such a bold design and I love how it lets you use all the beautiful fabrics in a jelly roll.  

Snow Kissed Star

The pattern in the magazine called for adding wide borders using a coordinating print around the central snowflake; however, for a wedding quilt I wanted something a little more special. 


IMG_2819
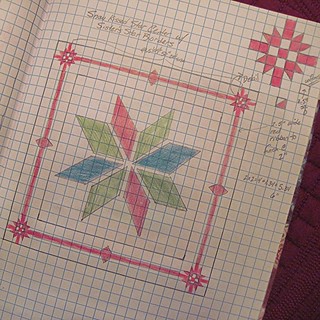
In my sketchbook I started playing around with a border to frame the center snowflake. I knew I wanted to go with a crisp red and white border design - something simple, but with visual impact on the four corners. 

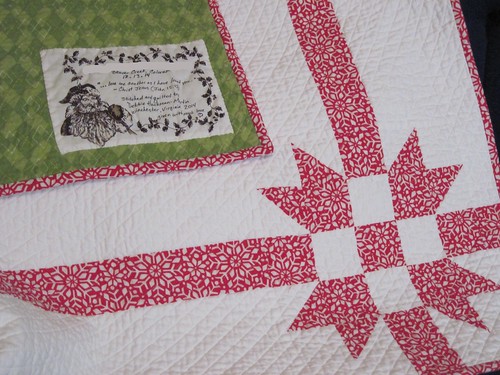
Two years ago I made this Gift Wrap pillow using a sweet little pattern by Stephanie {Venus de Hilo}. The star in the pillow is called Sister's Star...and I love how it looks like a bow. It seemed to be the perfect star block to use on the four corners of this quilt.

I planned out 10.5" sister's stars with a 2.5" ribbon framing the center Snow-Kissed Star.

My local quilt shop, The Scrappy Apple, had several yards of a red snowflake print from the In from the Cold fabric line - also by Kate Spain. I used this fabric for the red borders and the binding. 

For this young couple I wanted the quilt to have fresh clean lines, and just a hint of a vintage twist. The quilt top turned out just as I hoped it would :o) It is actually a square quilt - I just could not get high enough above it to take a picture that did not make it look rectangular.


IMG_2796
Photo taken between rain showers on a cold, windy day

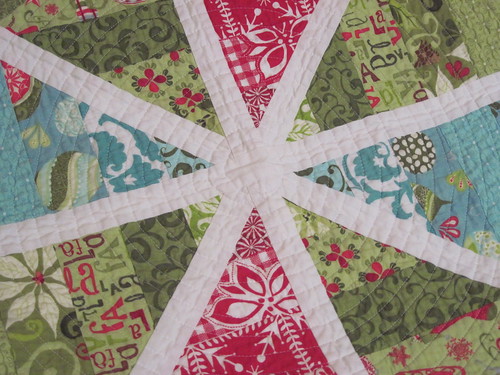
To quilt it I used the walking foot on my machine and quilted in a large spiral using 1/2" spacing. That was the easiest distance to space the lines because it allowed me to use the side of the walking foot as my guide. Using my Janome sewing machine it probably took about 12-15 hours spaced over several days to get the quilting done. Here is a close-up to show the spiral quilting:


IMG_2809
I lightly traced around a circular jar lid to get the spiral started

For the backing I found a wonderfully soft, apple-green argyle flannel from Connecting Threads. The apple-green is a great match for the fabrics on the front of the quilt. I was hoping flannel would make the quilt cuddle-worthy and it did not disappoint. The vintage Santa label is from a yard of All Occasion Quilt Labels by Northcott. A Pentel black gel fabric pen worked great to write on the label. 


IMG_2814
Name of the bride & groom crossed out on the label to protect privacy

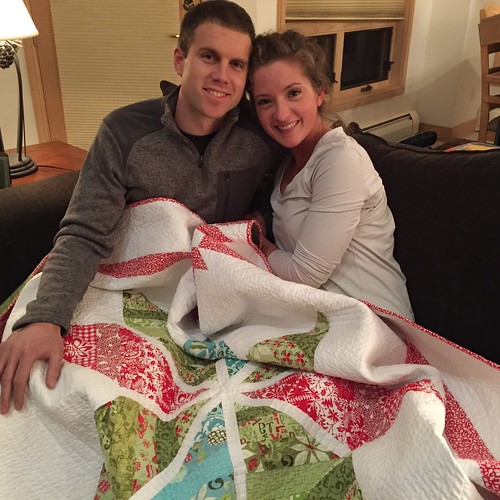
The bridal couple live a long way from where I live so my dear friend, M, delivered the quilt to them when her family traveled to the wedding. She sent me this sweet picture of the lovely bride and groom with their Snowflake Among the Stars quilt. I hope it will be a treasured part of their Christmas celebrations for years to come :o)


IMG_1269
The sweet bride and groom with their wedding quilt :o)

What a fun quilting journey this was! Wishing these newly weds a grace-filled marriage blessed with many happy years :o)