
 |
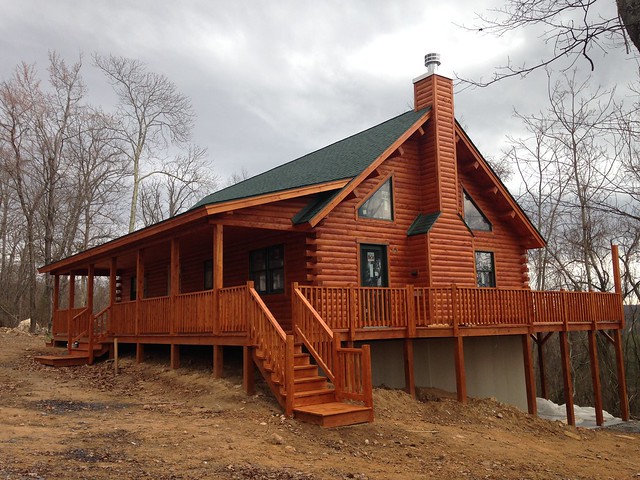
| Almost all the work on the exterior is now finished |
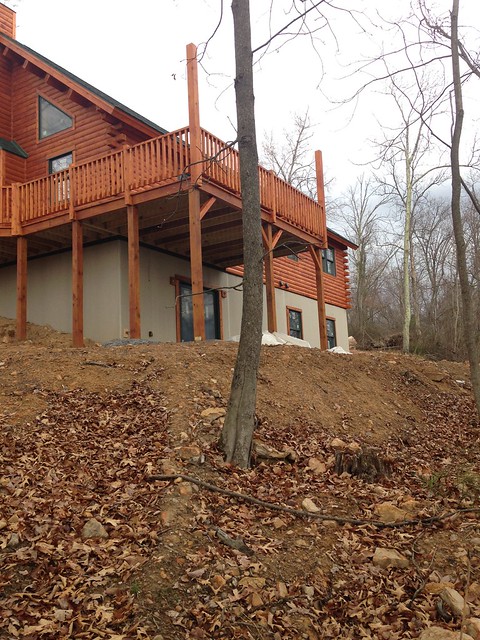 |
| Steep drop-off behind the house |
Behind the house our builder had to move a lot of soil so that there is a bit of space before it starts to drop off down the mountain. We will need to either plant ground cover, or put in some type of retaining wall to prevent the soil from eroding away. The tall corner posts up on the deck were my request. We have something similar at our current house so I can hang baskets of flowers. Currently, I also use them to hang bird feeders, however we don't want to attract bear onto our deck, so I won't hang bird seed on this deck.
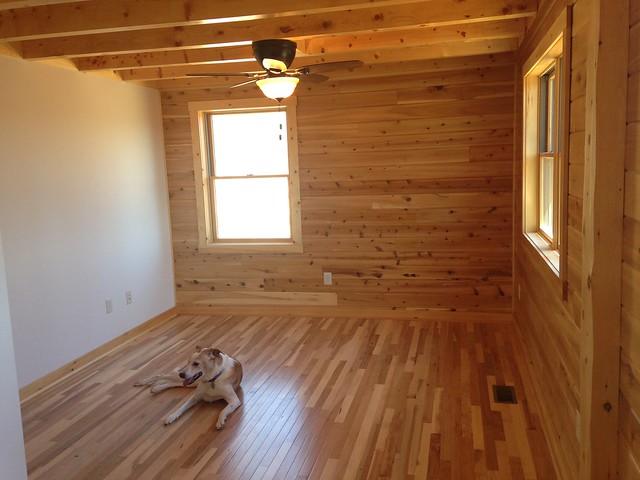 |
| Completed master bedroom |
The master bedroom is the only 100% complete room so far. The exterior walls and ceiling are northern white cedar. They are finished with a clear topcoat. It's amazing how much the clear sealer brought out the wood grain and knots. I'm also surprised at how much darker they are every time we go up to see the house. I guess the wood is seasoning. The entire main level (except master bath) has 2-1/4" hickory hardwood on the floor. We chose hickory for a few reasons: it's a very hard wood so that will aid in scratch resistance, the color variations will blend together the various woods used in the house, and the color variations combined with the narrow width will also help mask the inevitable scratches that will come with living in our home. I like the almost-tapestry appearance of it. I think our dog, Shiloh, approves.
I'm so glad we decided to use a little bit of drywall in the bedrooms and bathrooms. My first inclination was to go all wood on the walls, but my husband thought we might want the option to be able to add a bit of color. Now that I see this room finished I'm glad it's not wood all around - I think that might have been a bit much.
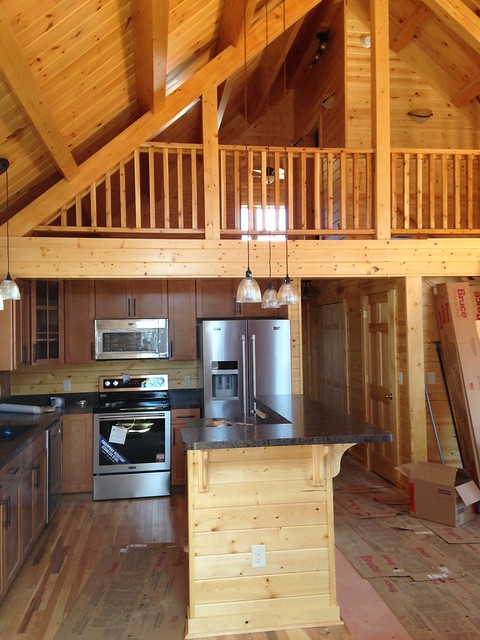 |
| Kitchen with loft above |
I've been most nervous about the kitchen. Since the house has a great room the kitchen is fully in view. It was so hard to pick out all the options (cabinets, counters, lights, appliances, sink, faucet, etc.) without knowing how the walls were going to look once they were stained, or how the hickory floors were going to look. The interior walls (and kitchen island) are all pine instead of cedar, like the exterior walls, and you can see the difference in color. I'm not sure why our builder mixes cedar and pine. It was hard to choose the stain color for the kitchen cabinets with so many different wood types. My husband did not want painted or black cabinets, so I had to choose a color to stain them. I really appreciate the advice given to me by the cabinet specialist I worked with at Lowes. She advised me not to try and match the various woods, but instead to think of them like furniture and let them all have a different grain pattern and stain color. Now that I see them all together I think it was sound advice.
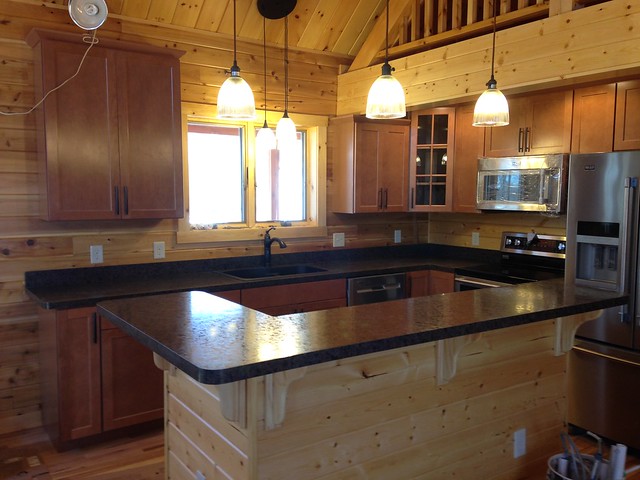 |
| Details of the kitchen |
Something I've learned about log homes is that they truly are custom - each step has to be figured out like a puzzle. For instance, look at the upper cabinets - can you see there are three different cabinet heights? The cabinets above the stove and refrigerator go right up to the ceiling (the loft is above). If you look closely at the cabinet to the right of the sink you can see it is shorter. That's because the main beam holding up the second floor is huge! Because of this we needed that cabinet to be shorter. Now look at the cabinet to the left of the sink - see how tall it is. That's because a shorter cabinet would look too small and like it was floating with the cathedral ceiling above it. I was so grateful to work with a knowledgeable (and reassuring) cabinet planner! She assured me that they would turn out looking great, and she was right :o) Just to add a focal point we added one glass front cabinet door in the corner.
Trying to stay within our budget we chose Wilsonart upgraded laminate counters in a finish called river gemstone. My thought was the dark counters would make a nice contrast to all the light wood in the rest of the great room. I paired them with a Franke granite finish sink and an oil rubbed bronze Moen faucet.
The lights were another difficult decision. The three over the island needed to hang approx. 13' down from the cathedral ceiling, which limited our choices. In the end we found these simple pendants that are suspended by their wiring and allowed us to choose any shades. To provide maximum light efficiency we chose glass instead of metal shades, so light will shine up as well as down. We've been told wood does not reflect light the way that painted surfaces do, so we wanted to make sure the kitchen is bright enough.
My initial plans did not include stainless steel appliances, but during the Black Friday appliance sales I was blessed to find this set. It had been purchased by someone else who never took delivery. Because of this they were offered at a super sales price. Lowes held them for us at no cost for over four months! Such a blessing!
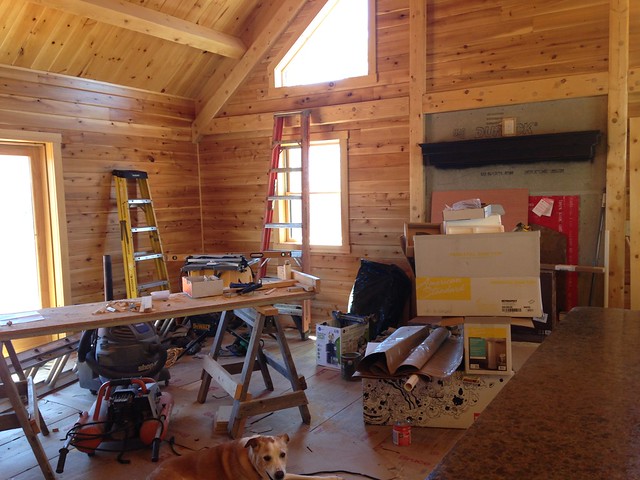 |
| The great room - holding spot for all tools |
Finally, we come to the great room. The walls and floors are all finished (floors are covered with cardboard to protect the wood). Just the ceiling fan and stone on the fireplace are left to complete. Stone will completely fill the area within the wall stiffeners shown in the upper right side of this photo. Once the fireplace is finished I'm pretty sure just some plumbing/water supply work needs to be done, then the house should be move in ready.
 |
| Katahdin Cedar Log Homes |
It's been almost an entire year since our builder, Cabin Run Construction, broke ground in May of 2016. At times it seems like things move fast, and at times it seems like they move slowly. But, all-in-all it has truly been a dream come true to build our log home and we are so very blessed to have this experience. I'll be sure to let you know when we move in :o)