Hello! You have arrived at my stop on the Around the World Blog Hop :o) Today you are in Winchester, Virginia, USA on a pretty typical cold, damp January day. If you are here for the first time - Welcome!
I was trying to do a little research on the origins of this particular blog hop and the nearest I can figure out is it started in early 2014. I'm not sure who started it - if you try to follow the hop backwards it just keeps going and going. Throughout it's spread it has featured blogs from all genre. I was tagged by the lovely Karen of CapitolAQuilter to participate. You can read more about Karen here on the post she wrote for the hop.
 |
Karen's SuperNova My SuperNova
SuperNova pattern by the talented Lee of Freshly Pieced |
I met Karen about 2-1/2 years ago while we were both participating in the SuperNova Quilt-Along over on flickr. Here are the quilts Karen and I made. Karen's quilt is on the left and mine is on the right. Since then our virtual paths have crossed several times. Maybe someday we will meet in person :o)
This is an interesting hop because it basically permits the blogger to share anything they choose with four questions as a guide, so I'll work my way through them.
 |
| My quilting To Do list |
What am I working on?
In the last year I've really been convicted about not starting new projects that just add to the pile of unfinished work. To help me focus my efforts and make the best use of my time I started a short list back in the summer. Doing this has really helped me resist the urge to drop everything and jump in on the latest quilt-alongs and swaps going around on flickr and Instagram. Don't get me wrong, I love to join in every once-in-awhile because I think it helps keep creativity and fun going - not to mention the great people you meet, but if I'm to make any long-term progress I have to focus and not be dividing my time among too many projects.
Since I've shown you my list I'll share with you my progress on three of the quilts not yet marked off.
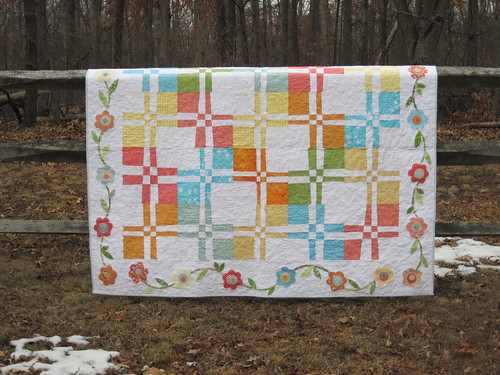
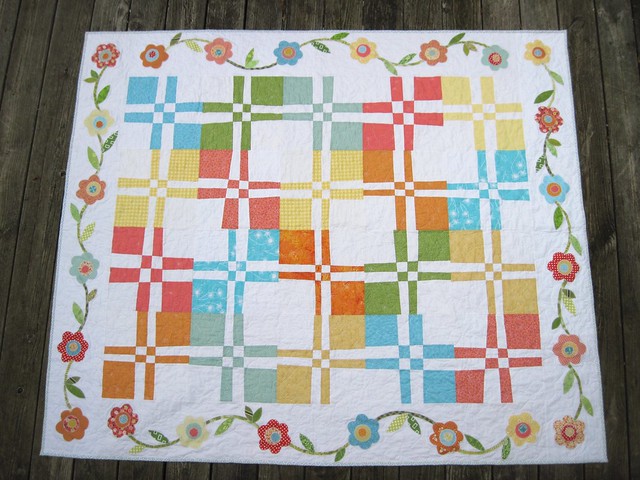
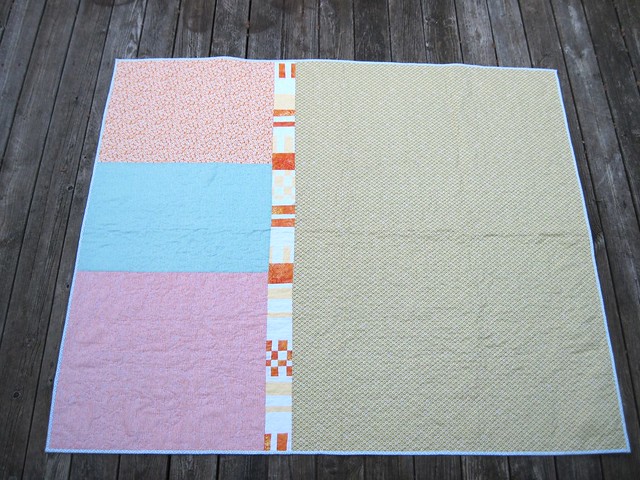
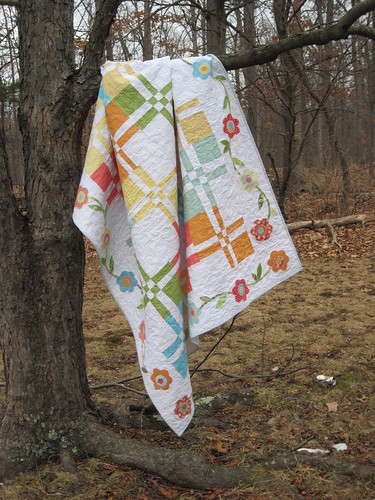
The March Faith Circle Quilt is a Wonky 4 Patch with machine applique borders. I am currently hand sewing down the binding. After this only the label is left to finish and then this one is heading for Restore Innocence in Colorado. Hopefully it will bring comfort and joy to a young woman in need.
 |
| As you can see I use a lot of pins when I stitch down binding - I find it helps keep my hands from fatigue |
Next up I need to finish repair/restoration work on a quilt belonging to a friend of mine, Penny. The Dresden plates on the quilt were originally pieced by her mother from clothing worn by her little girls. I made took the Dresden blocks and added pieced borders to make one large quilt for Penny and her sister to give to their mother. If you would like to see a picture of the quilt as it was originally finished click here. When she passed her daughters each wanted a lap quilt so we separated the large quilt into two quilts. This created the need for new borders and the binding to be replaced.
 |
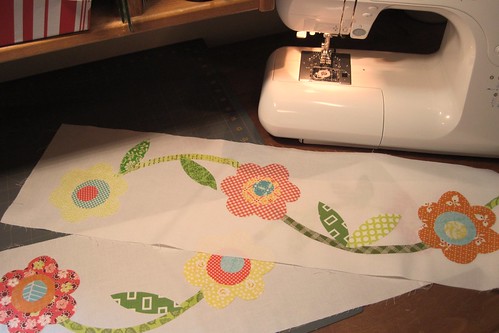
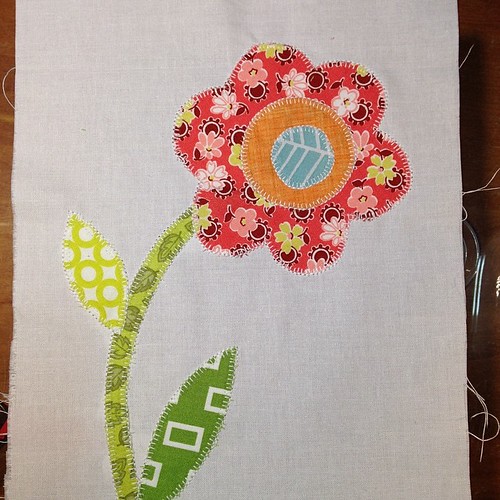
| Repair/restoration work - need to add an appliqued border and binding |
Finally I'm working on a quilt to enter into a local show. The Northern Shenandoah Valley Quilt Show will have a modern quilts category for the very first time. I'm excited for the opportunity to play a part in showing the community what modern quilts can look like. I'm making what I hope will be a well received adaptation of my Dashing Geese quilt block.
 |
| Dashing Geese block show in top left corner for reference only. |
This pretty much wraps up what I'm working on in the sewing realm. In addition, I have a pair of crochet Croc sock liners in the works for my son, and an infinity/mobius scarf for me. I'd probably better save those photos for a different post :o)
I'm going to attempt to combine the next three questions into one answer.
How does your work differ from others of its genre?
Why do you write/create what you do?
How does your writing/creating process work?
Often, as I'm sewing, I ponder how my work differs from that of others. Learning any new skill requires sitting under the teaching of others who have come before...talented, brilliant people who have caught my eye and caused me to stop and admire the beauty they have created. I have learned so much from the excellent tutorials and patterns so freely shared throughout the virtual quilting and crafting community. Generous people who have it in their heart to bring others along do so much for us all. This was an excellent starting point...but did my work differ from that of anyone else?
I began to wonder if I had it in me to move from simply remaking what others have already done and begin to create my own quilt designs - maybe not full patterns, but starting with quilt blocks.
About this time another online friend, Emily of Simple Girl, Simple Life, introduced me to Quiltmaker's 100 Blocks. I wondered...can I do this, too?? Can I come up with my own original designs? In all honesty I didn't think so...where would I even begin...how could I be 100% sure no one else had already designed what I came up with? Nonetheless I jumped in to give it a try.
I know there are a few excellent drafting programs out that are popular in the quilting world...I don't use any of them. As a technology resource teacher I spend all day, every day, on a computer, so at this point in time I find it a fun change of pace to sketch out my design ideas on graph paper.
 |
| My design notebook |
For starters I open my 1/4" grid composition book and take up my colored pencils. To generate ideas I look at several resources, books of traditional quilt blocks, images on the Internet, quilts I've seen in magazines, etc. I look at the blocks and try to come up with ways I can change them...kind of make them my own. Once I've sketched out some miniature drawings I move over to 12" paper. (Quiltmaker's requires all blocks to be 12" square.)
 |
| 12" Grid paper to reflect actual size of blocks |
My first block design, Dashing Geese appeared in Quiltmaker's Volume 9. Dashing Geese combines a Churn Dash quilt block with flying geese. This block requires paper piecing because the geese units are not conventional 1:2 ratio. I did use the drawing tools in Microsoft Word to create the paper piecing pattern. Next, I came up with the idea for Nested Bear Paw. This block was inspired by land we purchased and where we hope to build a log cabin. It was super exciting to have Nested Bear Paw appear on the cover of Quiltmaker's Volume 10!! I loved this block so much I was convinced I would not be able to come up with any more ideas. However, I kept my eyes open and before too long inspiration for a third block materialized-also inspired by our future log home. I've submitted this block to Quiltmaker's for consideration in Volume 11 and am waiting to see if it will be accepted for this future issue.
As I was reading blog posts written by other Volume 10 designers I noted how many of them refer to secondary patterns created by repeating their blocks across a quilt top. This became a new challenge for me as I puzzled with how to design a block with both a primary and a secondary design element. I've sketched out a design, but have yet to make a up sample block. This one may have the potential to become a pattern for a whole quilt instead of just a stand alone block. I'm pretty excited to see how it will turn out :o)
Drawing out ideas with pencil and paper makes me feel connected to those who quilted in the generations before me...women who did not have benefit of computer drafting and copy/paste features. Many of them possessed mighty talent and I admire their ability to create the intricate designs that so captivate us today.
Well, in a nut shell that summarizes how I'm different from others, why I create, and how I do it :o) I sincerely hope that if anyone who reads this has imagined designing their own quilt block, but not taken the steps to do so, they will feel emboldened to give it a try :o)
Next up on our trip around the blog world I am pointing you to the Pacific Northwest to my good friend - and I can say my quilting mentor - Anita, of Bloomin' Workshop. Anita has taught me more than anyone else how to be a quilter. She has a heart for sharing her talent and writes the best tutorials of anyone I know. I met Anita when I stumbled across her Medallion Quilt-Along. I look forward to reading her post next week - Monday, January 12.
ps. If you are inspired to design a quilt block I urge you to submit it to Quiltmaker's...let me know if you need submission information. I'm happy to point you in the right direction :o)
Happy quilting...and creating?!?!