Showing posts with label quilt. Show all posts

Saturday, January 6, 2018

Formulating a Quilting Plan

In my last post I made reference to joining in with Aby Quilts to complete an unfinished quilt each quarter. I'm actually hoping to complete three this first quarter - all of them for the Faith Circle of do. Good Stitches. Last year, with moving to our new home, I was able to coordinate the planning of these quilts from my circle, but not able to pull off getting them completed. Now that the new year is upon us I will be coordinating two quilts in 2018, so I need to get myself in gear and finish the 2017 quilts.

First up is the green and blue improv log cabin quilt. I am thrilled with how saturated the colors are in this quilt top. Yesterday I got it pin basted using a nice open space on the basement floor. It just took a little over an hour to baste this 48" square quilt. The challenge was to keep our dog from walking back and forth on it while I was working. At one point she even decided to lay down on it. Maybe that means it's snuggle worthy?
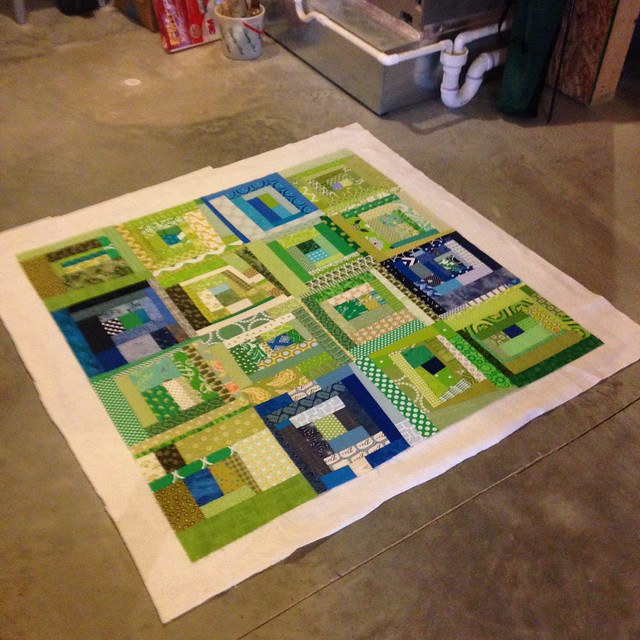
Sandwiching the quilt
All smoothed out and ready to pin baste

As it was spread out on the floor I mulled over how I'd like to quilt it. Options considered include:
  • Edge to edge straight line quilting using painters tape as a guide
  • Grid quilting using painters tape as a guide
  • All over meander/stipple and possibly include loops
  • Flame/wood grain quilting the individual squares
It's been a while since I've done any free-motion quilting so I think it's time to give it some practice again. As I've written about before, I have a pretty small Janome domestic sewing machine. It can be a challenge to use it for quilting; however, for the most part I've been pretty happy with what I've been able to do with this machine. I decided to try the flame/wood grain design in each individual square. This saves me from having to feed large sections of the quilt through my machine as I will only be working on one square at a time. I'll start by stitching-in-the-ditch along the seams where the blocks are joined. This will stabilize the quilt sandwich, and allow me to stitch along this same line as I work back and forth in the wood grain design. 

Planning out the quilting design
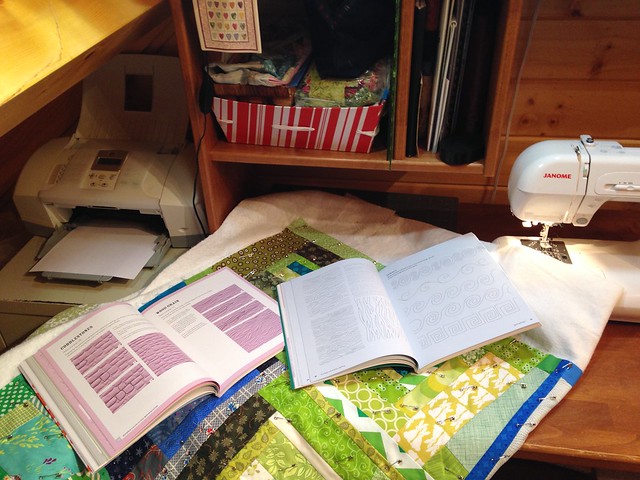
Searching for quilting options in my reference books

I have a couple of great books I've written about before that are so helpful with learning about developing the skills needed with free-motion quilting. I pulled them out along with an old composition book (left over from my son's schooling days!) and practiced sketching out the design.
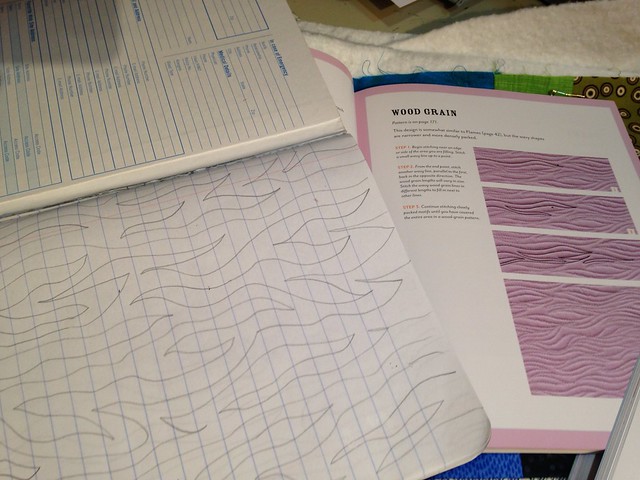
Practicing my quilting design
Sketching out the wood grain design


I'm thinking I will alternate the direction of the wood grain stitching from block to block. I also plan to use up various shades of blue and green thread I was gifted from a friend whose mother used to quilt. Here's to a good plan, now wish me luck as I get started! 


Wednesday, March 15, 2017

Quilt of Valor - Faith Circle

Twice a year I have the opportunity to select the quilt design and recipient for one of our Faith Circle quilts. Last fall I knew my turn was coming up, and I knew who I wanted to make a quilt for - a special soldier who fought for our country in Iraq. I have such respect for the Quilts of Valor Foundation as they strive to wrap in love members of our armed forces who have been touched by war.

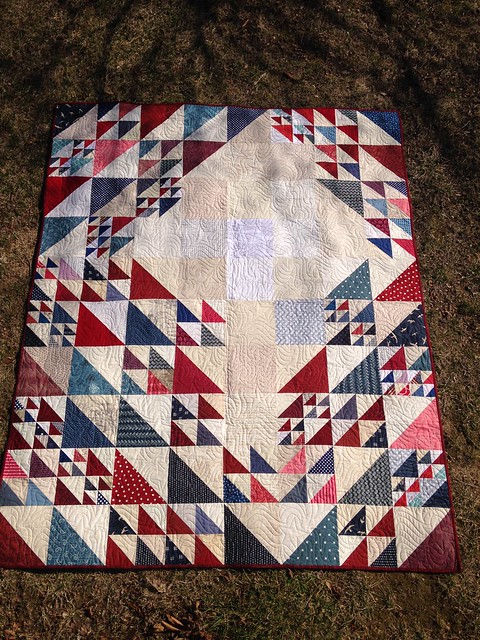
Quilt of Valor - October 2016 quilt
Quilt of Valor

Quilts can often have a more feminine look to them, so I did quite a bit of looking to find a pattern/design with a more masculine appeal. As soon as I saw this quilt designed by the talented Ara Jane Olufson I knew it was the right one. She happily granted us permission to use her design for our quilt.

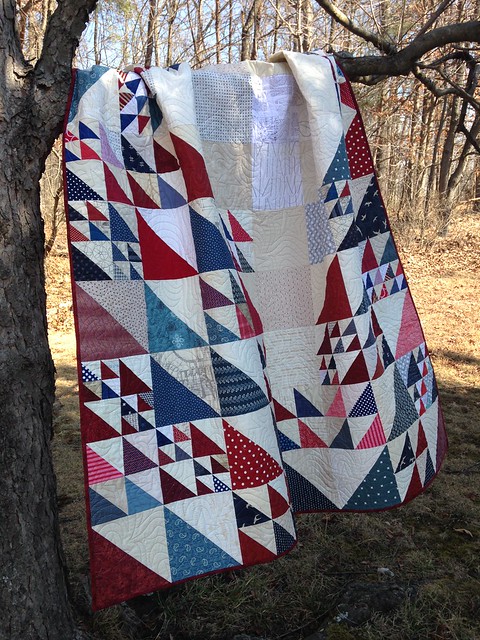
Quilt of Valor - October 2016 Faith Circle Quilt
A bit of breeze to add movement


The Faith Circle ladies were so wonderful to make extra blocks and send fabric squares so that our quilt would be of a nice size. It ended up at 64" x 80" before washing. Perfect size to snuggle up on the couch with!

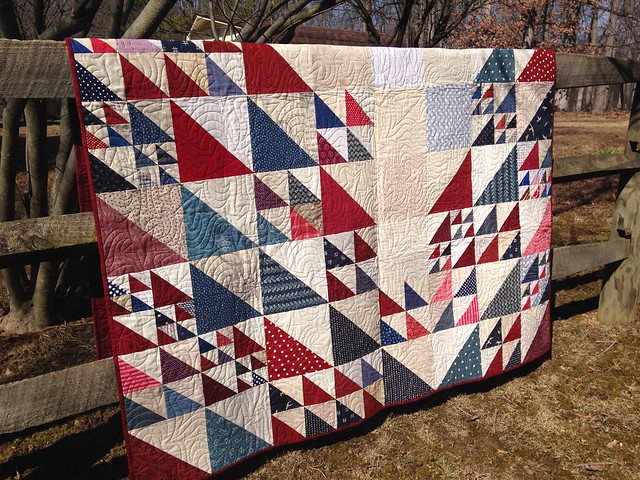
Quilt of Valor - October 2016 Faith Circle Quilt
This picture shows off the nice texture added by the long arm quilting

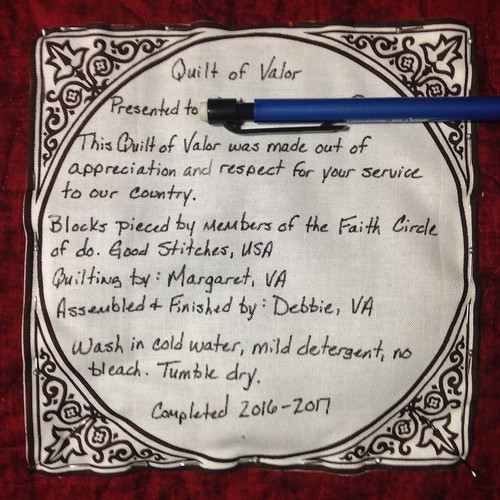
The long arm quilting was graciously done by a local friend - we agreed that an all over star pattern was the best choice.  The Quilts of Valor Foundation has guidelines they request you follow for all quilts, and included in that is the label. I usually struggle with what to put on a label, so I found their guidelines to be very helpful.

Faith Circle Quilt Label
I used a Pentel Gel Roller for Fabric pen to make the label

This was a very satisfying quilt to work on and finish. I hope it will be a blessing to it's intended owner.

The Faith Circle is a virtual quilt group operating under the guidelines of do. Good Stitches. If you are interested in finding out more, or joining, you can do so here.

The mission of the Quilts of Valor Foundation is to cover service members and veterans touched by war with comforting and healing

Sunday, January 1, 2017

Day One: Where to go from here

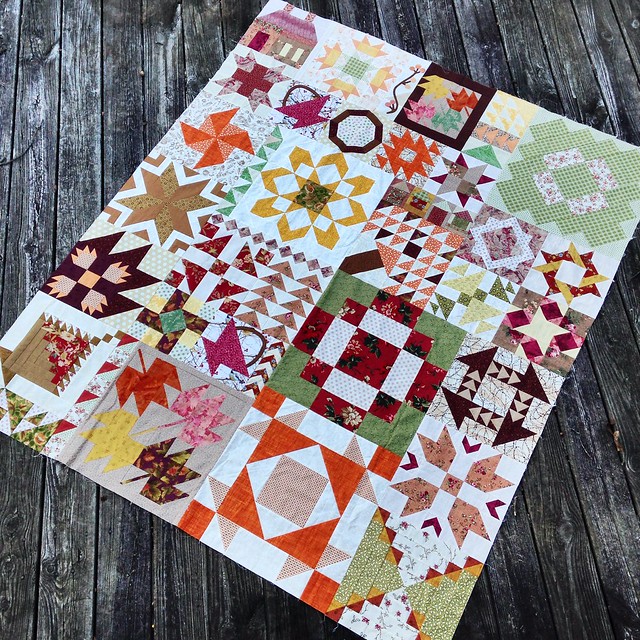
Well, here we are at Day One of a brand new year. In my sewing room are several work-in-process quilts at various stages of completion, in addition to supplies for a couple of projects not yet begun. One project I'd like to bring to a close this year is my Random Sampler Quilt. I finished the quilt top several months ago, but never shared a picture of it.

Random Sampler - completed quilt top
Random Sampler quilt top

This top was such an enjoyable journey. It began as a quilt-along and ended up including several quilt blocks I've designed. To round it out I thoroughly enjoyed searching for blocks I loved to fill in all the various spaces.

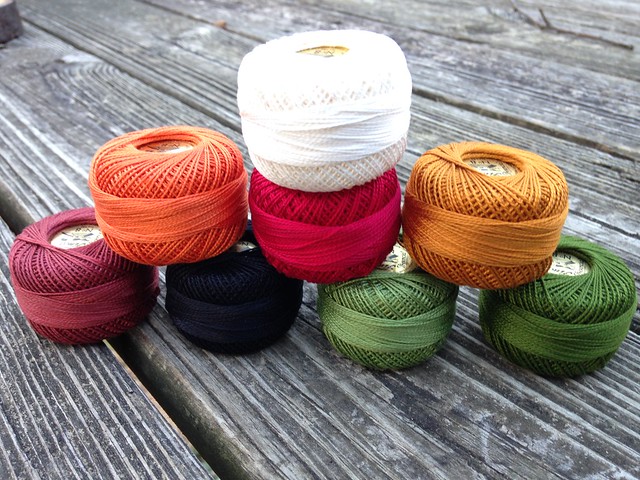
While sewing the blocks and filler strips needed for this top, I had time to mull over how to quilt it: machine quilting -vs- hand quilting. After working with perle cotton on my last two projects I decided I wanted the Random Sampler to be hand quilted using big stitches and No. 8 perle cotton. It's just hard to beat the beautiful texture created by hand quilting, and the slow pace is so relaxing. My local quilt shop has a great inventory of Presencia Finca and I had no problem matching colors with my quilt top.

Untitled
No. 8 perle cotton

As soon as I purchase batting suitable for hand quilting, a good thimble, and cozy flannel for the backing I'm all set to begin, and I can't wait!

For my family 2017 is a year that will see us realize the dream of moving into our log home in the not too distant future. This will be a great quilt for snuggling on the couch with my husband while we look out over the mountains and enjoy our new home.

Blessings!
~Debbie

Monday, November 28, 2016

Baby shower goodness

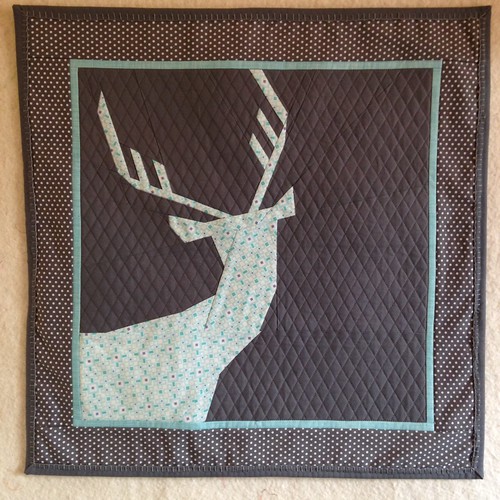
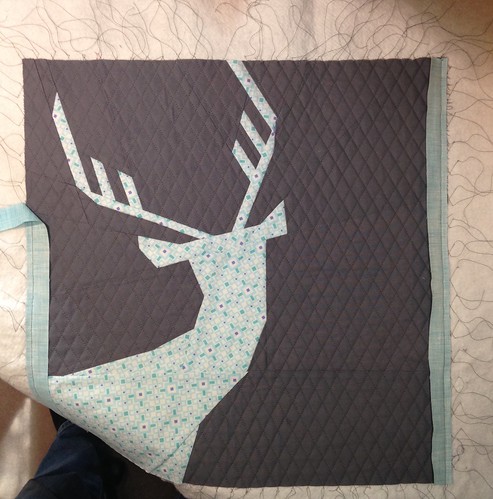
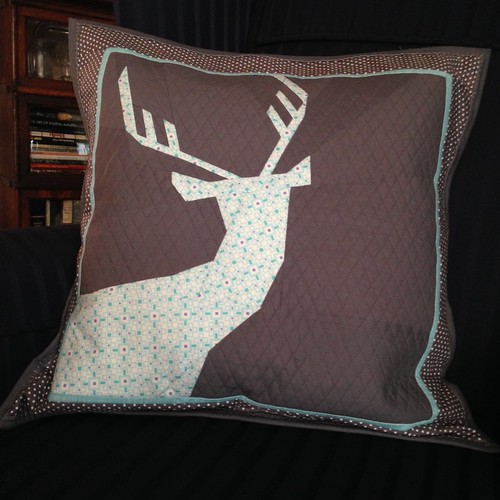
How fun it is to find just the right pattern when needing to make a gift. A few years ago Julianna, of Sewing Under Rainbow, shared a paper pieced tutorial for the Not So Spring Deer. This deer, to me, looks like a young buck, and therefore perfect to honor the upcoming arrival of a certain little mister :o)

Paper pieced deer wall hanging
The "Not So Spring Deer" paper pieced pattern as a wall hanging

This little man's mama is creating a woodland setting in baby's nursery and using neutral colors with a touch of blue. The geometric print from Kate Spain's Good Fortune line seemed the perfect print for paper piecing as the densely printed pattern blurs well where the paper pieces come together. Looking through my stash I found a nice variety of medium dark gray fabrics to round out the project.

Quilting process shot
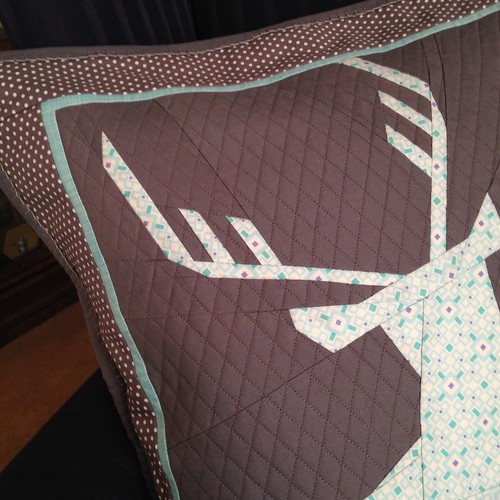
30 degree diamond quilting

I wanted the solid gray background fabric to have a dense quilting that did not extend into the borders. To accomplish this I layered the deer panel onto the batting; then used a ruler to mark 30 degree diamonds, and the edge of the walking foot to quilt the lines approx. 1/2 inch apart. Each time I came to the deer I cut the thread, knotted it, and wove it in. After the quilting was finished I stitched the borders onto the batting.


Half inch 30 degree grid quilting
30 degree diamond quilting

The dense quilting does a nice job of making the deer stand out from the background. A thin blue 1/4 " border adds a nice frame, and then some fun polka dots to enhance the young look of the buck.

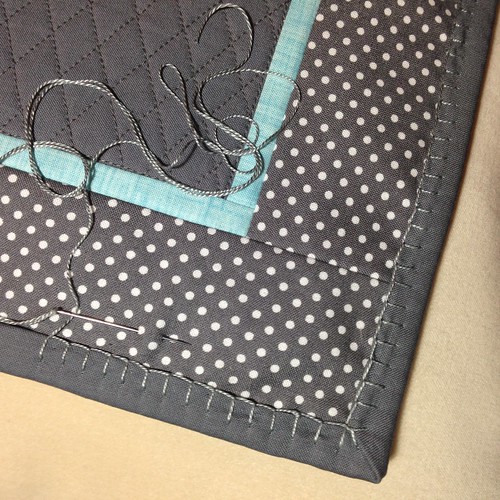
Perle cotton button hole stitch
Perle cotton buttonhole stitch
Somewhere I remembered seeing buttonhole stitch used to sew down binding. I thought this would add a nice hand-stitched look as well as a texture, and I just happened to have the perfect gray perle cotton on hand! I love how it looks, but was surprised at how hard it is to do buttonhole stitch through cotton; definitely hard on the hands. I don't think I could do this on a larger quilt.


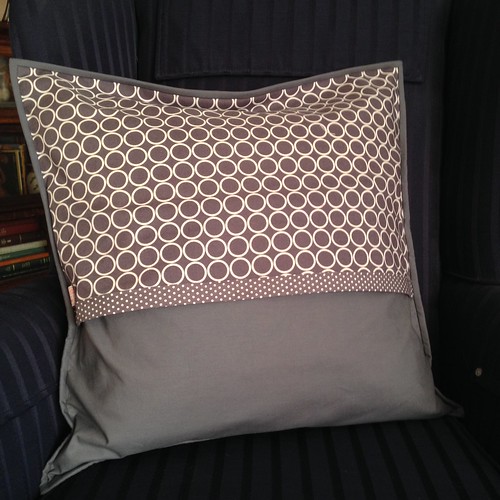
Envelope style back
Envelope style back

I found two more prints in my stash which are just the right shade of gray to finish out the mini quilt. For the back I opted to go with an envelope closure; this allows the mini to be used either as a wall hanging, or a pillow. Using fun prints makes the back just as show-worthy as the front :o) Projects like this are so much fun! I love finding just the right fabrics and considering each little detail.

Paper pieced deer as a pillow
Not So Spring Deer as a pillow

 I'm praying for the safe arrival of this sweet little boy, and blessings for his mama and daddy as they experience the joys of their first baby.


Monday, May 2, 2016

Quiltmaker's 100 Blocks Vol. 13 Blog Hop!

Welcome quilting friends! How fun to have you join me for the opening day of Quiltmaker's 100 Blocks, Vol. 13 Blog Hop :o) I'm so thrilled to have my fourth block included in Quiltmaker's biannual collection of quilt blocks. To add to the fun my block appears on the cover - WooHoo!!

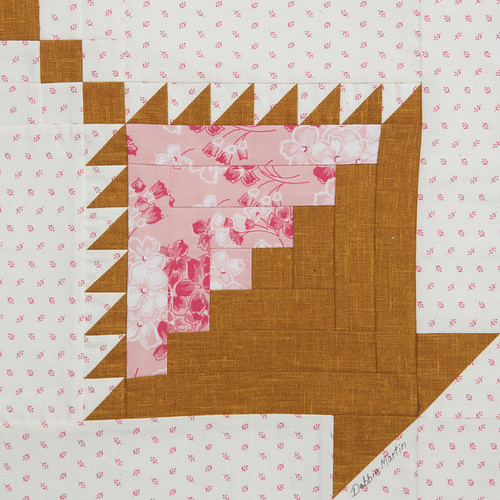
First, I'm so happy to introduce my block, Flowers for the Cabin. Maybe you can see why it has this name?
The intentional selection and placement of floral fabric = Flowers
The use of log cabin piecing to create the basket = for the Cabin

Flowers for the Cabin


I have to say this issue of Quiltmaker's 100 Blocks contained quite a surprise for me. I was not at all expecting to see this block when I opened my designer preview issue of Volume 13 about a month ago. You see, Flowers for the Cabin has a bit of a backstory which can be found here if you're interested.

Flowers for the Cabin makes a perfect springtime block using the light pinks and crisp white fabrics shown above. In my area of the country we have a huge celebration each spring called the Apple Blossom Festival and these fabric are perfect for it :o)

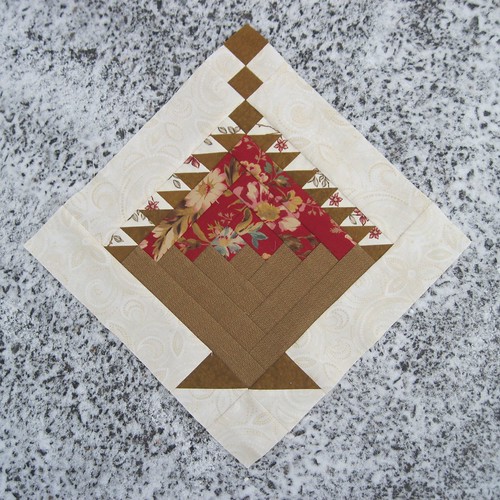
However, Flowers for the Cabin can easily become a basket of flowers suited for the harvest season by changing out the floral fabric, as shown in this example:

Flowers for the Cabin


I think a Flowers for the Cabin block would make a perfect center for a medallion quilt. Or, maybe use it in a four-block arrangement like one of the examples shown below. I just pasted an image of my block in Google Slides and copies/rotated/added colored squares to create these mock-ups. 


Four-block layout options

How about a drawing?! Quiltmaker's is generously giving one of my blog readers a free issue of 100 Blocks, Volume 13For a chance to win leave me a comment telling me about your sewing machine: Love it? Hate it? Have your eye on a particular model? I hope to upgrade my machine in about a year and I'd love to have input on machines to consider :o) If you suspect you may be a "no reply" blogger please make sure to include your email address in your comment. I'll draw a random winner on Saturday morning, May 7.

Don't miss out on all the other blogs featured in the tour. They can be found on Quilty Pleasures blog. I can't wait to fix a cup of tea and enjoy the hop myself!

I hope you've enjoyed stopping by :o) I'd love to see you back here again. If you'd like regular updates from Shadows of the Blue Ridge consider signing up for an email subscription (top right of your screen), or you can find me on Bloglovin'.

Friday, January 1, 2016

Beginning the New Year With the Old

Are you a list maker? Historically I am not - I just mentally go over what I need to do and begin. The process of preparing for a move after so many years in our current home (27+) has got my mind going in all sorts of directions for things that need to get done before the move is imminent. So many, in fact, that I find I really do need to be listing them. Unfinished projects is a category that's high on the list. I don't want to have a pile of things that never got finished, so this past summer I began really disciplining myself not to buy new supplies and patterns, or spend a lot of time surfing social media (think Pinterest, Instagram, blogs, flickr, etc.) looking at all the latest and greatest. Instead I pulled out my unfinished projects and assessed how they might be put to use - either as is, or with minimal additional work. As a starting point I chose my French General Swoon blocks.

Five French Swoon blocks all in a row


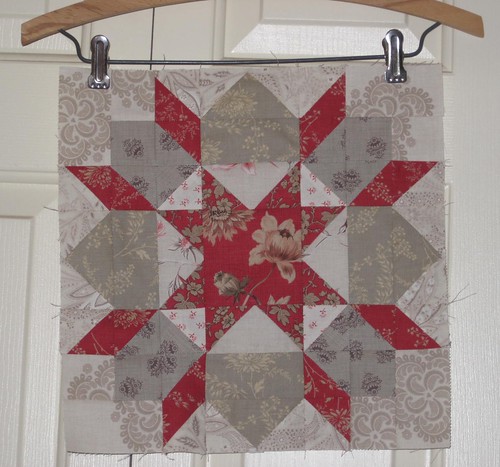
I nick-named these blocks French Swoon. I've mentioned before that Rouenneries by French General is my all time favorite fabric. You really can't go wrong with any of French General's fabric lines. The subtle color shadings and patterns mix and match so well and add rich depth to any textile project. Rouenneries first came out about the time I began quilting in earnest and by the time I discovered it most quilt shops were down to odd bits and pieces left over. I searched far and wide on Etsy and quilt shop Web sites to collect whatever I could find. Perhaps that's what makes my stash so precious to me :o)

When the Swoon pattern (by Thimbleblossoms) came out my sewing skills were just about at the point where I thought I could make these blocks. They are pretty complicated - each block is made up of 43 little units including squares, half-square triangles, and flying geese. Most of the Rouenneries I had at that time came from 5" charm squares, so I could not make the original 24.5" block,  Instead I just about broke my brain and reduced the pattern down to make 12.5" blocks. It took me quite a bit of figuring (math is not my strongest area) to come up with the fabric dimensions. I was pretty proud of myself when I got the first block done:


French Swoon!
My first 12.5"-ish Swoon block


Now, one interesting challenge I can point out to you about going back to old projects - you will notice right away that your sewing skills have improved since the item was initially made. This presents both a challenge and an opportunity. First, I discovered that since I had yet to master the perfect scant 1/4" seam all five of my Swoon blocks are a different size...this will be interesting. Next, I noticed that since I made these four years ago...and my sewing skills have improved since then...I am no longer worried about ruining them when it comes time to quilt them...can you say, "HOORAY!" with me. Most quilters know that feeling in the pit of the stomach about not wanting to quilt your "perfect" top because you'll ruin it. Well now I can clearly see that's it's not perfect to begin with. How's that for taking the pressure off :o)

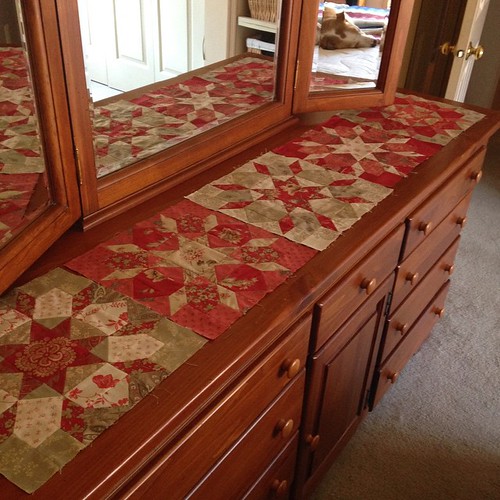
Back in the spring I happily discovered that these five, already completed blocks, will make a beautiful runner for our dresser - no additional blocks needed.

New life for French Swoon blocks
Envisioning a runner for our dresser

Having just finished all of the things I needed for Christmas giving I'm ready to begin the new year with an old project. Really, I can't wait!

Hope you find a gem to begin your year with - be it an old one like mine, or a fresh new start! I'd love to hear what you'll be working on :o)