Showing posts with label process. Show all posts

Tuesday, December 30, 2014

Easy Free Motion Quilting?? Yes!!

Over the past year I've really felt a strong pull to grow my skills at quilting the quilts I make. I want to know that when I make a quilt I've not only made the quilt top, but quilted it, too, and can be proud of both.

It helps to take some time to learn about your sewing machine. In the five years I've had my machine I've learned a lot through trial and error. For instance: most of the free-motion quilting references say to lower your feed dogs. I never could get the tension to come out right on my machine when I did this. While researching tension problems I came across this post about feed dogs by Leah Day of the Free Motion Quilting Project, and it completely changed my experience with tension. On my Janome it is essential to leave the feed dogs up. If I put them down the tension is just a mess. I just have to set the stitch length to zero and all is well. I've also learned to get comfortable with the small harp space (it's about 6" wide and 5" tall) on my sewing machine, a Janome DC3018. This picture illustrates it pretty well, I think :o) Yes that is a grapefruit!
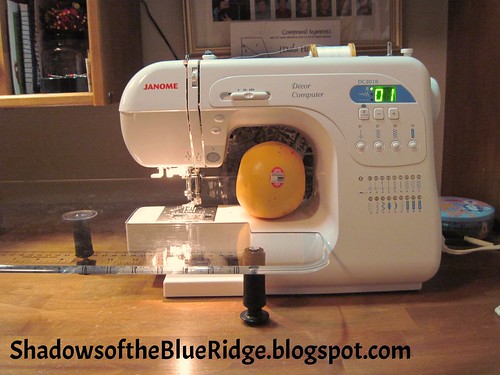

My Janome sewing machine
Janome DC3018
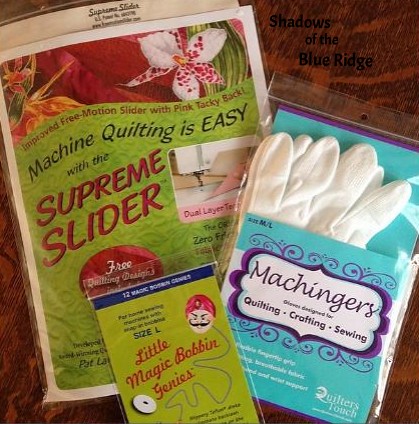
Back in March I ordered some supplies to seriously begin quilting practice. After reading recommendations from others I bought a Supreme Slider, a pair of Machingers gloves, and some Little Magic Bobbin Genies. They didn't see immediate action, but one by one I've started using them. 


Free Motion Quilting Supplies
Free-motion quilting supplies
I'm not certain my Janome likes the Little Magic Bobbin Genies. The bobbin holder is not very deep and it does raise the height of the bobbin...but I've continued using one anyway. I can say I like the Machingers gloves so much better than any other gloves I've tried-they are definitely worth investing in! They have a nice amount of grip to them, but are not heavy and hot. More recently I've been using the Supreme Slider - I like it a lot, too!

In addition, I used a few 40% off coupons at Joann Fabric to purchase several free-motion quilting books. 
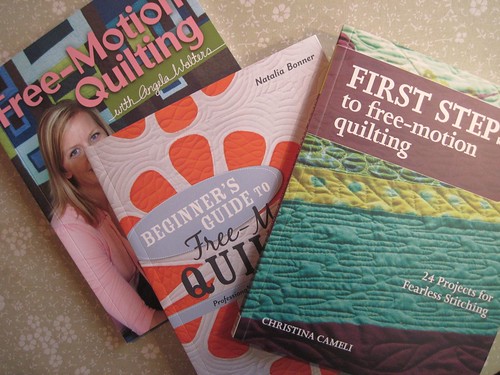

Free-motion quilting books

If you are like me, and are truly starting from square zero I found it helpful to read through more than one book. Each author is so encouraging and shares many helpful suggestions. Each of these books divide quilting designs into categories and show how to build on previously taught skills. I also took their suggestion to use paper and pencil and draw out the design I wanted to use so my muscles would get used to the flow of creating it. 

In the past I always thought that doing a stipple/meander design was where one should start when learning to free-motion quilt. I tried this on a few quilts with okay results, but just was not comfortable. Many times I would find myself backed into a corner - surrounded on all sides where I had already quilted and no way to get out. In Natalia Bonner's book, Beginner's Guide to Free-Motion Quilting, I selected a design called Loops and Poppies. It is similar to the stipple design, but just as the name implies it includes loops and flowers. 
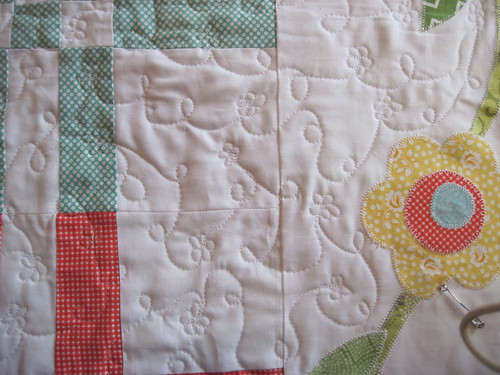

Loops and Poppies all-over quilting
Loops and Poppies design by Natalia Bonner
This pattern has really freed me to enjoy quilting! As I'm stitching along I no longer have to worry about my quilting being surrounded on all sides. If I get into a "road block" I simply stitch a poppy and come right back out on the same side of the flower where I stitched in. Wow!! As you can see from the picture above, my little poppy flowers are not perfect, but they look cute, anyway :o) Fun. Fun. Fun.

I'm stitching this on a pretty large scale and I find I'm not so good at using my hands to frame the area I'm stitching...as a matter of fact, my "technique" definitely needs some work. I'd like to practice on some smaller items like pillows or wall hangings where the scale of the quilting can be a lot tighter. I think doing this will allow me to improve my hand/arm position while quilting. I'm actually looking forward to it!

I hope this has encouraged you if, like me, you have felt overwhelmed by learning to free-motion quilt. Sequential building of skills (and a few of the right tools) make a big difference! I'd love to hear any tips you have to share with me...we can continue to learn this together! Happy quilting :o)

Saturday, June 14, 2014

Summer handwork {sewing & crochet}

Something about summer just makes me want to do handwork. Whether it's sewing or crochet it's just so relaxing to have a portable project to take outside. Last week I reached into my unfinished projects and pulled out my English paper pieced Lone Star and got started with adding the background fabric. I knew it wouldn't take me very long to get it done, and in fact it's almost finished. I'm getting ready to take a trip and have been searching for something to take with me for some down time. So...I guess I'll just have to start a new hand piecing project to take along...darn :o)

IMG_2617

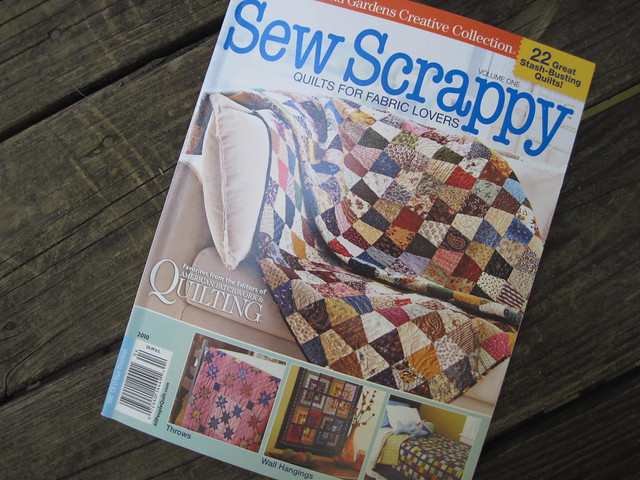
A couple years ago I bought this magazine, Sew Scrappy, by Better Homes & Gardens. I've looked through it many times - there are some really great scrap quilts in it. I've had my eye on a few of them...just waiting for the right "need" to come along :o)

IMG_2615

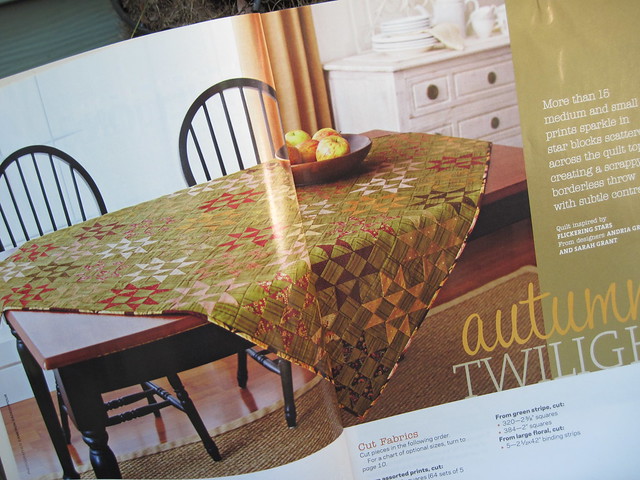
This quilt, Autumn Twilight, really caught my eye! I've always been drawn to stars. I don't need a quilt, but I do need new covers for the pillows on our couch. The current covers fell victim to a teething puppy quite a while ago...we've just been living with them. I'm thinking four stars per side will do nicely for new covers. 

IMG_2612

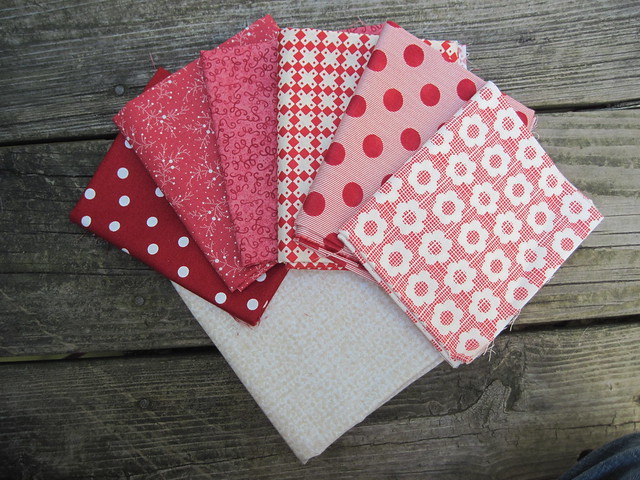
Temptation is always there to go out and buy new supplies, but I've got more than enough fabric to meet the needs of most any small project so I've reaching into my stash instead. My plan is to go with an assortment of red stars {the center one with the curling ribbons may not make the cut} and use the low volume cream for the background fabric. 

IMG_2616

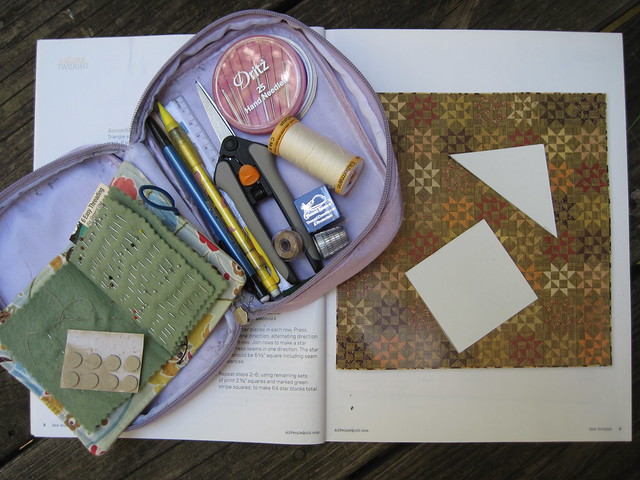
This is my little hand sewing kit. It's all stocked up ready to begin the pillow covers. I made the square and triangle templates from scraps of cardboard I keep on hand. The pattern in the magazine calls for 6" finished blocks, but I resized my hand stitched blocks to finish at 10" in order to fit the 20" couch pillows. 


Getting ready for some sock crocheting

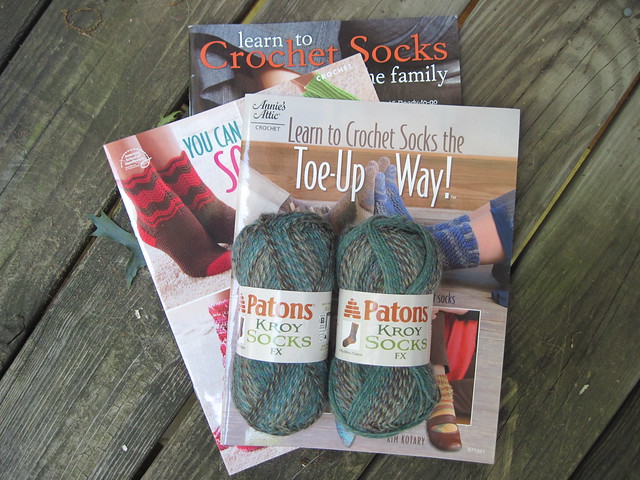
I believe I'll also take along some sock yarn to get started with a new pair of socks. Ever since I made these mean-green hunting socks for my brother-in-law I've been wanting to make a pair like them for myself. I like the toe section from one pattern, and the heel section from another pattern. For the foot and ankle I'll probably follow what I made up for my brother-in-law's socks. 

I do believe that between these two projects I'll have enough handwork to last me through a summer of enjoying time outside on the deck. How about you? Do you like to fill your summer with any handwork projects? If so, I'd love to hear about them :o)

Thursday, February 13, 2014

Clever?!

Do you ever marvel at the clever creations found all around us? It can be seen everywhere. For example, here is a fabulous succulent wreath from the Christmas display at Longwood Gardens in Pennsylvania. This wreath is so amazing because of the the precise placement of texture and color...so clever!


#longwoodgardens Succulent wreath

Debbie of A Quilters Table is the host for the February Faith Circle quilt. She selected the Vice Versa block by Gen X Quilters. This block design is just so clever! I love it :o) Here are the two I made for our bee quilt:


vice versa block

I look at things like this and I wonder...how did AnneMarie think of this? Was it a sudden inspiration or did she ponder, sketch, cross out, and finally arrive at this Vice Versa block? She says blocks for this series were studied for positive and negative space and the inverse relationship that can be created. Clever, clever, clever. 

In one of my previous posts I mentioned my desire to someday be a designer. I've tried a bit of designing while crocheting socks. I've combined toe, heel and cuff construction from various patterns, and used my favorite stitches for the foot and ankle/leg sections to make these socks. 


New Socks :o)
Socks I made for me :o)
Mean Green Hunting Socks
Socks made for my brother-in-law :o)
It's been fun (and at times frustrating) and takes me quite a while to get a finished product that actually fits. I find that one of the hardest parts of the design process is writing down what I did so I can actually replicate it again. I might call this mish-mash of sock parts a kind of franken-pattern for socks (taking from several different sources), but is it clever? I don't know. 

Back in the fall I started sketching out some ideas for my own quilt block design and then creating layout options for it. I've found that it take time, and it takes quiet. One of my layout options is pretty straight-forward and what might be expected of the block, but dare I say it...I think my second layout option just might be clever :o) It will be fun to make up these quilts and see just where they stand. 

Meanwhile, here are a couple of pictures from the huge snowstorm we had today. I just love snow and never tire of the beauty and wonder it creates in the world. Enjoy!


February snowstorm

February Snow


Saturday, February 1, 2014

February in A Lovely Year of Finishes

I can hardly believe we are already up to February 2014! January was one of the coldest months I remember, and here in the shadows of the Blue Ridge Mountains we had a fair amount of snow. With all of the snow days off school I was able to breeze right through my January ALYoF goal...we'll see how I do for February :o)

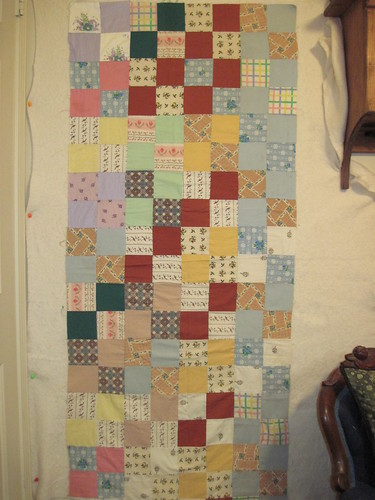
Penny's mom's scrap topThis month my goal is to finish this vintage patchwork quilt. There is a story behind this patchwork. This partial quilt top was found among the craft items belonging to the mom of a sweet friend from church. It is made of bits of fabric from her children's clothing and dates back to about the 1950's. 

My friend asked if it could be made into a finished quilt. When I looked at it I knew it would need to be disassembled and reassembled in order to make a sturdy quilt. Many of the seams had been stitched with less than 1/8" seam allowance and were already coming apart. It took several sessions with the seam ripper, but with perseverance I got them all apart. 

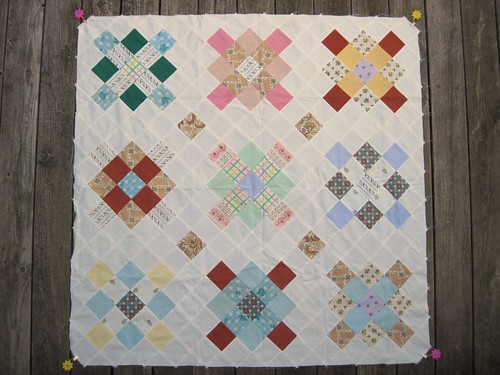
I knew these bits of fabric would look lovely in a granny square layout. (The little flowers are tablecloth weights--it was bitterly cold and extremely windy when I took this picture!) Most of the the fabrics are soft shades so I used Kona Cotton Bone for the background. I love how visually soft the top now looks!


IMG_2388

My February goal is to complete this quilt. I purchased additional Kona Bone for the backing and DS Quilts Farm Stand Dots in beige for the binding. I plan on doing diagonal straight lines for the quilting using an off-white thread. 

I'm looking forward to getting this one off my work-in-process list. I'm linking up the the February Goal Party for A Lovely Year of Finishes!

Monday, January 6, 2014

Basting Tools

Progress on the Faith Circle Row Quilt has reached the point of pin basting. Wow so many pins are used in the process of basting a quilt!


It can be pretty hard on fingers to close all of these pins as they are put into the quilt sandwich. I was wishing I had one of the tools people use to close pins. I've tried using a spoon in the past, but was not totally sold on that method. As I was thinking about this I tried to come up with something I might already have on hand to help close the pins. I got to thinking about the sharpener for my kitchen knives, but it was too large in diameter. Then, I thought of the awl-type tool I have for use with beads. it worked great! 


This is actually called a Bead Reamer and is used to enlarge and round out the opening in beads. However...it is also perfect for closing basting pins!


The texture of the tool really makes it easy to use with the pins! It really helped to make quicker work of basting this quilt!


Do you pin baste, and if so, how do you close the pins?

Friday, January 3, 2014

Setting Goals

With a new year comes the promise of fresh starts...and hopefully, for me, several finishes! I've decided to jump on board with the wonderful group of quilters participating in A Lovely Year of Finishes as it fits right into what I've set before myself to accomplish. When I look around my sewing room I don't want to see so many unfinished projects...and so much fabric just sitting there. I just don't think these things lend themselves to being a good steward of the things I've been blessed with. 

A Lovely Year of Finishes encourages a goal be set to finish at least one project each month. At this point in time I have enough unfinished projects that I don't need to begin anything new in order to come up with 12 finishes for the year. My January goal is to complete the September Faith Circle quilt for do. Good Stitches. (I wrote about this row quilt in my previous post.) 


Often, by the time it comes to the quilt back am ready to just be finished with the quilt and begin something new. While I do love a scrappy back I challenged myself to come up with a design that would allow me to use fabric I already had in my stash. I started by doing a search in the flickr Quilt Backs group to find some inspiration. I found several pictures where the quilter had created a plaid design with fabric and I really liked the look. Next I got out my sketch notebook and worked out a plan:


Working out the measurements is not a strong area for me and I was a bit nervous I would get the back finished only to discover I'd made a mistake. I'm happy to report that I got all of the dimensions correct and now have a completed quilt back made entirely of stash fabric!

I'm so excited to have actually planned out and completed my own quilt back! Whenever people talk to me about things that I've made I am quick to point out that most of the time I am just following a pattern and it is the designer of that pattern who is truly the talented one. I'd love to be a designer one day...maybe with this quilt back I can now say I am :o)

I'd love to hear about something you've designed!

Saturday, December 28, 2013

Rows of Faith

September was my month to design the quilt layout for the Faith Circle of do. Good Stitches. I've learned over the past year that it is an interesting process to work on a quilt with a community of people. You absolutely have to go into the process with grace in your heart, and look at the final product as a quilt of beauty, not a quilt of perfection. 

Lessons I've learned:
  • it's best to select a block design that does not require points to match up when blocks are joined together
  • everyone has their own definition of a 1/4" seam
  • asking for a white background means you will get mostly white, but an off-white is sure to show up someplace (the reverse is true if you specify off-white)
  •  there will always be someone who is struggling to get blocks mailed off on time (and sometimes that someone is me!)
I list these things not because I'm being critical...really it's quite the opposite. I list them because I believe that in the end none of these things really matter, and they provide a reason for us to extend grace to one another. In the Faith Circle we make our quilts for Restore Innocence and the girls helped by this organization don't care about any of the things listed above. What matters to them is finding hope and believing that people really do care about them. 

Here is the completed top for the Faith Circle September quilt. I still have to square off the side on the right before it is ready to quilt. 


Have you learned any lessons from working on projects with other people? If so, I'd love to hear about them :o)

Saturday, August 31, 2013

Planning a Sampler

This Fall I enrolled in The Penny Sampler online class taught by the talented Rachel of Stitched in Color. The main class project is a beautifully designed Scandinavian sampler quilt which Rachel named, "The Penny Sampler." The class focuses on developing skills in three areas:
  • machine applique
  • precise piecing
  • machine paper piecing
Rachel teaches these skills through mini stand-alone projects. The first skill we are working on is machine applique with various techniques to choose from. 

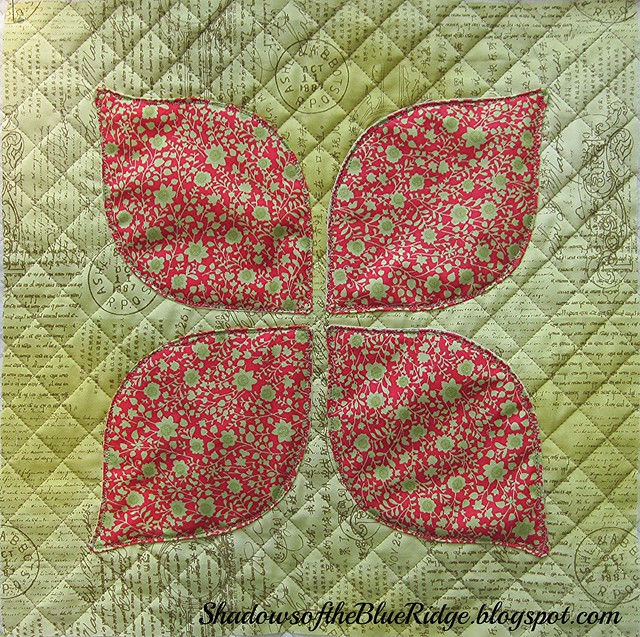
Dogwood Blossom~practice project
I chose to try the stitch and flip method to create my dogwood petals and then use sketch stitch applique to attach them to my quilted-in-advance background fabric. I seem to be on a grid-quilting roll lately...really like the look of it. It is super fun to sketch stitch! I think I've found something I will continue to enjoy and will add variety to my quilting skills :o) I ended up using my darning foot and free-motion quilting for the sketch stitching. I love the "slightly" messy look of it...so freeing! (Note: this is a stand along project...not part of the Penny Sampler quilt top. It can be used as the front of a pillow, although I may just set this aside for now and try making a quilt-as-you-go mini medallion quilt with it.)

I used three online color palette builders to help me select the colors for my Penny Sampler quilt top. The photo I used for my inspiration is not mine so I'll not post it for public viewing. However, I will show you the rich, beautiful colors that resulted from it!

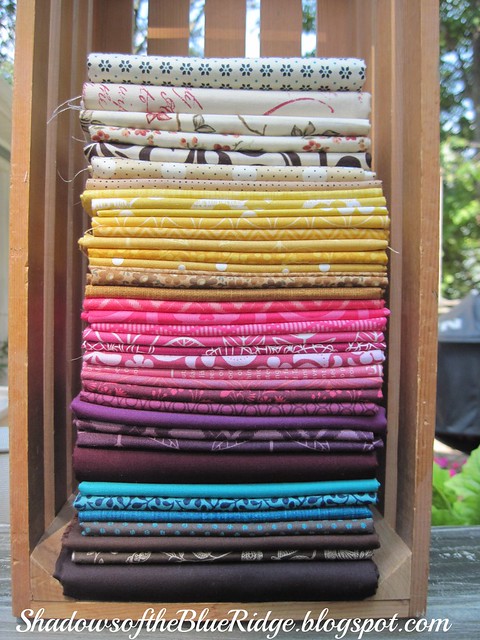
Fabric Pull!
I am really loving these colors! Deep, dark chocolate browns, teal (this word does not even need any adjectives...it's super all by itself!) rich eggplant purples blending into lively magenta's, mustard yellows, and creamy neutrals. Sounds good enough to eat!

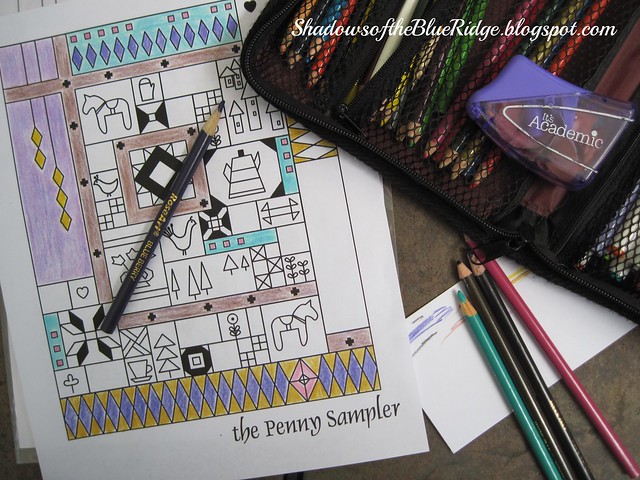
Rachel provided us with a black-line master of the quilt top so we can color it in to help balance out the use of color across the quilt.

Sketching out plans
Clearly I need more depth to the variety of shades in my colored pencils :o) I just have basic colors so the shades don't match up too well with my fabrics, but I do get an idea where I want to put my main colors. 

This is going to be a fun Fall! Hope you have a great Labor Day weekend~I'm off to work on my next class assignments :o)


Saturday, August 3, 2013

For the love of Epp {English paper piecing, that is}

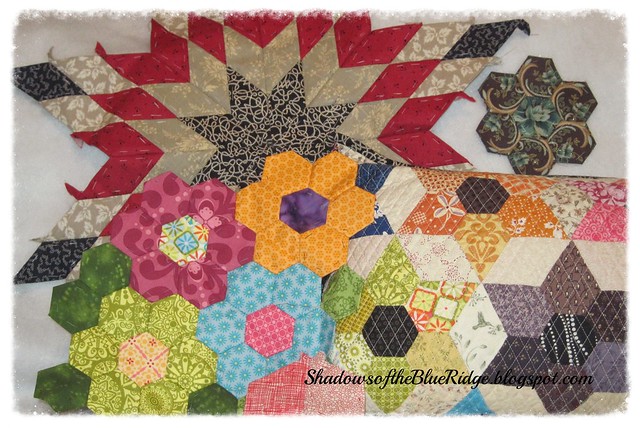
Last summer I was introduced to the wonders of English paper piecing. It was love at first stitch. The more I quilt the more I love hand work...be that hand stitching, applique, or hand quilting. Here are a few of the Epp projects I've been working on:

English paper piecing work

The jewel star pillow is the only complete project so far. The mini lone star is the focal point for a wall hanging and the grandmother's garden hexies will be a small pillow. I just love very single stitch from the basting to the joining of the various shapes. Please ignore the fact that I am showing you a photograph containing unfinished projects while I continue on to write about yet another project I'm getting ready to start :o)

When I saw the Mini QT Swap group on flickr had selected Epp and foundation piecing for the next swap round I just knew I had to ask to participate! I'd participated in a swap round with this talented group of ladies before when the theme was True Mini. Here is the quilt I made for that round. 

I was so excited to find out that I'd been paired up with Jen of SewWhat! We are both middle school teachers and if that does not make us two birds of a feather I don't know what would :o) After spending some time looking through her photo pool and reading her blog I'd made some notes on what I thought she may like in a little quilt. Now it's time to dive into the design process!

Mini QT EPP Swap!


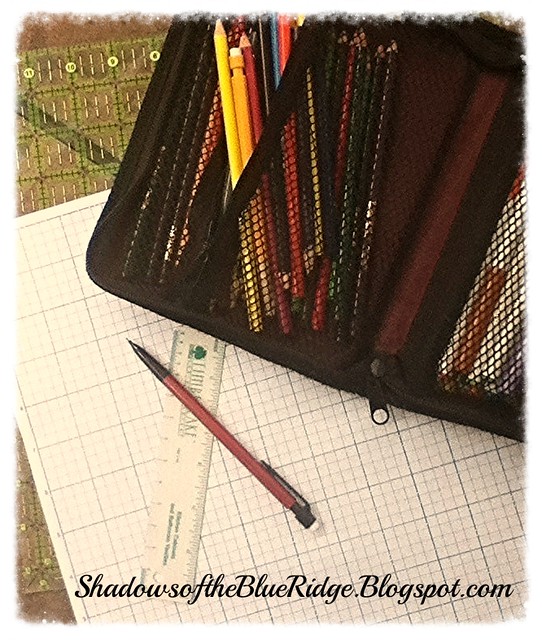
I thought I'd try sketching out some designs to see what I was going to be able to do in a 12"x12" (maximum size} quilt. I found a lot of inspiration in the photo pools for these flickr groups:
Ferris Wheel Along
English Paper Piecing/Foundation Piecing
60 Degree Diamonds

English paper piecing templates

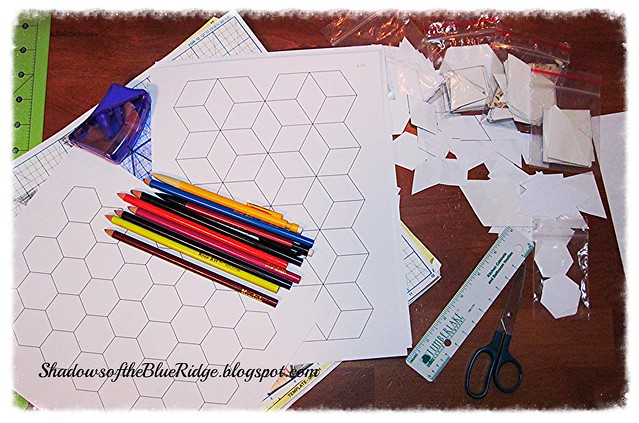
After working out a layout I'm pretty sure will work I used the incompetech Web site to draft template paper. This is a great site for making almost every shape used for English paper piecing. Now I've cut out all of my template papers and I'm ready to begin selecting fabric.

The current state of my fabric

I am really fortunate to have a well stocked stash. For several months I participated in the Stash Stack Club sponsored by Pink Castle Fabrics. You can find information about the club here. It was a really good way to build up the blenders in my fabric stash. I'm happy to say that I've really been putting them to use!

I'm off now to pull fabrics. I'd love to hear about what you are working on!