Monday, March 31, 2014

Sharing the News :o)

I've been near bursting with excitement for awhile now, and can't wait to share the news...


Squeal!! Isn't this exciting!!

It's fun to look back at how this happened. Back in May (almost a year ago) I found out my DQS12 (Doll Quilt Swap) partner, Emily of Simple Girl's Simple Life, had submitted a fun block called Red is a Neutral which was chosen for Quiltmaker's 100 Blocks, Volume 7. I was so happy for Emily! She hosted a magazine give-away on her blog and I happened to be the lucky winner :o) 

After looking at all of the creative blocks in that issue of Quiltmaker's 100 Blocks I began wondering if I could design an original block to submit. I played around with an idea, drafted a pattern, and made up a sample block for consideration for Volume 9...that was in August. Then I waited on pins and needles until February when acceptance notifications were sent out to those with blocks chosen for inclusion. Oh. How. Exciting!!

The Volume 9 on-sale date is May 6. Prior to that Quiltmaker's 100 Blocks will host a blog tour from April 28 - May 2, and my day is Wednesday, April 30! Each day of the tour you can visit the blogs of various designers to read about their design process, and get tips on block construction or possible layout options. You won't want to miss the fun give-aways, either! 

I'll leave you with a sneak peak of the magazine cover!


Tuesday, March 25, 2014

March Finish - A Lovely Year of Finishes

Well March certainly breezed right on by! I'm happy to say that as quickly as it went by I was still able to complete my March goal for ALYoF. My mini was No. 104 in the link-up party :o)


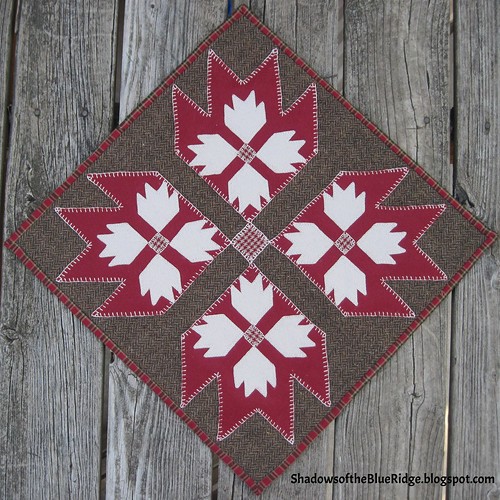
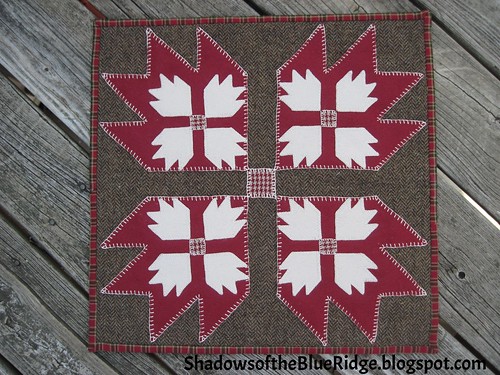
Nested Bear Paws
Nested Bear Paws ~ Wool Felt Wall Hanging
I just love how this turned out...the colors, the rich texture, the warm vibe it gives off. As I mentioned in my March goal post this is a special little wall hanging: About three years ago we fulfilled one of my husband's life dreams and purchased land on the side of a mountain...Bear Garden Mountain. This Nested Bear Paws wall hanging is intended to hang in the home we build there. 


Nested Bear Paws


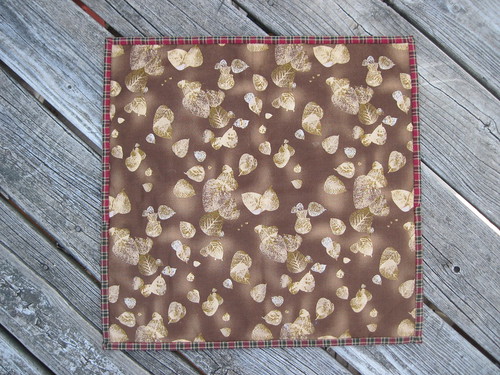
The back is a simple leaf print to match the natural, earthy feel of the front. The binding is one of my favorite homespuns..a red plaid. I machine attached it to the front and hand sewed the back. 


Nested Bear Paws

All in all this is one I am so happy to say is now finished! I love how my participation in A Lovely Year of Finishes is helping me to focus in on completing some of the special projects I've started, but never put the time into finishing. 

I am linking up to the March Finishes Party Mine is Entry No. 17!

Happy end of March to you :o)

Tuesday, March 4, 2014

March Goal - A Lovely Year of Finishes

It's time to set my March goal for A Lovely Year of Finishes (ALYoF). Ha! What I really need to set as my goal is completion of our state and federal tax returns...but somehow I don't think it would be very interesting, or wise, to post pictures of that on line :o)

Following my pattern for both January and February my goal this month comes from my work-in-process pile. This is another one I am super excited to get finished!

Nested Bear Paw
I don't really know that this has an official name, but I'm going to call it Nested Bear Paws.
About three years ago we fulfilled one of my husband's life dreams and purchased land on the side of a mountain...Bear Garden Mountain. I thought it would be really great to have a bear paw wall hanging to put in our home...once we build it. When we came home from our real estate closing I started doing a Google search for bear paw quilts. 


Nested Bear Paws

In addition to machine quilting I love to do hand work. Several years ago I started making wool felt penny mats (sometimes called rugs). I dug though my supply of wool and selected the berry and cream felt for the paws and a herringbone weave for the background. I used old file folders to draft a pattern and got out my perle No. 8 cotton to begin blanket stitching. After that first initial burst of excitement it got pushed aside for more pressing projects. 

This seems like the perfect time to pull this out and get it finished. It will actually serve another purpose, as well. In Handworks Club (at school) we told all the girls they now need to select a long-term project to work on for the remainder of the school year. In June we will feature all of their work in a display case by the front office. Since much of my club time is spent trouble-shooting issues for the girls I need my own project to be something that doesn't requiring a great deal of concentration. So blanket stitching bear paws to wool will be perfect!


Bear Paw Wool Wall Hanging

This is what the final layout will look like...I just love the nested bear paws! I'm not sure whether there will be additional boarders of not.  I do believe at some point in time I will tackle this design as a giant quilt block!

Linking up the the March ALYoF Goal Setting Party! Mine is Entry No. 104. Jump over there and have a look at all of the great projects going on...you're sure to find something to inspire you :o)

Happy stitching!

Saturday, March 1, 2014

Tutorial: Wonky Disappearing 4 Patch

For awhile now I've wanted to try my hand at writing a tutorial. This month I am the quilter for the Faith Circle March quilt which means I'm in charge of selecting the quilt block, the color scheme, directions, and once I receive everyone's blocks...final assembly of the quilt. So, this is a nice opportunity to try writing a tutorial. 

Tutorials are an important part of the Modern Quilt Movement. Sharing information with one another through social media has helped fuel the growth of modern quilting. Most of my quilting knowledge has been gained via the excellent tutorials I've followed on blogs. Two talented tutorial writers who come to mind are Anita @ Bloomin' Workshop, and Rachel @ Stitched in Color. I always learn something new about quilting when I follow along with their detailed instructions.

The block I chose for the Faith Circle March Quilt is a wonky block. Wonky can translate into lower stress quilting because there is not as much pressure to have everything match up just so. This tutorial will produce two matching Disappearing 4 Patch blocks.

Please note: I am not the creator of this fun block. I just wanted to try my hand at writing a tutorial and thought this would be a good opportunity since I needed to provide instructions to the Faith Circle for our March quilt.


Wonky Disappearing 4 Patch

Since it is almost Spring I want to use softer colors for the Faith Circle quilt to go along with the season. 

Color Palette

If you have a Kona Color Card here is a list of colors that match up with my fabric samples...sometimes it's hard to tell color shading on a computer screen.

Colors:

  • True white (please do not use off-white)
  • Salmon
  • Mango
  • Banana
  • Azure
  • Pistachio
The fabrics can have any scale for print size, but please do not use solids except for the white. Prints can be tone-on-tone or have small bits of other color, but overall the fabric should "read" as the colors shown/listed above.

Wonky Disappearing 4 Patch {D4P} - Tutorial

Fabric Squares
Materials

(4) White squares cut 7" x 7"

(4) Print squares cut 7" x 7"

(Note the squares can be cut to any size depending on your how large you want your final block. For this quilt the Faith Circle will be using 7" x 7" blocks.)


1. Sew one white square to each print using a 1/4" seam allowance. Press seams toward the darker fabric.

2. Take two of the sewn units and sew them together with the colored fabric rotated to opposite ends. Take care to match up the center seam.

Matching Seams

3. I like to pin generously. I find I get much better results from my sewing if I pin...especially when matching seams.

Ready to sew seams

After stitching I iron this seam open to reduce bulk at the intersection of the center seam. Now there are two 4-patch quilt blocks.

4. Lay the blocks out on a cutting mat, one on top of the other. However, rotate the top block 45 degrees so a white section is over top of a print section on the block below (see picture).

Rotating Blocks

Try to make sure the seams of the top block are lined up directly over top of the seams in the block below (both horizontally & vertically). Now we are ready to make some wonky cuts using a long ruler.

Measuring for cuts  

5. Using a long ruler measure over from the center seam. The cut will be a wonky one, not completely parallel with the seam. Do not go over more than 2" from the center seam, nor less than 1". A good tip to keep in mind is, "A little wonky goes a long way." So, I try have about a 1/4" difference between the top and bottom measurements on the ruler. 


Squares all cut

6. Make a total of two vertical cuts and two horizontal cuts.

Swap pieces

7. Now take the four pieces indicated with red arrows and pull the stitched unit from the bottom and put it on top. 

8. Stitch the rows of the block back together using a 1/4" seam. Iron the seams toward the darker fabric. Keep in mind that since the cuts we made are wonky the pieces will not align perfectly.

Aligning pieces

Line up the "inside" edge of each piece as best you can and allow the edge which will form the outside of the block to be off.

9. When working with the center sections I do pin to match up the seam at the center intersection as I think this makes the final block look neater once it is completely assembled. I iron these seams open to reduce bulk.

Matching seams

10. Once the three rows are joined then finish final assembly of the block. Iron these seams open to reduce bulk.

11. Once the blocks are reassembled they should look like "twins" however, the color placement will be opposite each other. Because the block construction is wonky the blocks will need to be trimmed down to the desired size. Use the horizontal and vertical seam to center your blocks as you square them up.

Faith Circle: please do not trim or square-up your finished blocks. Send them to me as is and I will trim as I construct the quilt top.

I hope you found this to be an easy, fun block to construct! Here is an example of what the layout for the Faith Circle quilt may be:

Finished Wonky D4P Blocks

I look forward to seeing some Wonky Disappearing 4 Patch blocks cropping up this Spring! Happy sewing :o)