Tuesday, December 30, 2014

Easy Free Motion Quilting?? Yes!!

Over the past year I've really felt a strong pull to grow my skills at quilting the quilts I make. I want to know that when I make a quilt I've not only made the quilt top, but quilted it, too, and can be proud of both.

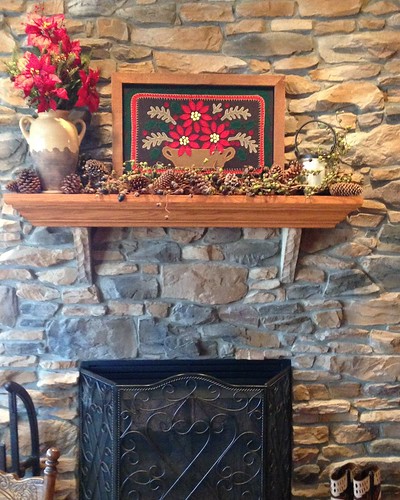
It helps to take some time to learn about your sewing machine. In the five years I've had my machine I've learned a lot through trial and error. For instance: most of the free-motion quilting references say to lower your feed dogs. I never could get the tension to come out right on my machine when I did this. While researching tension problems I came across this post about feed dogs by Leah Day of the Free Motion Quilting Project, and it completely changed my experience with tension. On my Janome it is essential to leave the feed dogs up. If I put them down the tension is just a mess. I just have to set the stitch length to zero and all is well. I've also learned to get comfortable with the small harp space (it's about 6" wide and 5" tall) on my sewing machine, a Janome DC3018. This picture illustrates it pretty well, I think :o) Yes that is a grapefruit!
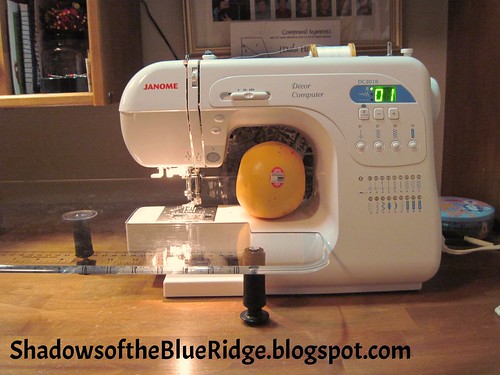

My Janome sewing machine
Janome DC3018
Back in March I ordered some supplies to seriously begin quilting practice. After reading recommendations from others I bought a Supreme Slider, a pair of Machingers gloves, and some Little Magic Bobbin Genies. They didn't see immediate action, but one by one I've started using them. 


Free Motion Quilting Supplies
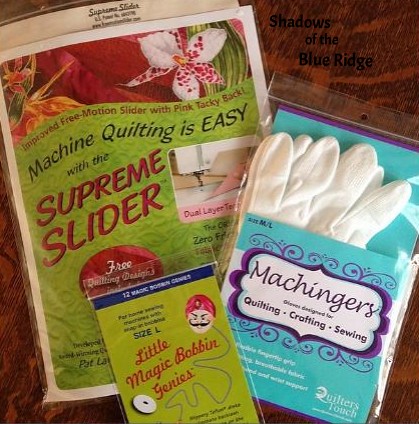
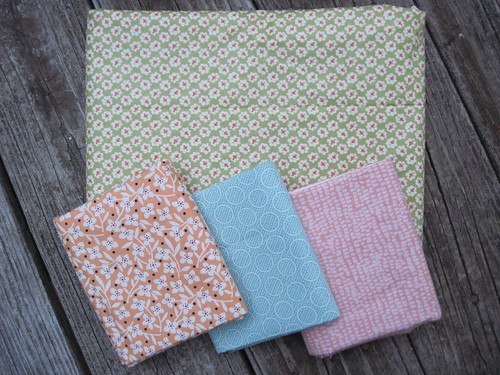
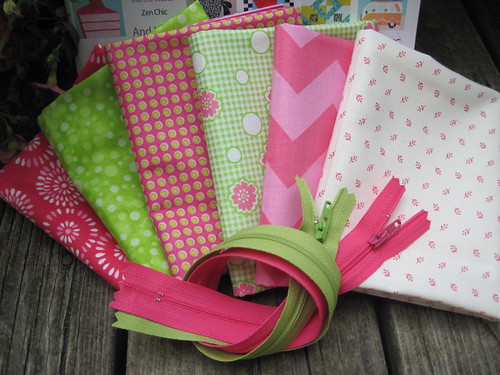
Free-motion quilting supplies
I'm not certain my Janome likes the Little Magic Bobbin Genies. The bobbin holder is not very deep and it does raise the height of the bobbin...but I've continued using one anyway. I can say I like the Machingers gloves so much better than any other gloves I've tried-they are definitely worth investing in! They have a nice amount of grip to them, but are not heavy and hot. More recently I've been using the Supreme Slider - I like it a lot, too!

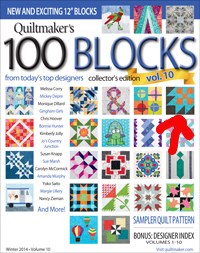
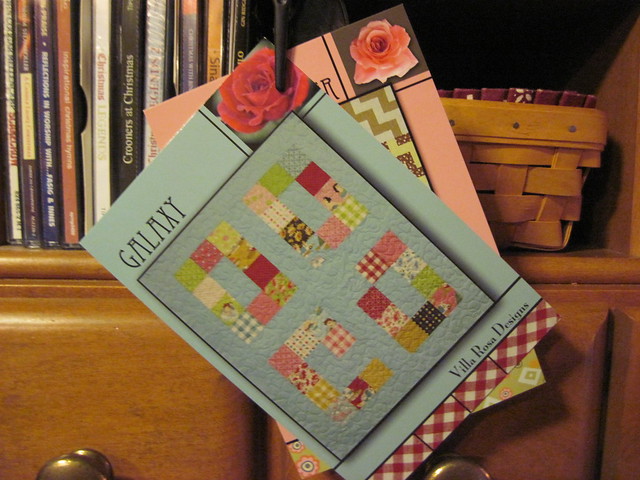
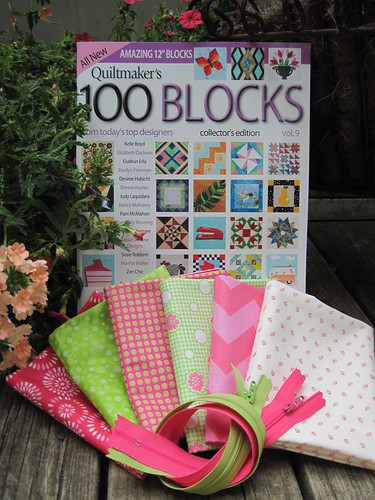
In addition, I used a few 40% off coupons at Joann Fabric to purchase several free-motion quilting books. 


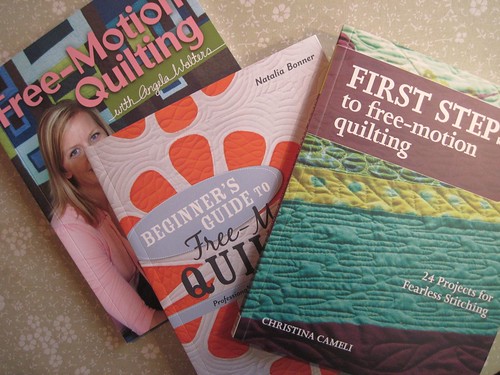
Free-motion quilting books

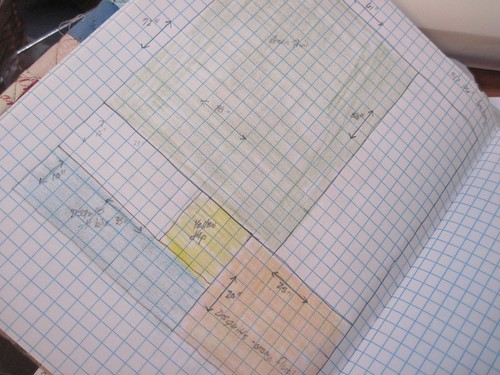
If you are like me, and are truly starting from square zero I found it helpful to read through more than one book. Each author is so encouraging and shares many helpful suggestions. Each of these books divide quilting designs into categories and show how to build on previously taught skills. I also took their suggestion to use paper and pencil and draw out the design I wanted to use so my muscles would get used to the flow of creating it. 

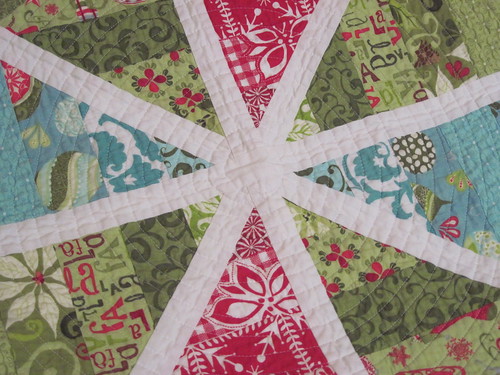
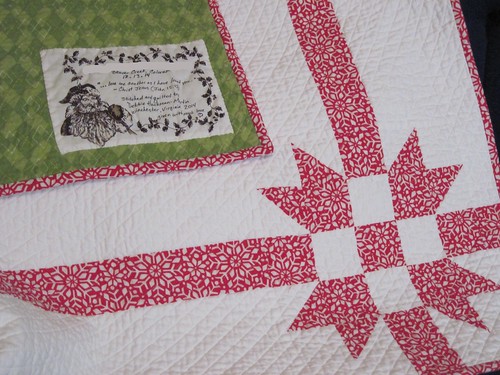
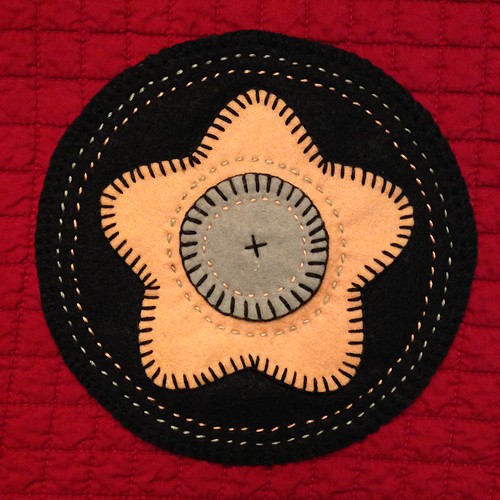
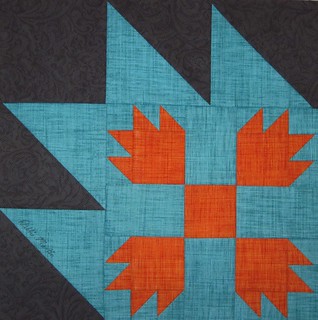
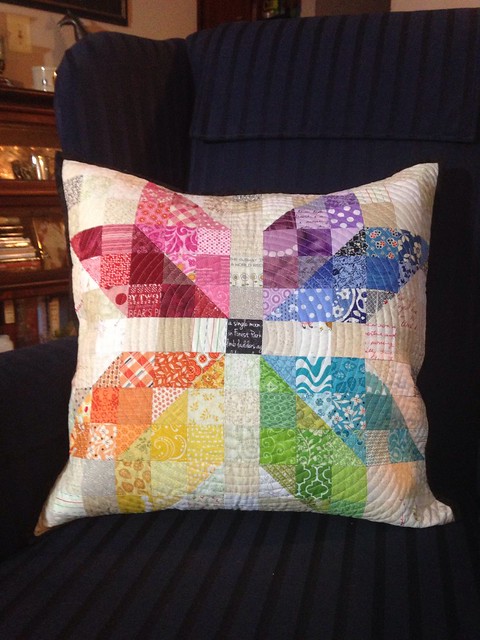
In the past I always thought that doing a stipple/meander design was where one should start when learning to free-motion quilt. I tried this on a few quilts with okay results, but just was not comfortable. Many times I would find myself backed into a corner - surrounded on all sides where I had already quilted and no way to get out. In Natalia Bonner's book, Beginner's Guide to Free-Motion Quilting, I selected a design called Loops and Poppies. It is similar to the stipple design, but just as the name implies it includes loops and flowers. 


Loops and Poppies all-over quilting
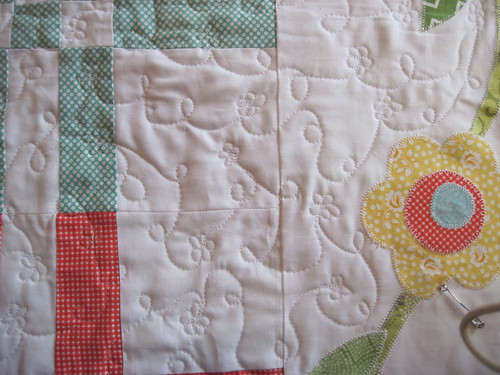
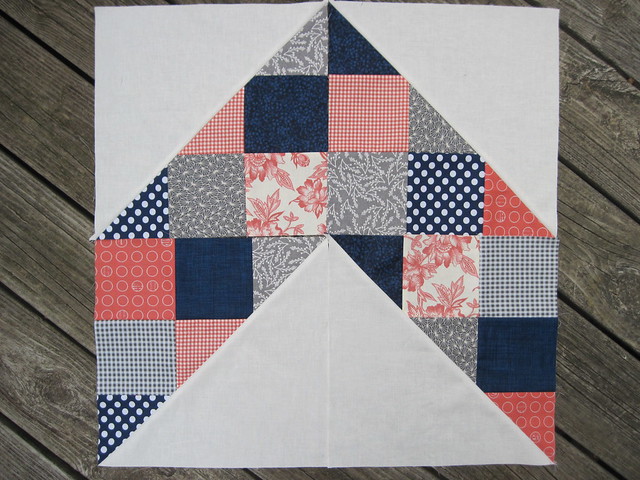
Loops and Poppies design by Natalia Bonner
This pattern has really freed me to enjoy quilting! As I'm stitching along I no longer have to worry about my quilting being surrounded on all sides. If I get into a "road block" I simply stitch a poppy and come right back out on the same side of the flower where I stitched in. Wow!! As you can see from the picture above, my little poppy flowers are not perfect, but they look cute, anyway :o) Fun. Fun. Fun.

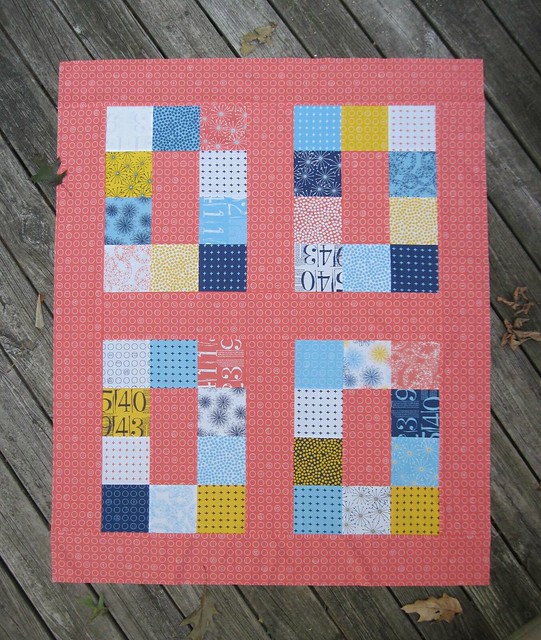
I'm stitching this on a pretty large scale and I find I'm not so good at using my hands to frame the area I'm stitching...as a matter of fact, my "technique" definitely needs some work. I'd like to practice on some smaller items like pillows or wall hangings where the scale of the quilting can be a lot tighter. I think doing this will allow me to improve my hand/arm position while quilting. I'm actually looking forward to it!

I hope this has encouraged you if, like me, you have felt overwhelmed by learning to free-motion quilt. Sequential building of skills (and a few of the right tools) make a big difference! I'd love to hear any tips you have to share with me...we can continue to learn this together! Happy quilting :o)


Monday, December 15, 2014

Snowflake Among the Stars

IMG_2790
Photo taken between rain showers on a cold, windy day

Snowflake Among the Stars started out as many quilts do...with the announcement of an exciting life event. My dear friend, M, shared with me the news that her daughter {also an M} was going to be married! I've know this younger M since she was a precious little four year old :o)

With a wedding date set for mid-December it was a fun opportunity to make a quilt that not only celebrated the marriage of this couple, but could be used each Christmas. The quilt started with this dynamic snowflake as a central medallion. This pattern, Snow-Kissed Star, is designed by Konda Luckau of Moose on the Porch Quilts, and was featured in the Nov/Dec 2011 issue of McCall's Quilting. It's such a bold design and I love how it lets you use all the beautiful fabrics in a jelly roll.  

Snow Kissed Star

The pattern in the magazine called for adding wide borders using a coordinating print around the central snowflake; however, for a wedding quilt I wanted something a little more special. 


IMG_2819
In my sketchbook I started playing around with a border to frame the center snowflake. I knew I wanted to go with a crisp red and white border design - something simple, but with visual impact on the four corners. 

Two years ago I made this Gift Wrap pillow using a sweet little pattern by Stephanie {Venus de Hilo}. The star in the pillow is called Sister's Star...and I love how it looks like a bow. It seemed to be the perfect star block to use on the four corners of this quilt.

I planned out 10.5" sister's stars with a 2.5" ribbon framing the center Snow-Kissed Star.

My local quilt shop, The Scrappy Apple, had several yards of a red snowflake print from the In from the Cold fabric line - also by Kate Spain. I used this fabric for the red borders and the binding. 

For this young couple I wanted the quilt to have fresh clean lines, and just a hint of a vintage twist. The quilt top turned out just as I hoped it would :o) It is actually a square quilt - I just could not get high enough above it to take a picture that did not make it look rectangular.


IMG_2796
Photo taken between rain showers on a cold, windy day

To quilt it I used the walking foot on my machine and quilted in a large spiral using 1/2" spacing. That was the easiest distance to space the lines because it allowed me to use the side of the walking foot as my guide. Using my Janome sewing machine it probably took about 12-15 hours spaced over several days to get the quilting done. Here is a close-up to show the spiral quilting:


IMG_2809
I lightly traced around a circular jar lid to get the spiral started

For the backing I found a wonderfully soft, apple-green argyle flannel from Connecting Threads. The apple-green is a great match for the fabrics on the front of the quilt. I was hoping flannel would make the quilt cuddle-worthy and it did not disappoint. The vintage Santa label is from a yard of All Occasion Quilt Labels by Northcott. A Pentel black gel fabric pen worked great to write on the label. 


IMG_2814
Name of the bride & groom crossed out on the label to protect privacy

The bridal couple live a long way from where I live so my dear friend, M, delivered the quilt to them when her family traveled to the wedding. She sent me this sweet picture of the lovely bride and groom with their Snowflake Among the Stars quilt. I hope it will be a treasured part of their Christmas celebrations for years to come :o)


IMG_1269
The sweet bride and groom with their wedding quilt :o)

What a fun quilting journey this was! Wishing these newly weds a grace-filled marriage blessed with many happy years :o)

Wednesday, November 26, 2014

Debbie's Sewing Class :o)

Untitled
Welcome to Debbie's Sewing Class :o)

I don't think it's a secret to anyone who reads my blog that I love doing hand work. We live in such a busy world and often I find myself compelled to finish things as fast as I can in order to begin the next new project. Hand work slows all that down. Sitting quietly and focusing on the small project between my hands brings such peace and allows time for reflection.

A few years ago my dear friend, M, and I decided to choose a project to work on that would encourage us to schedule time to get together and invest in our friendship. Life can get so busy that having a reason to get together helps make it happen. We chose this beautiful Poinsettia Basket pattern Leah Smith of The Country Cupboard. As we worked our way through this pattern I taught M how to do the blanket/buttonhole stitch on wool felt.


The picture that inspired the class
This beautiful fireplace is at my friend, M's, house.

Each Christmas M displays her lovely wool felt picture on her mantle where the beauty of the pattern has drawn many admirers. (Her husband made the great frame for her picture!) This fall M asked me if I would teach a wool felt class to friends and family and we chose a Saturday morning in November. 

I set about working on a pattern to use as I taught the basics of making wool felt pictures. I wanted the design to have gentle curves with no sharp angles so first time stitchers could build their confidence. Using round objects from around my home and a star-shaped cookie cutter I came up with the following pattern:


Untitled
Wool star candle mat.

These small candle mats use both the blanket/buttonhole stitch and a decorative running stitch. The circles and chunky star are so easy to stitch and I like how the running stitch adds to the texture. We had several different colored pieces for the students to choose from. 

I was a bit nervous teaching eight people at the same time how to hand stitch, but they were great students! It turns out that previous experience mending soccer shorts translated right over to working with wool felt for my friend, R. He happens to be my supervisor when I'm a technology resource teacher at school...I thought we should just use this sewing class for my formal teacher evaluation and be done with it :o) 

Here's a short video I made using Animoto to show you the fun we had :o)


Each student was able to complete the project in one morning and seemed to enjoy the process. We had some great laughs as new skills were learned :o) I'm looking forward to teaching again!

Saturday, November 22, 2014

100 Blocks Blog Tour Magazine Winner!!

Such an exciting week this has been! I hope you've enjoyed visiting each of the blogs for Quiltmaker's 100 Block, Volume 10 block designers...I know I have :o) It's fun to learn the inspiration behind the design of a quilt block. Learning about how the block testers contribute to the process was interesting, too! Such patient and talented ladies they are!

For the magazine drawing I asked readers to tell me how long they've been quilting and how they got started. Wow did I enjoy reading the stories you shared with me! I have to admit that more than one of them brought tears to my eyes. It is so wonderful how quilting has brought together people from across the generations and given family and friends a vehicle to create bonds. 

I used the Random Number Generator to pick a winner for an issue of Volume 10 to be sent directly from Quiltmaker's. 


The winner is No. 149!! Hooray!! I've sent Verna an email to let her know she is the magazine winner from my drawing. 


Verna blogs over at The Quilting Loon...go check out a few of her quilts. I believe we can read about the pretty quilt she mentions in her comment here.

I'm so thankful for each person who took the time to visit my blog and leave a comment about Nested Bear Paw. Wishing a blessed and happy Thanksgiving to all :o)

Wednesday, November 19, 2014

Quiltmaker's 100 Blocks Volume 10 Blog Tour

QMMS-140050-cover_200
My block made the front cover :o)


{Welcome Friends}

What a privilege it is to be part of the monumental tenth issue of Quiltmaker's 100 Blocks. This publication provides such a wonderful opportunity for both new and experienced designers to share their creative ideas. This is the second issue I've had a block in...the first was my Dashing Geese block in Volume 9.

I'm over-the-moon about finding my block, Nested Bear Paw, on the front cover! There may have been some dancing around the house when I learned of this :o)


Here's a larger picture of Nested Bear Paw (Block 982, p. 59) so you can get a better look at it:


Nested Bear Paw
Nested Bear Paw by Debbie Martin

Inspiration for the Nested Bear Paw quilt block came from a wool felt wall hanging I designed and made. Inside each large bear paw is a smaller set of paws.


Nested Bear Paws
Wool felt wall hanging designed & stitched by Debbie Martin

When making this design with wool felt it was pretty straight forward to get the layout to work; however, when it came to translating it into a quilt block I had to rethink the dimensions in order to get the small set of paws to fit inside the larger paw. It took me a while to get this figured out.

This is a block that lends itself to both modern and traditional quilts. When making my block for the magazine (picture above) I used Moda's Puzzle Pieces in Jacquard Black for the background and P&B Textiles Color Weave in Orange and Light Aqua for the paws. These fabrics tend to have a modern feel.

Showing that Nested Bear Paw is also a block friendly with more traditional quilts I used reproduction fabric when I put together a wall hanging to send in for the Designers Gallery (page 16.) 


Nested Bear Paw wall hanging by Debbie Martin

Fabrics for this mini quilt include Amity and Love Knots from the Ladies Album collection by Barbara Brackman, and Hope Chest by Laundry Basket Quilts - all from Moda Fabrics. Here's how Nested Bear Paw would look as a full size bed quilt:

I used photo editing software to create this

Quiltmaker's is generously giving one of my blog readers a free issue of 100 Blocks, Volume 10. To be entered into the drawing just leave me a comment telling me how long you've been quilting and how you got started. If you suspect you may be a "no reply" blogger please make sure to include your email address in your comment. I'll draw a random winner on Friday evening, November 21.

Thank you so much for stopping by Shadows of the Blue Ridge :o) If you'd like to follow my blog in the upper right side bar are options for BlogLovin', email, and Google Friends Connect. I hope you are enjoying this special week and visiting the blogs of many block designers, as well as sponsors to the blog tour!


Saturday, November 15, 2014

Quiltmaker's Excitement is in the Air!

Can you feel it? There's a buzz in the air...Quiltmaker's 100 Block Volume 10 has arrived in stores! My local quilt shop, The Scrappy Apple, reports issues of Volume 10 are selling fast and furious. 

To celebrate reaching the 10 issue milestone Quiltmaker's put together a fun video. Click the video image to watch it.

Note: I am not in the video

Join me back here on Wednesday, November 19 to play along on Quiltmaker's 100 Blocks blog hop...I'll share a bit of background on my block and hold a drawing for a free issue of the magazine. See you on Wednesday!


Saturday, November 1, 2014

Ten, 10, X

Ten...that's how many issues of Quiltmaker's 100 Blocks are now in print. That means 1,000 quilt blocks have been designed, submitted and published. Wow!! Now that's impressive :o) Even cause for a celebration!!

QMMS-140050-cover_200
Quiltmaker's 100 Blocks, Volume 10

Admittedly, I am late to join in on the 100 Blocks fun with Dashing Geese in Volume 9 being my first submission and acceptance. To have a block included in the milestone tenth issue is, to me, quite an honor. 

Something I appreciate about this publication is the opportunity it provides for anyone to experiment with designing. For quite a while I would mull over how I could follow patterns created by others and come out with a beautiful product, but wonder if I had any capacity to design. I so appreciate the vision that designers have...looking at things in ways not previously thought of. How fun to know, that even on a small scale, I can design an original quilt block.

I hope you'll join in November 17 - 21 for the blog hop tour! Stop by my blog on Wednesday, November 19 for details on my block and fun give-aways :o)

p.s. My block made the front cover of the magazine!! Wow, how fun it was to discover that...I may have squealed and danced around a bit :o) Can you guess which one it is? I won't tell until the blog hop...hope to see you then!


Sunday, October 19, 2014

Just in Time

{Way} back when I was in college I majored in business administration. This major required classes in economics, and I have to say they were probably my least favorite classes. It has surprised me, in my adult life, how much economics really does apply...and not just to money, but to many different aspects of life. 

One economic principle is that of "Just in Time." In college we were applying that to inventory and the laws of supply and demand...not stock piling inventory, but purchasing it just in time to be used. Boring to a young college co-ed, but important to the cash flow of a company. 

I find that as I live and work "just in time" is happening all the time. At school we train our teachers "just in time" for the technology they will be using with students. At home I cook dinner "just in time" for family to arrive home and eat it. Cleaning the house happens "just in time" for a guest to arrive {bad, I know!} Even crafting pursuits happen "just in time" for a gift that needs to be given. Sometimes all of this "just in time" drives me crazy. 

If I am honest with myself I can see how I cause a lot of my own "just in time" issues by how I choose to spend my time. At some point earlier in the year I made the decision that my sewing was getting a bit out of hand. In an attempt to keep up with the ebb and flow of the online quilting community I was starting to loose meaning in the things I was spending my time working on. Many projects were being started, but few were actually getting finished. Each new start made past unfinished projects a bit less precious and desirable to finish. 

With this knowledge under my belt I resolve to be more intentional about what I work on and not get drawn into beginning projects that have little real purpose to me personally. I'm finding joy in cheering other on from the sidelines, but not feeling compelled to always join in. Now I will say that occasionally a bit of impulse is a good thing, because it does help to keep creativity flowing ~ at least for me.

Wow! If you're still reading at this point thank you for listening :o)

I will share my latest "just in time" finish...but, I'm happy to say that I started these socks back in June in order to enjoy every step of the process while crocheting them. I did just get them finished this morning "just in time" for a delightfully cool autumn day :o)


IMG_2766-a

I realize these are just plain, utilitarian socks, but I am oh-so-happy to have them finished! They turned out exactly as I hoped they would: cozy and soft :o)

The yarn is Patons Kroy Socks FX in Cascade Colors. The design is a hodgepodge of patterns: 
  • the toe area comes from Patons Women's Twisting Lace Socks
  • the heel & cuff areas comes from Patons Kroy Toe Up Socks
  • the foot and ankle are my design (just simple half/double crochet stitch)
I've wanted to make myself a pair of these ever since I made socks for my brother-in-law last year. My yarn is a bit more chunky than what I used for his, but I'm liking them :o)

How about you? Do you live a whole lot of life "just in time," or have you learned to master your schedule and live a bit more intentionally?


Saturday, September 27, 2014

Leave no blocks behind - In pursuit of a quilt back

Back in March I was the quilt designer for the Faith Circle quilt. For this quilt I asked the Faith Circle ladies to make wonky disappearing 4-patch blocks using a palette of soft colors. You can read more about the quilt design and find the block tutorial here. In my mind I had visions of a plaid center section surrounded by applique borders of whimsical flowers. 

image

After a few more months than I intended the finished quilt top finally emerged :o) These happy little flowers took longer than I expected to complete, but I am oh-so-happy with the finished top...it turned out exactly as I pictured it.

As often happens with our Faith Circle quilts there were a couple of blocks left over after the quilt top was assembled.


IMG_2743

I try to go by the motto, "Leave no blocks behind." In other words, when a quilt is completely finished (quilted and bound) I really don't want any orphan blocks left over. A good way to accomplish this is to use the extra blocks when making the quilt back. I have collected a few larger cuts of fabric to put together with the two blocks in a pieced back. I want the back to use the same soft colors as the quilt top.


IMG_2744

In my quilt notebook I've started to sketch out an idea...we'll see if it works out with the blocks and fabrics I've pulled. I hope to get the back pieced this weekend, and maybe get the quilt basted, too. 


IMG_2746

I'm excited to see this quilt progressing! 

Sunday, September 21, 2014

It's been a coral and blue weekend

I had two projects to work on this weekend and funny enough they both used the same color families: coral and blue. 

First came my September do. Good Stitches blocks. We were asked to make Patchwork Chevron Blocks using  this Moda Bakeshop tutorial from Jeni Baker of In Color Order.

IMG_2741

These blocks are each 12" square so this will be a huge, fun chevron quilt top :o) I'm really liking the coral, navy, and gray color combination Kim wanted us to use. 

Next up is a shop sample (my first!) for my local quilt shop, The Scrappy Apple. My friend, Kelley, asked me if I could make the sample top using Galaxy, a Villa Rosa Designs pattern.


IMG_2740

Gallaxy is super fast to make up using one charm pack and yardage. The fabric line in this quilt is Figures by Brigitte Heitland for ZEN CHIC for Moda. This fabric line has some great prints in it! 

If you've never seen Rosecards (pattern cards) by Pat Fryer for Villa Rosa Designs they are definitely worth looking for. Rosecards are the size of a standard postcard and feature quick, easy patterns for quilts and other projects that often use precuts. 

IMG_2742

It was a super productive weekend in the sewing room! I'd love to hear what you worked on this weekend :o)

Sunday, September 7, 2014

We interrupt this blog to bring you the 2014/15 school year

Wow! Have you noticed a rather long stretch of silence on Shadows of the Blue Ridge? I sure have. It seems every year when a new school year begins it takes me a while to adjust to a new normal and balance my work time with my "at home" time. Even if I haven't been blogging there has been some sewing going on over here: 

Early in August I tried a super tutorial from Dominique at The Running Thimble to make quilted luggage tags as part of a birthday gift for a sweet friend. So fun! And can I just say...these use scraps :o) I certainly see more of these luggage tags in my sewing future.


Quilted Luggage Tags
Front and back view

As I wrote in my last post, I was fortunate to be in on the first round of The Great Pillow Fight Swap over on flickr. It was a lot of fun learning about my secret partner :o) She likes bright colors and seems to be drawn to rainbow and color wheel designs. Using this information I chose the fabulous Christmas Snowflake pattern by Rachel Wooden Spoon to create a color wheel snowflake pillow.


It's Finished!

I just love this snowflake block and ROYGBIV makes it so fun :o) I enjoy being able to use scraps from my supply and this pillow top was great way to do just that. For the quilting I did a continuous spiral. I just used the default needle position on my walking foot, so the quilt lines are about 3/8" apart. I've never done a spiral before and found it to be pretty easy once I got past the tiny part in the very center. This will be going in the mail to my partner as soon as the window for sending packages arrives.


This weekend I learned how to do Susie's Magic Binding from Aunt Marti @ 52 Quilts.com. This binding method allowed me to quickly finish up a small quilt that had a super fast deadline. Wow...if you've not tried this binding method you really need to! Generally I'm not a huge fan of using a machine to sew down binding, but the faux flange really makes it easy and in my opinion great looking, too. I was a bit concerned the flange would not line up nicely on the mitered corners while sewing the binding down, but just to show you how well this works here are all four corners...not a dud in sight :o) Now just to be honest I will say that I pin judiciously...about every inch, so that probably helped, too. 


Finally, one last piece of sewing fun. Earlier in the spring I wrote up this little post about Quilt Market. I mentioned that I'd been able to preorder one of Moda's Building Blocks quilt kits. Well...it arrived this week!! Just look at this beautiful box :o) 

I can't wait to dig in and get started on this beauty! However, I am going to exercise great restraint and continue working through my priority list first...but be assured there will be visions of this quilt floating in my head :o)

Happy quilting!

Wednesday, July 30, 2014

Scrap Consumption Progress & July ALYoF

Goodness is seems like forever ago that I wrote up this post about the need to use up fabric scraps and set a goal for July in the Lovely Year of Finishes group. The good news is that I've been able to do both :o) 

My July ALYoF goal was to make two rows for a Year of Rows quilt my local quilt guild is doing as a fun project this year. Each month we are drawing an idea out of a bowl and interpreting it any way we choose into a row of quilt blocks. In the end we will have 12 rows to put together into a quilt. These quilts can be any size you choose. Mine is 36" wide because that dimension allows me to use blocks of various sizes (4", 6", 9", or 12") as I make up the rows.

Local quilt guild row quilt

The first month saw the word "stars" selected as the theme so I drafted my own paper piecing pattern for these 8-point scrappy stars. The second moth saw "girls night out" for the theme. It was a bit harder to choose something to represent that theme. After thinking about it I concluded that going to my local guild meeting was the most consistent thing I do for girls night out so I choose to make a row of spools. 


IMG_2689

I really like the super pointy "arms" on this style of star. Many of these background fabrics represent the very last precious scraps of favorite fabrics. 


IMG_2688

I actually made this center spool block (text print fabric) quite a while ago with no real idea what I would use it for. I've always thought this particular print from the Mama Said Sew fabric line is so cute. 


IMG_2690

Both of these rows have been constructed mostly from my fabric scraps with very little cutting from folded stash fabric needed. 

In addition, I've been able to make more of a dent in my scraps with a recent flickr swap I joined: The Great Pillow Fight Swap. I don't participate in a lot of bees or swaps because with working full time I don't have a great deal of sewing time. However, I do feel like joining in every now and then on a small project type of swap helps to keep creativity flowing and to keep in touch with others in the online quilting community. 


What are your thoughts partner?

My secret partner requested scrappy low volume combined with bright colors. From looking through her flickr favorites I see she is drawn to rainbow brights and color wheel layouts. I combined this information with the wonderfully scrappy Christmas Snowflake block designed by Rachel Woodenspoon. She got her inspiration from Rachel of Stitched in Color's Snowflake block from the Penny Sampler class. A great tutorial for a pillow-size version of Rachel's block was put together by Katie of the Seattle Modern Quilt Guild (scroll down to find a link to downloadable instructions.)


Rainbow of 2" squares

This is the colorful collection of scraps I cut up to make the pillow top. Again, more than half of these came from scraps with the balance cut from stash fabrics. 

Great Pillow Swap Progress

So far I've managed to get two quadrants of the snowflake stitched together. I really enjoy this kind of sewing where all of the points have to match up exactly...it's kind of a personal challenge :o) It was fun to move the little 2" squares around trying to get the color balance just right in each point. I pretty much maxed out my variety of fabrics for each color of this snowflake block. 

I"m happy to have met my July ALYoF goals and am linking up with the July finishes party. Hop on over there to check out the other beautiful projects going on!

Monday, July 21, 2014

Progress Update: Summer Handwork

I'm compelled to do handwork projects in the summer...I just do not want to be limited to staying in my sewing room. At the beginning of the summer I prepped both a sewing and a crochet project to take on a trip. I've made good progress on both. 


Two of the four Flickering Stars blocks are complete. These will become a pillow front for the couch in our family room. 


This is what the back of the blocks look like. You can see where the templates were traced to provide the stitching lines. It probably takes me between four to five hours to make each block. In that amount of time I could have the entire pillow finished using a sewing machine, but there is something so satisfying to sewing by hand. 


Here are the pieces for the last two stars. I should be able to finish them both by the end of August...hopefully :)

In addition, I always like to have a good crochet project in the works. These are the socks I started in June:


I'm combining parts from various patterns to make them. The toe and heel are single crochet and the rest of the sock is done in half-double crochet...my favorite stitch! No doubt these will be ready for that first chilly Fall day :o)

So how about you? Any hand projects in the works? 

Note: Due to a necessary hardware update we are without home Internet service for a week, so this post is being done from my phone. Later I plan on going back to add hyperlinks and cleaning up any formatting issues. 


And the Winner Is...

Thank you to each of you who took the time to comment on my blog anniversary post :) As promised I used the Random Number Generator to pick a winner. 


As you can see, the winner is Number 29: Mimi's Darlins! I've contacted her to get a mailing address and will send the prize package right out!

Again, I am greatful to each of you who follow along with Shadows of the Blue Ridge :)


Monday, July 14, 2014

One Year Blog Anniversary - Cause for a Giveaway!

Shadows of the Blue Ridge is one year old!


Blog Anniversary ~ Time for a Giveaway!
 
I knew this day was coming...I've had a mental note about it in my head for the last month. Summertime for teachers is often a time of reflection on the previous school year. This habit of reflection is one reason I began blogging. As I'm sure many people feel, I was nervous writing and actually publishing that first post. Insecurity about writing styles and proper language mechanics whispered into my ear. I am happy to say not a single comment all year has come in referencing either of these areas :o) Apparently none of my errors have been too egregious, or people are very good at following their mother's admonition, "If you don't have something nice to say then don't say anything at all." 

So, reflection...what has blogging caused me to reflect on? Or maybe, if I reflect on the act of blogging what has it done in my life? I believe the two of these are really tied together. Blogging has caused me to reflect on what I really think. If I didn't take the time to blog I might not seriously consider things such as:
  • Why do I make quilts and various other crafted items
  • What influences me to make the things I do
  • Whose "voices" am I listening to in the quilting/crafting world, and why
  • How do I balance crafting with the other important aspects of my life
  • How can I use blogging/crafting to honor God and bring Him glory 
This is a pretty good list to start with. I have thoughts and feelings for each of these areas. There is value in taking the time to wrestle with answers to "who, what, when, where, why, and how" questions. Sometimes the answers to these questions are included in what I've written about, or what I've specifically chosen not to write about.

Now for the celebration and giveaway! 

Blog Anniversary ~ Time for a Giveaway!

Celebrate Shadows of the Blue Ridge with me for a chance to win this pink and green fat quarter bundle, zippers, and a copy of Quiltmaker's 100 Blocks, Volume 9 which contains the pattern for my Dashing Geese block. Why pink and green? Where I live we have long been know as the "Apple Capital" and each year we celebrate like no other town with a HUGE celebration called the Apple Blossom Festival. You've never seen so much pink and green in your life! So it seems completely appropriate for me to share this pink and green-ness with one of my lucky blog followers :o) These lovely fat quarters and zippers come from my local quilt shop, The Scrappy Apple


Blog Anniversary ~ Time for a Giveaway!

There's just one thing you need to do for a chance to win: Follow my blog. That's it, just be a follower of Shadows of the Blue Ridge. If this is your first visit to Shadows of the Blue Ridge and you'd like to follow me you can choose from three different ways: (1) Bloglovin', (2) sign up for email notification, or (3) click Join the site to use Google's Friend Connect. Then, whether you've been a follower for awhile now, or are a brand new follower, just tell me in a Comment  how you follow Shadows of the Blue Ridge...simple as that :o) If you suspect you are a No Reply Blogger please include your email address in your comment so I can contact you if you are the winner. 

A winner will be chosen on Sunday, July 20th at 9:00 p.m. EST using the Random Number Generator. 

Thank you for traveling through this year with me! I look forward to sharing more of this crafting journey in the year ahead :o)