Thursday, January 25, 2018

A Wedding on the Way!

There's a wedding on the way in our family!! Can you sense the excitement here? Our son G, and his bride-to-be, C will be married this coming fall. Of course, there has to be a quilt made for the soon to be established new family :o)

Knowing the young bride it was easy to select fabrics. She is drawn to earth colors, and things that have a bit of sparkle and shine to them. Can you imagine fabrics more perfect than Shimmer by Jennifer Sampou? The fabrics are made in Japan and come in beautiful shades of blue, gray, taupe, and creams. Each contain a shimmer of silver, gold, or both. Since I'm a bit late to the Shimmer rollout we'll happily go with a mix of Shimmer, Shimmer 2, and Shimmer On :o)
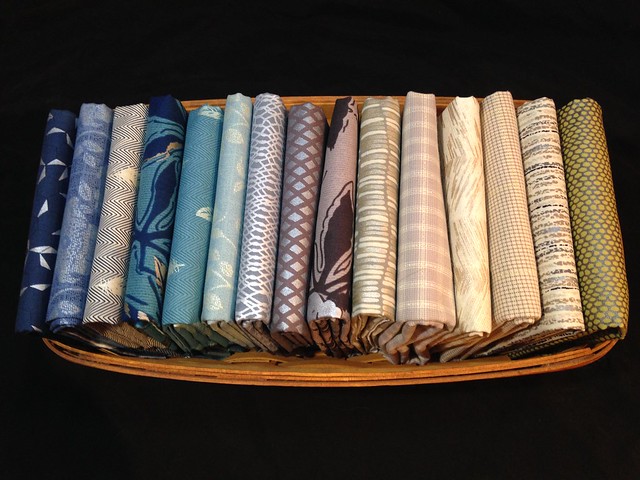
Combination of fabrics by Jennifer Sampou
Half yard cuts from Shimmer, Shimmer 2, and Shimmer On

Because of the metallic ink used on these fabrics they are a bit less drapy than regular quilting cottons, but I think in a large lap quilt with fluffy batting and a flannel backing they will lend a nice substance to the quilt. I was able to find a nice assortment of these fabrics on Etsy.
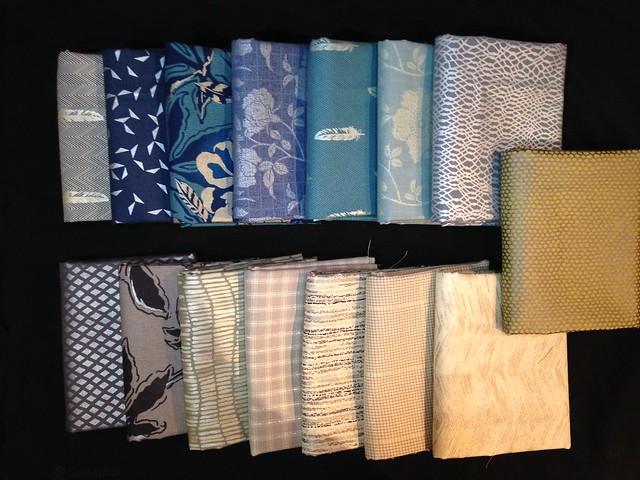
Earth tones in blues, grays, and taupe
It's difficult to show the lovely metallic in a photograph 

Although the fabrics quickly made themselves evident to me I was initially unsure of what pattern to use. I narrowed my thoughts down to three ideas which I showed the bride and groom. (Although it is tempting to make the quilt as a surprise I really feel that with something requiring this much time I'd prefer to make sure I am creating something that matches their tastes.) Here are the three ideas I came up with for them to preview. First up was the wonderfully modern Octagon Shimmer quilt designed by Jennifer Sampou to go with her fabric line. Obviously this would be a great choice since it was designed especially for these fabrics. Next I pitched the idea of a triangle quilt like this one. I've wanted to make a triangle quilt for some time now and have had this QAL bookmarked on my computer. I think these fabrics would be great in a triangle quilt! Then, to round things out I added in a more traditional quilt design, the Dreamcatcher pattern by Denyse Russart - really a beautiful quilt!

A bit to my surprise the traditional style Dreamcatcher quilt turned out to be their favorite. I almost jumped right in and bought the pattern, but then got to looking at it and thinking...it looks very similar to my Boxed Star quilt block that I designed for Quiltmaker's 100 Blocks, Volume 15.
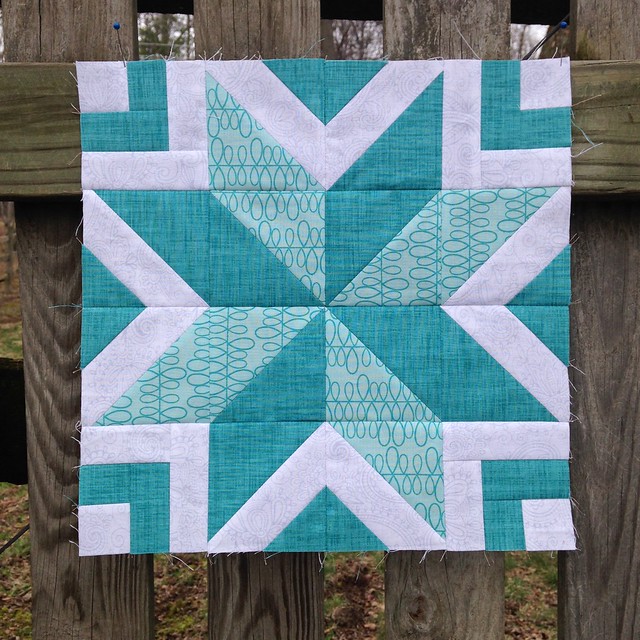
Boxed Star
Boxed Star quilt block designed by me :o)

How fun it would be to have a reason to make a quilt using one of my very own designs! In the magazine each of the blocks must be 12" square. However, I am going to resize my block up to 18" square and go with a 4 x 4 layout. This will allow for a generous 72" square quilt - a good size for cuddling on the couch.
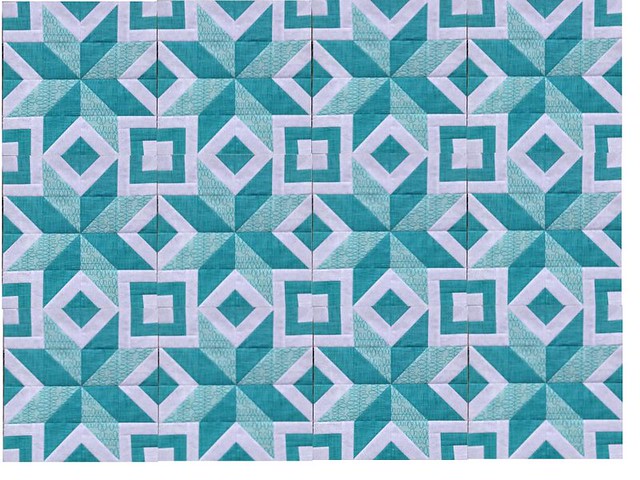
Boxed Star Quilt
Mock-up of 12" Boxed Star blocks


In my previous post I shared this mock-up of a quilt top using the Boxed Star block. I was thrilled to see the secondary design made by the boxes and squares of blue since secondary design was what I was hoping to achieve. However, I don't want those boxes and squares to be quite as prominent in this wedding quilt, so I'm going to try making them with a lighter contrasting color. That way they will be a completely separate design element from the stars.

I will be combining blue fabrics with the gray and taupe fabrics and each star will be a different combination, thus yielding a more scrappy look to the quilt. (No surprise there, right 😁) As soon as I get a sample block made up I'll be back to share more!

Untitled
Combinations of blues and gray/taupes

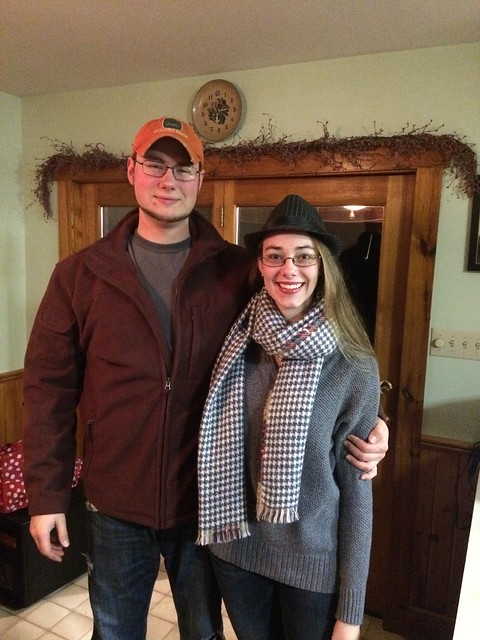
Here's a picture of our sweet couple :o) We can't wait to add C to our family!
Untitled
Our engaged couple!


Hope you are somewhere warm! It's a cold, windy January day here. Happy sewing!


Monday, January 15, 2018

Gentle Winter Mornings

I'm already reading it online - people yearning for the arrival of spring. It seems each year as soon as Christmas and New Years have passed there is a general feeling that winter should be over. I find I enjoy the fragile wintertime mornings when the sun shines with a gentleness not found during the other seasons of the year.

Untitled
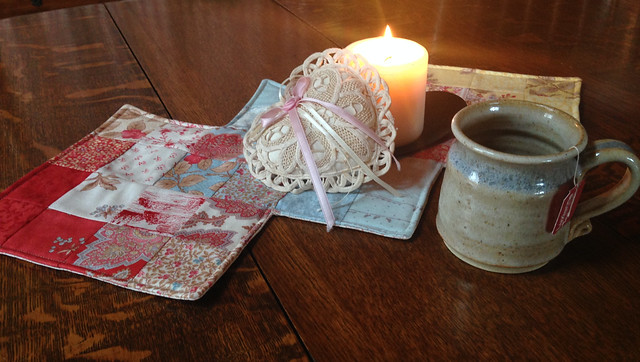
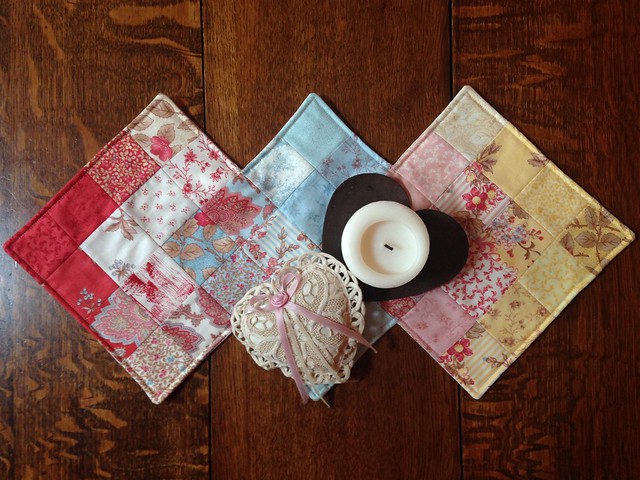
Quiet tablescape

In my sewing loft I have been quilting away on the green & blue Faith Circle log cabin quilt - and making good progress, too! Every time I get to the point of actually quilting something I remember how much fun it is to free motion quilt, but it's also quite a workout for the arms and shoulders. To take a break from the quilting I wanted to do a little sewing, but didn't want to begin something new and add to the already robust collection of unfinished projects. I went through my various stacks and bags and came across this small mat I had begun using fabric from a mini charm pack I'd received as part of a swap.

Untitled
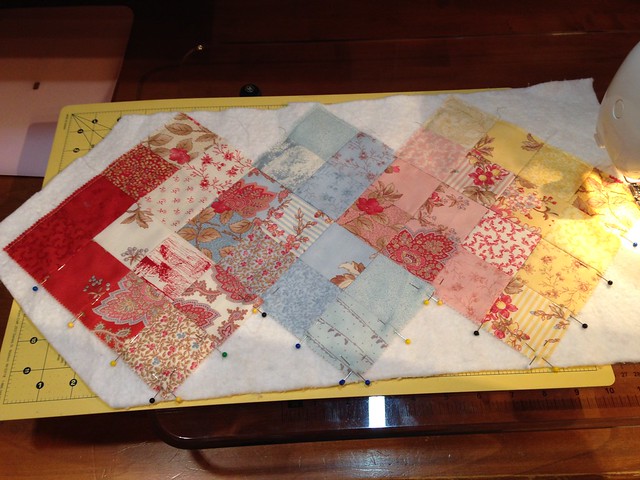
Basting the small mat onto a batting scrap

When I first received the mini charm pack I had no quick ideas of what to do with it, so it sat on my shelf for quite a while. Then, while online one day I came across a photograph showing a layout similar to this where the fabric colors flow from one to another giving the illusion of merging squares. The mini charms would be perfect since there were a good variety of colors and shades within the package. Then it sat unfinished for just over 2-1/2 years. Last night I pinned the mat top onto a batting scrap and basted around it. Then the extra batting was trimmed away.

Untitled
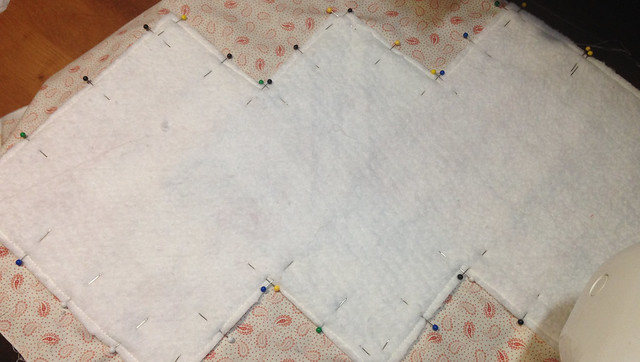
Mat pinned face down onto backing fabric

Next this was pinned, face down, onto a fat quarter that was to be the backing. I stitched around the shape again using a quarter inch seam. I left a three inch opening to feed through so it could be turned right-side out.

Untitled
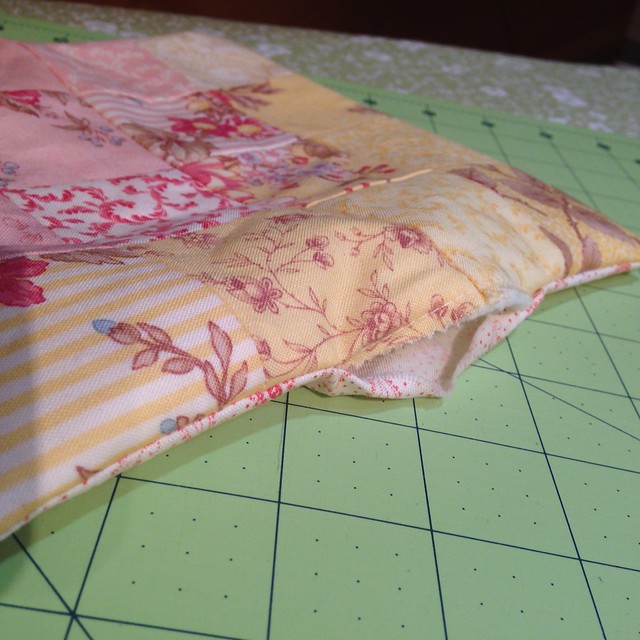
Small opening to turn piece right-side out

I carefully clipped all of the points and corners and used a pointy stick to get them all turned nicely. Them I ironed both the front and back so it would flatten out nicely. Finally, I top stitched all the way around to secure the top and bottom layers, and close up the opening.

Untitled
Completed table mat

The soft, gentle colors in this mat remind me of the fragile winter sun in the early morning. Quiet, peaceful, contemplative. Let's not rush headlong into spring and miss this opportunity to enjoy this special time of year.


Saturday, January 6, 2018

Formulating a Quilting Plan

In my last post I made reference to joining in with Aby Quilts to complete an unfinished quilt each quarter. I'm actually hoping to complete three this first quarter - all of them for the Faith Circle of do. Good Stitches. Last year, with moving to our new home, I was able to coordinate the planning of these quilts from my circle, but not able to pull off getting them completed. Now that the new year is upon us I will be coordinating two quilts in 2018, so I need to get myself in gear and finish the 2017 quilts.

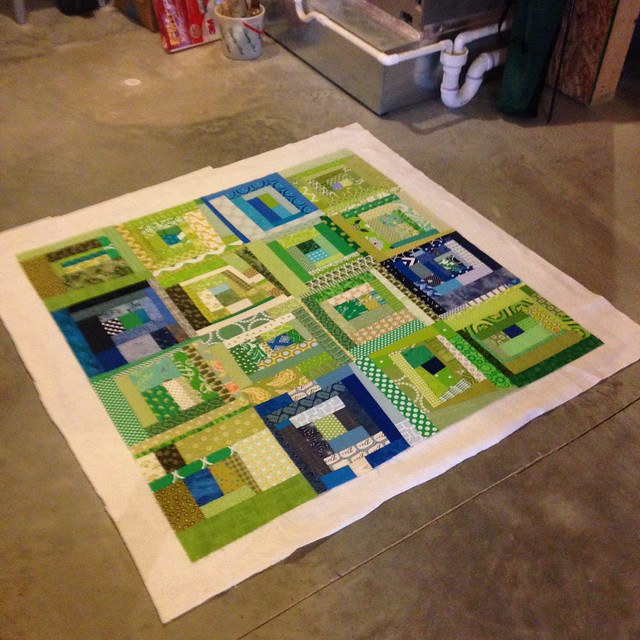
First up is the green and blue improv log cabin quilt. I am thrilled with how saturated the colors are in this quilt top. Yesterday I got it pin basted using a nice open space on the basement floor. It just took a little over an hour to baste this 48" square quilt. The challenge was to keep our dog from walking back and forth on it while I was working. At one point she even decided to lay down on it. Maybe that means it's snuggle worthy?

Sandwiching the quilt
All smoothed out and ready to pin baste

As it was spread out on the floor I mulled over how I'd like to quilt it. Options considered include:
  • Edge to edge straight line quilting using painters tape as a guide
  • Grid quilting using painters tape as a guide
  • All over meander/stipple and possibly include loops
  • Flame/wood grain quilting the individual squares
It's been a while since I've done any free-motion quilting so I think it's time to give it some practice again. As I've written about before, I have a pretty small Janome domestic sewing machine. It can be a challenge to use it for quilting; however, for the most part I've been pretty happy with what I've been able to do with this machine. I decided to try the flame/wood grain design in each individual square. This saves me from having to feed large sections of the quilt through my machine as I will only be working on one square at a time. I'll start by stitching-in-the-ditch along the seams where the blocks are joined. This will stabilize the quilt sandwich, and allow me to stitch along this same line as I work back and forth in the wood grain design. 

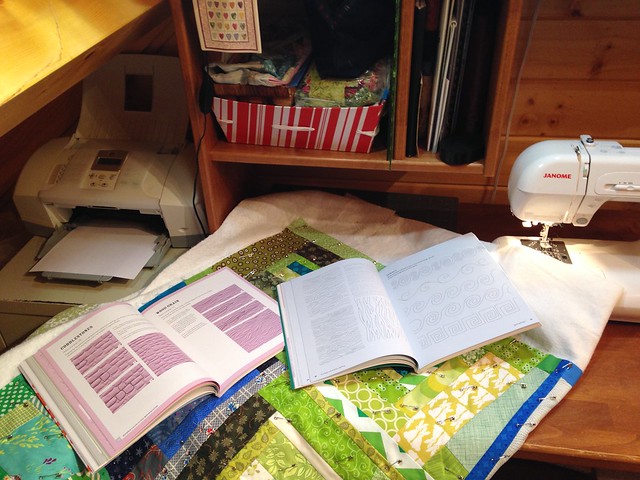
Planning out the quilting design
Searching for quilting options in my reference books

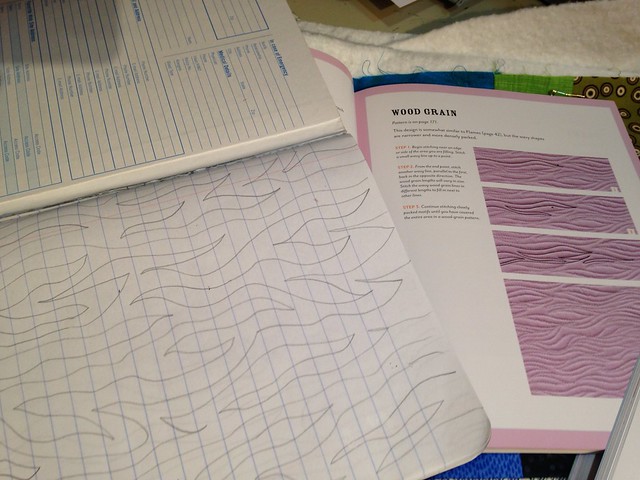
I have a couple of great books I've written about before that are so helpful with learning about developing the skills needed with free-motion quilting. I pulled them out along with an old composition book (left over from my son's schooling days!) and practiced sketching out the design.

Practicing my quilting design
Sketching out the wood grain design


I'm thinking I will alternate the direction of the wood grain stitching from block to block. I also plan to use up various shades of blue and green thread I was gifted from a friend whose mother used to quilt. Here's to a good plan, now wish me luck as I get started! 


Tuesday, January 2, 2018

Scrap Busting

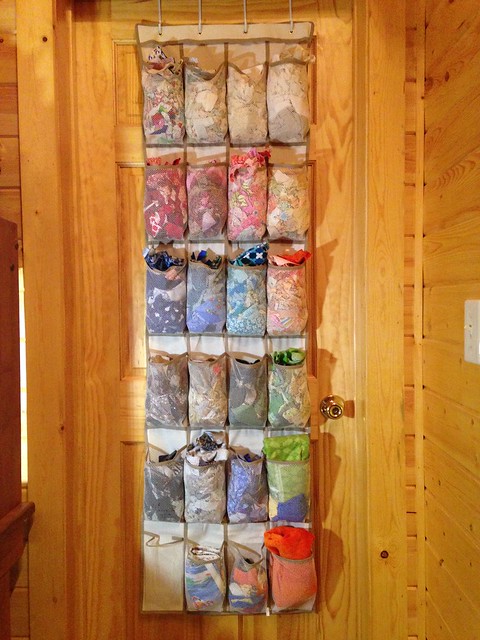
At the start of Christmas break off school I decided I wanted to do a little bit of "just because" sewing using my scraps (no surprise there!) I like to make sure my scraps don't exceed their storage space and several of the colors are getting pretty overstuffed. Here's a picture of how I store my scraps:

Scrap storage
Over-the-door shoe organizer/scrap storage

I've used this shoe organizer for several years now. It's been a great way for me to corral scraps without taking up floor or shelf space in my small sewing area. Granted this storage method would not work for someone who does a high volume of sewing.

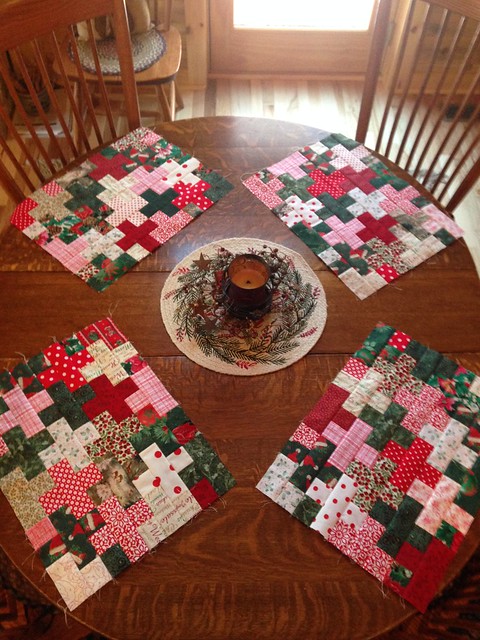
I pulled out Christmas fabrics left over from previous projects with the intention of making placemats. It's been on my mind to make another set of scrappy plus placemats similar to this set I made a few years ago. Over the course of my time off school I was able to get the tops sewn for a set of four mats. It's fun to mingle the various fabrics together!

Plus block placemat tops
Plus block tops for placemats

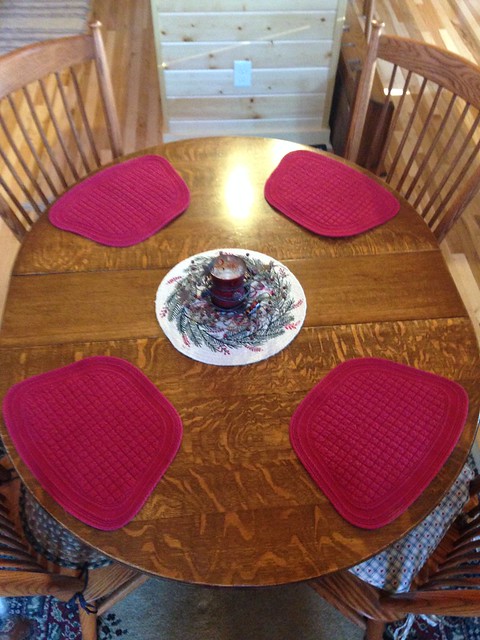
Now I'm going to decide if I want to leave them as rectangles or trim them into a wedge shape. As you can see we have an oval table which makes standard shaped placemats a little less than desirable. Several years ago I purchased a set of wedge mats specifically made for round tables from Improvements Catalog. I love the shape, however, they are just a bit smaller than I'd prefer. See how nicely they fit a round/oval table:

Untitled
Wedge mats from Improvements Catalog

I've got time before next Christmas to make my decision. In the meantime I've decided to join in with Aby of Aby Quilts and try to complete one unfinished project each quarter this year. First up are the three charity quilts for Faith Circle of do. Good Stitches. The tops are complete and ready to be sandwiched and quilted. I'm excited to get started!

How about you? Do you have any unfinished projects ready to queue up? Why don't you join us!