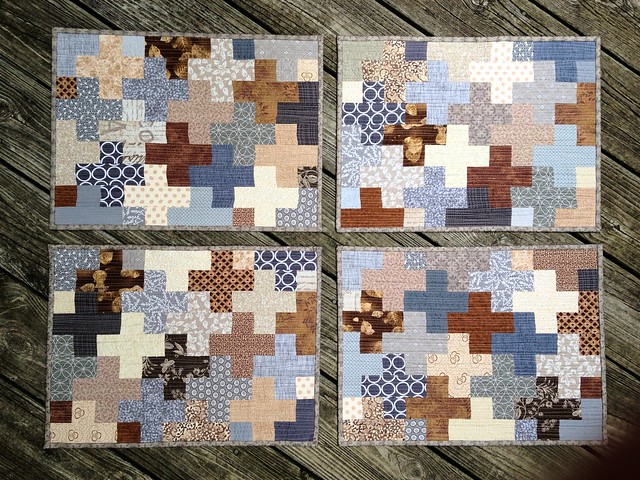
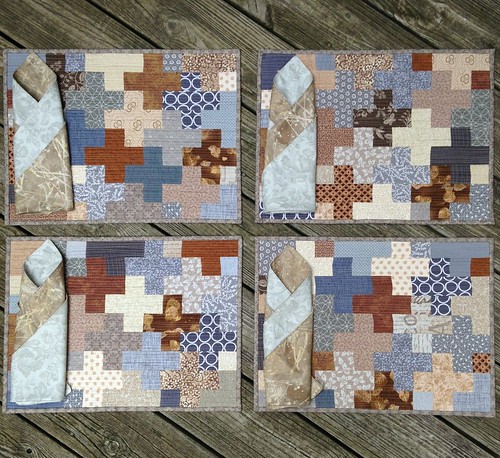
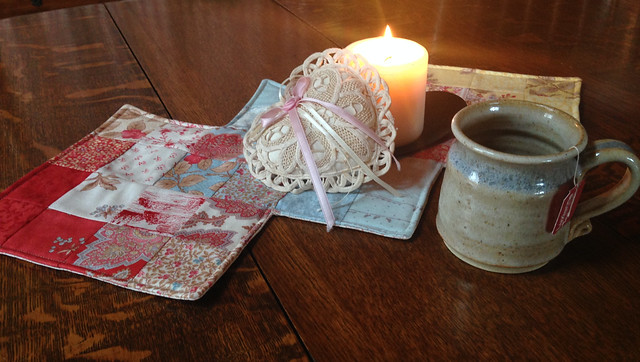
Showing posts with label scraps. Show all posts

Monday, January 15, 2018

Gentle Winter Mornings

I'm already reading it online - people yearning for the arrival of spring. It seems each year as soon as Christmas and New Years have passed there is a general feeling that winter should be over. I find I enjoy the fragile wintertime mornings when the sun shines with a gentleness not found during the other seasons of the year.

Untitled
Quiet tablescape

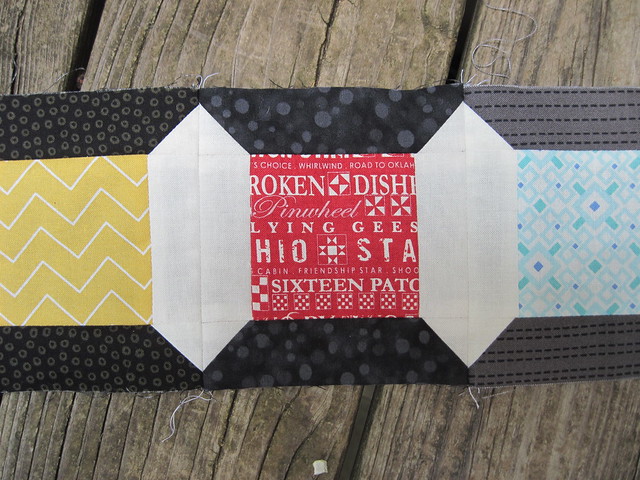
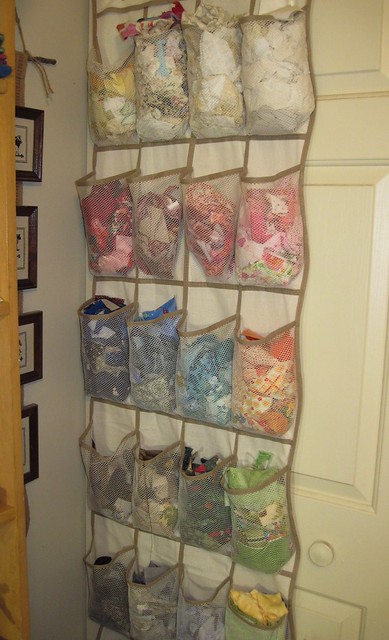
In my sewing loft I have been quilting away on the green & blue Faith Circle log cabin quilt - and making good progress, too! Every time I get to the point of actually quilting something I remember how much fun it is to free motion quilt, but it's also quite a workout for the arms and shoulders. To take a break from the quilting I wanted to do a little sewing, but didn't want to begin something new and add to the already robust collection of unfinished projects. I went through my various stacks and bags and came across this small mat I had begun using fabric from a mini charm pack I'd received as part of a swap.

Untitled
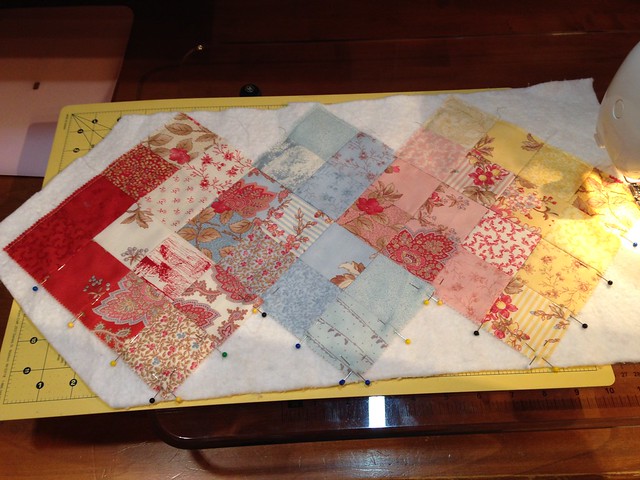
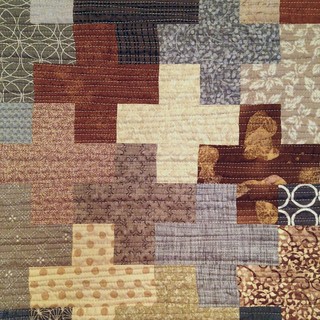
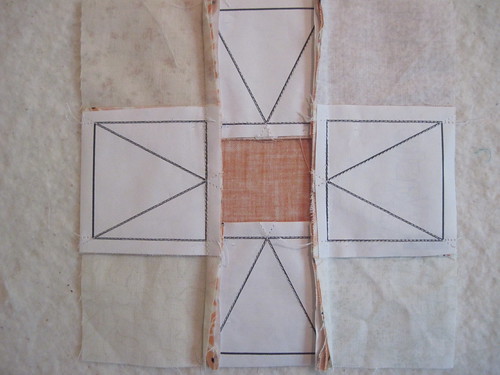
Basting the small mat onto a batting scrap

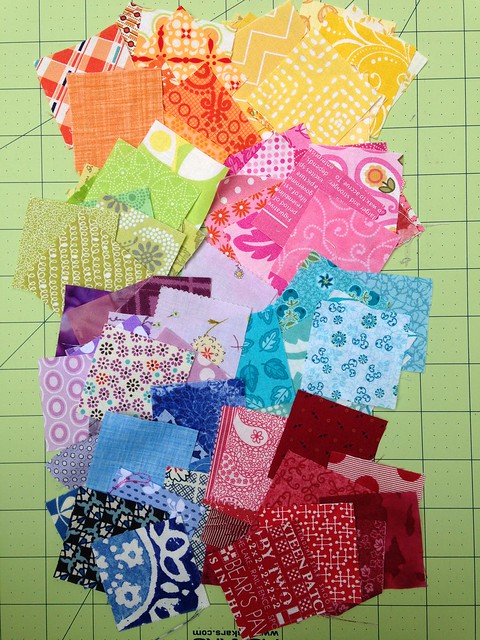
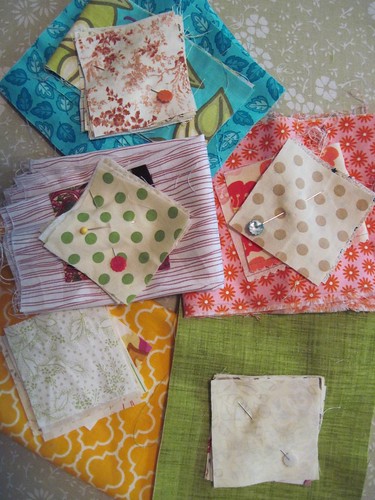
When I first received the mini charm pack I had no quick ideas of what to do with it, so it sat on my shelf for quite a while. Then, while online one day I came across a photograph showing a layout similar to this where the fabric colors flow from one to another giving the illusion of merging squares. The mini charms would be perfect since there were a good variety of colors and shades within the package. Then it sat unfinished for just over 2-1/2 years. Last night I pinned the mat top onto a batting scrap and basted around it. Then the extra batting was trimmed away.

Untitled
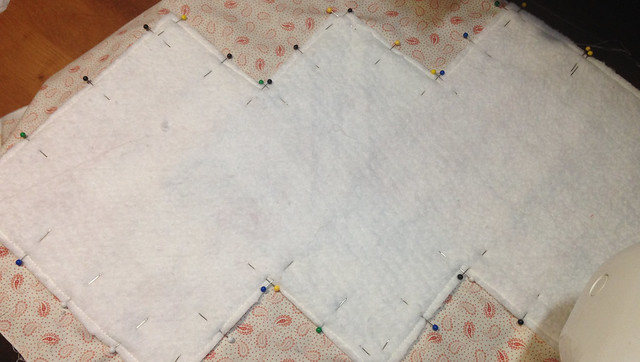
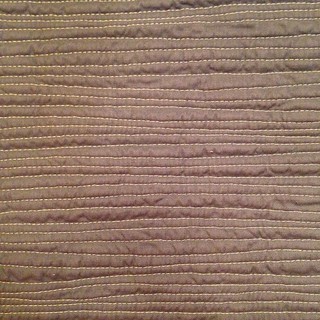
Mat pinned face down onto backing fabric

Next this was pinned, face down, onto a fat quarter that was to be the backing. I stitched around the shape again using a quarter inch seam. I left a three inch opening to feed through so it could be turned right-side out.

Untitled
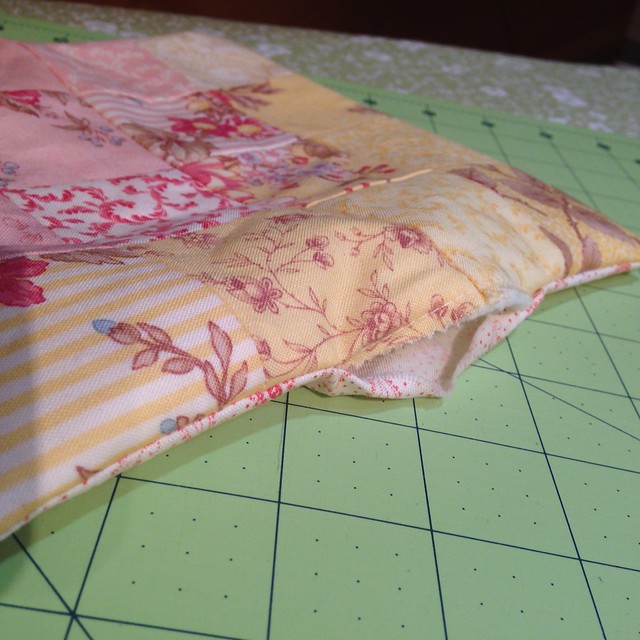
Small opening to turn piece right-side out

I carefully clipped all of the points and corners and used a pointy stick to get them all turned nicely. Them I ironed both the front and back so it would flatten out nicely. Finally, I top stitched all the way around to secure the top and bottom layers, and close up the opening.
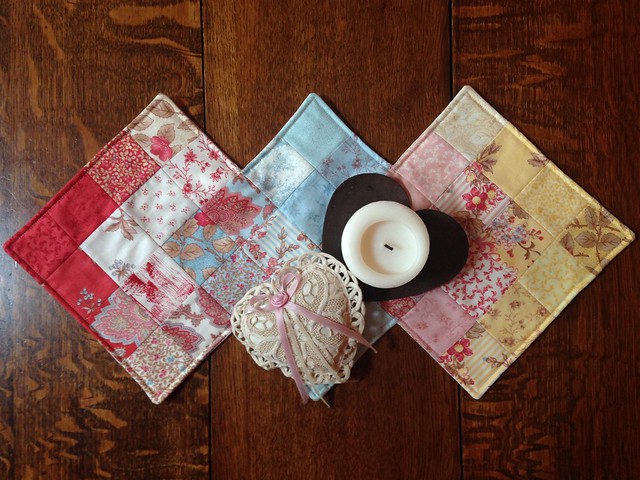
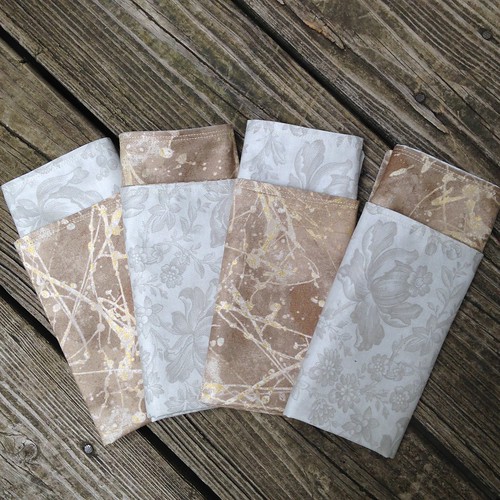
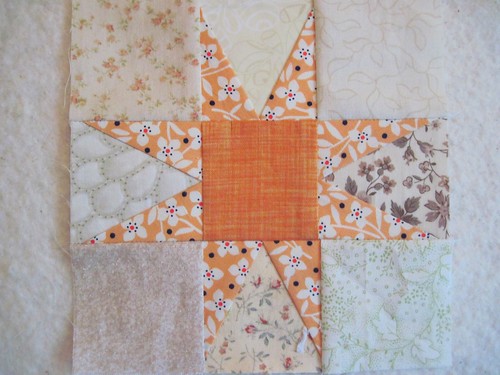
Untitled
Completed table mat

The soft, gentle colors in this mat remind me of the fragile winter sun in the early morning. Quiet, peaceful, contemplative. Let's not rush headlong into spring and miss this opportunity to enjoy this special time of year.


Saturday, September 3, 2016

Acorns of all shapes and sizes

Late summer is always a fun creative time for me. My dear friend, M, has a birthday in August and I always have the best time making things for her. She and I both share a love for autumn so this year I thought I'd use the icon of all things fall-ish, the acorn, as inspiration.

Acorns of all shapes & sizes
Acorns of all shapes and sizes :o)

It all started when I happened across the super cute acorn patchwork pillow pattern by Bridgette of The Family Hearth. This is a great pattern for using up scraps of low volume fabric! I love the bold, graphic design! I made my pillow with a simple envelope style back.

Acorn patchwork pillow
Acorn patchwork pillow - pattern by Bridgette from The Family Hearth

For the quilting I used masking tape to mark simple diagonal lines in order to stitch an "X" through each square.  It's always so fun to quilt small projects because they fit in my Janome sewing machine without any tight pushing or pulling to get the quilting done.

After the pillow was finished I did a bit of searching for some acorn accessories to go with it. On Pinterest I found the pattern for patchwork acorn potholders made with fabric on the front and a dish towel backing.

Untitled
Patchwork acorn potholders

These patchwork acorn potholders by Therm-o-Web are so easy to make, and again, scraps are the name of the game! I really like how the fabric squares end up on point in the potholders. I lined them with Insul-Bright to make them more heat resistant in addition to the dish towel backs.

Finally, I just wanted one more small item to tuck into the package and decided on the little crochet acorn. This pattern comes from Kristi of the blog Engsidrun. I was able to use scraps from some of my favorite yarn for these sweet little acorn.

Crochet acorns
Crochet acorn

I am fully aware that I probably got a bit carried away with theme gifts, but I had such fun that maybe I got away with it? Hope you enjoy the first days of fall! I know I will :o)


Monday, August 3, 2015

Setting a New Table

In my previous post I mentioned a wedding gift I had the joy to make early this summer. A dear young lady, K, whom I've know since before she was born was to get married to an equally dear young man, M, {is it okay to call a young man dear} and this happy occasion called for special gift. I knew I wanted to make a set of placemats.

+ Plus Block Place Mats +
Plus Block Place Mats

While looking through their online wedding registry I noted a decided bent for neutral colors...specifically cream, brown, and gray. This not being a typical color combination for me I inquired of the bride's mom if I should add a pop of anything else? She consulted with the bride's sisters and it was established that all neutral was the way to go.


For color inspiration I used a photo of a shower curtain they included in their registry. A friend of mine had just finished a sweet mini quilt featuring the Plus Block and I immediately thought it would be a great pattern to weave these colors together. Following my usual design path I pulled out my composition notebook and drew up a plan. Next up I pulled a large variety of fabrics from my stash and set out to begin piecing.

I love the combination of these neutral fabrics! A good reminder to step outside of my creative comfort zone more often :o)  To verify that this really was going to turn into a desirable placemat I made the first one up complete with quilting. Instead of using batting I used two layers of flannel - I wanted the placemats to have some body to them, but didn't want them to seem heavy.

Organic quilting on Plus Block placemat
Placemat front - close up

For the quilting I used a favorite method: organic straight lines closely spaced. A run through the washer and dryer really brought out the great texture. Even the placemat backs look nice! At this point I was convinced this was the plan and proceeded to make the remaining three mats.

Organic straight line quilting
Placemat back - really shows the texture!
No placemats are complete without a set of matching napkins to accompany them. While visiting my brother I happened upon a fabric store and stopped in. I found both a tan and a gray fabric that seemed like they would work nicely for the napkins. They are reversible with tan on one side and gray on the other.

Reversible napkins
Reversible napkins

All in all this was a fun sewing project to work on. I wish this new couple many, many years of happiness and God's richest blessings upon their marriage. 

Placemats & Napkins - the complete set

Wednesday, July 30, 2014

Scrap Consumption Progress & July ALYoF

Goodness is seems like forever ago that I wrote up this post about the need to use up fabric scraps and set a goal for July in the Lovely Year of Finishes group. The good news is that I've been able to do both :o) 

My July ALYoF goal was to make two rows for a Year of Rows quilt my local quilt guild is doing as a fun project this year. Each month we are drawing an idea out of a bowl and interpreting it any way we choose into a row of quilt blocks. In the end we will have 12 rows to put together into a quilt. These quilts can be any size you choose. Mine is 36" wide because that dimension allows me to use blocks of various sizes (4", 6", 9", or 12") as I make up the rows.

Local quilt guild row quilt

The first month saw the word "stars" selected as the theme so I drafted my own paper piecing pattern for these 8-point scrappy stars. The second moth saw "girls night out" for the theme. It was a bit harder to choose something to represent that theme. After thinking about it I concluded that going to my local guild meeting was the most consistent thing I do for girls night out so I choose to make a row of spools. 


IMG_2689

I really like the super pointy "arms" on this style of star. Many of these background fabrics represent the very last precious scraps of favorite fabrics. 


IMG_2688

I actually made this center spool block (text print fabric) quite a while ago with no real idea what I would use it for. I've always thought this particular print from the Mama Said Sew fabric line is so cute. 


IMG_2690

Both of these rows have been constructed mostly from my fabric scraps with very little cutting from folded stash fabric needed. 

In addition, I've been able to make more of a dent in my scraps with a recent flickr swap I joined: The Great Pillow Fight Swap. I don't participate in a lot of bees or swaps because with working full time I don't have a great deal of sewing time. However, I do feel like joining in every now and then on a small project type of swap helps to keep creativity flowing and to keep in touch with others in the online quilting community. 


What are your thoughts partner?

My secret partner requested scrappy low volume combined with bright colors. From looking through her flickr favorites I see she is drawn to rainbow brights and color wheel layouts. I combined this information with the wonderfully scrappy Christmas Snowflake block designed by Rachel Woodenspoon. She got her inspiration from Rachel of Stitched in Color's Snowflake block from the Penny Sampler class. A great tutorial for a pillow-size version of Rachel's block was put together by Katie of the Seattle Modern Quilt Guild (scroll down to find a link to downloadable instructions.)


Rainbow of 2" squares

This is the colorful collection of scraps I cut up to make the pillow top. Again, more than half of these came from scraps with the balance cut from stash fabrics. 

Great Pillow Swap Progress

So far I've managed to get two quadrants of the snowflake stitched together. I really enjoy this kind of sewing where all of the points have to match up exactly...it's kind of a personal challenge :o) It was fun to move the little 2" squares around trying to get the color balance just right in each point. I pretty much maxed out my variety of fabrics for each color of this snowflake block. 

I"m happy to have met my July ALYoF goals and am linking up with the July finishes party. Hop on over there to check out the other beautiful projects going on!

Sunday, July 6, 2014

Using Scraps - July ALYoF Goal

How do you feel about fabric scraps? Do you love them, do you hate them, or are you indifferent towards them? In this day and age of a "throw away" mentality I like to look at my fabric as every scrap being precious and they challenge me to use them up :o) Now, before we go any further, let me give you my definition of a "fabric scrap." A scrap is any piece of fabric which is so small it can no longer be folded and stored with cuts of fabric (fat quarters, half yard cuts, and larger.)


Current state of my fabric scraps
I use an over-the-door shoe organizer to sort and store scraps
Somewhere online I discovered this idea to use an over-the-door shoe organizer for keeping scraps sorted by color. I've been using this method for about a year-and-a-half now and it works great for me. I try to make it a personal goal not to accumulate too many scraps so that each individual pouch cannot contain it's color. If you look at the top row you can see the neutral fabrics pouches are getting a bit too full. Thus setting the stage for a good scrap-using project :o)

Here's the background for my scrap busting project: My local quilt guild, Winchester Modern Quilters, has recently started a fun guild activity...a Row by Row quilt. We are each making our own quilts using our own fabric, and it can be any size. Each member wrote a word or phrase on a scrap of paper (ie. stars, flowers) and we put them all into a bowl. Then, each month we pull out a word and use it as an inspiration to make a row for a quilt. It is completely up to each quilter how she wants to interpret the word. 

I am getting a bit behind on this quilt because I was away on a trip so now two inspirational words/phrases have been selected: stars, and girls night out. Therefore, my July ALYoF Goal (A Lovely Year of Finishes) is to complete my two rows for this quilt. I am going to be working from my scraps. First up is the row of stars.


Star piles

I pulled my fabrics and organized them into piles. I will be making (6) six inch 8-Point Star blocks. I could not find a tutorial/pattern for the particular star I had in mind so I used Microsoft Word Drawing toolbar to create my own paper piecing pattern.


8-Point Paper Pieced Star
8-Point Star Block - front
Back view - 8 Point Paper Pieced Star
8-Point Star Block - Back
Here's what the back looks like with the paper pieces still attached. This is really a simple star to make and the paper piecing ensures nice, perfectly formed points.

Once the star blocks are complete I have to represent "Girls night out" as a quilt row. I have a couple ideas floating around in my head, but I'd love to hear any suggestions you might offer. If you have an idea please leave it for me in the Comments :o)

I'm linking up with the July Goals Party over at Sew Bittersweet Designs & Fiber of All Sorts. My scrappy quilt rows is entry No. 78. You should pop on over there and check out some of the other great projects going on this month!