Showing posts with label quilting. Show all posts

Sunday, October 30, 2016

Time to retire the tomato

I've never been big on pin cushions. I know some quilters make them, swap them, and collect them. Nope, that's just never been me. In fact, I've had the same humble tomato pin cushion given to me by my grandmother 30+ years ago when she gave me a sewing machine. It's one of those tomatoes that had a strawberry on a string that was used to sharpen pins. Well, the strawberry is long gone, but the tomato has endured.


My tomato pin cushion 

Actually, I don't even use a pin cushion as I'm sewing. Once I start pulling pins and using them I switch to a little magnetic platform that came from a museum gift shop as part of a toy. I really like to use this while I sew because I can just drop the pins on it and don't have to be concerned with sticking them into a pin cushion. However, I don't think it's a good idea to store my pins on this platform because it's too easy for them to get brushed off accidently.

do. Good Stitches~Faith Circle~October Blocks
Handy little magnetic platform

Yesterday, my local quilt club had a sew-in day. One of the ladies who attended brought a few small items she had made to give away. She had an assortment of adorable chicken pin cushions...I couldn't resist :o)

I love the sweet fabrics :o)

Check out that crazy hair!

Complete with a sassy tail!

Can you blame me for retiring the tomato? I do believe a chicken pin cushion this cute needs a name, don't you...any ideas?


Monday, January 4, 2016

Quilt As You Go: Quilting the Blocks - My Experience and Thoughts

Quilt As You Go {QAYG} is a technique that captured my attention early in my quilting journey. While attending a 2009 quilt show in Cumberland, MD I watched a demonstration for QAYG placemats. It made total sense to me that this would be a great method to learn and develop free motion quilting skills. For some reason it took me six years to give it a try - I highly recommend you not wait that long.
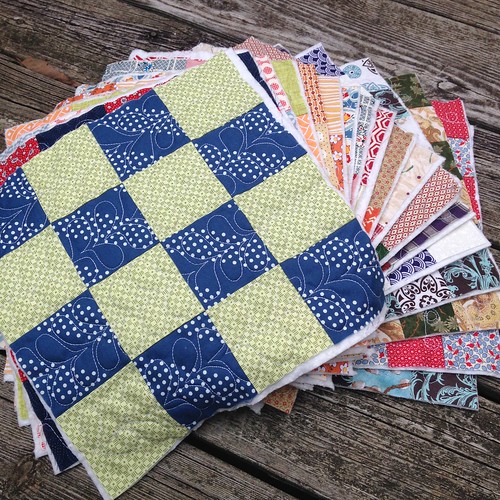
All the blocks have been quilted
This stack of blocks provided a lot of QAYG practice

Before going any farther let's define quilt as you go. Regular quilt making begins with assembling a quilt top, then making a quilt sandwich (top, batting, and backing), and finally quilting the entire top as one large piece. QAYG breaks the whole process down to the block level. A quilt block is completed, layered onto batting and then quilted - at this stage there is no backing fabric. One reason I really wanted to try this method of  quilt making is the small size of my sewing machine. Some of you may remember this picture:
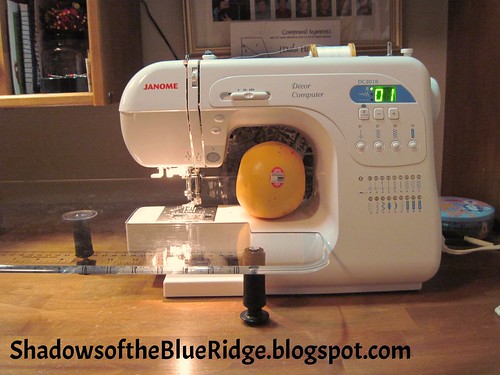
My Janome sewing machine
Yes, that is a grapefruit
As you can imagine it is pretty difficult to stuff a large quilt through the throat space on my sewing machine. If I only have to quilt one block at a time it frees up my hands and arms to focus on the flow of quilting rather than pushing, pulling, and twisting a bulky quilt through this relatively small space.

Before beginning I did some research on QAYG methods, considering both quilting the blocks, and what I was most concerned about, assembling them once they are finished. In this blog post I am going to focus on the quilting of the blocks and will save my thoughts regarding assembly for a Part 2 post. Okay, enough of the background...on to my experiences and thoughts :o)

My recent quilt finish, Great Grandmother's Patchwork Quilt, is made up of three different blocks: 9 patch, 16 patch, and 36 patch. These blocks provide a great opportunity to give QAYG a try. First I selected a different quilt design for each of these blocks.
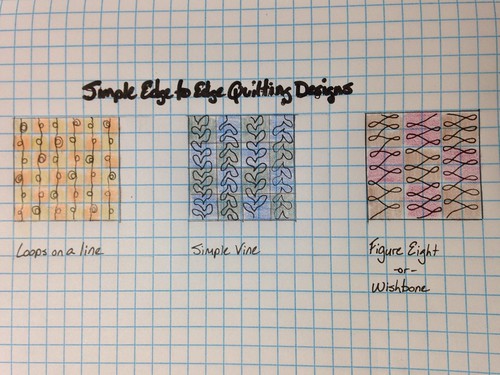
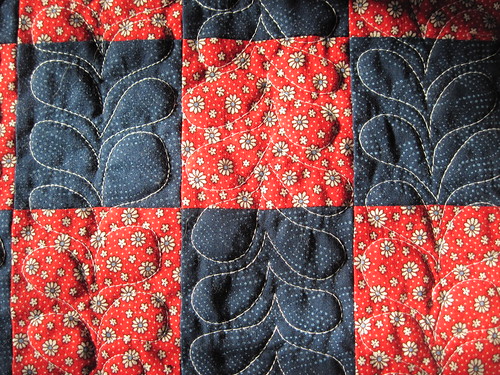
Simple edge to edge quilting
Simple edge to edge quilt designs
All three of these easy quilt designs are suggested in Christina Cameli's book, First Steps to free-motion quilting. I mentioned this book last year in another of my free-motion quilting posts. I highly recommend it (please note I purchased my own copy of this book and am not being asked to endorse it.)

For the actual quilting I grouped my blocks together and quilted all of each block at the same time, for example, I did all of the 36 patch first, then all of the 9 patch, and finally all of the 16 patch blocks. Also - and this is an important point - keeping in mind that a run through the washer and dryer improves the look of all quilting, I gave myself permission to learn how to do these designs on the actual blocks. In other words, the more blocks I quilted the better I got. The first few times I did each pattern it looks like beginner quilting.

I started with the loops on a line design because I thought this to be the easiest of the three. It actually was very easy and did not matter if I was working top to bottom or bottom to top on the block I got the same look - in other words I did not need to rotate the block when I reached the edge, I just stitched over to the next column and began again. Next, I did the figure eight/wishbone design. I loved the smooth movement of this design and it really was easy to find my rhythm with it. For this design I also I did not have to rotate my blocks but it took a bit more mental processing to switch from quiting up the block to quilting down the block. Finally, I saved the vine for last because I thought it was the most difficult of the three designs. For this one I definitely had to rotate the block with each pass and always worked bottom to top. Here's my skill progressions with the vine pattern:
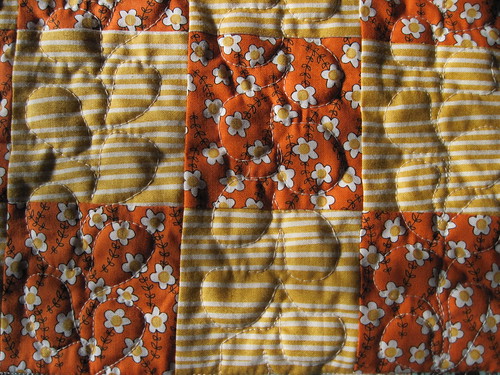
Free Motion Quilting-beginner
Vine: early attempt yields poorly formed leaves and inconsistent sizes


Free Motion Quilting - bit of practice
Vine: after a few blocks the vines are starting to look more uniform in size and shape


Free Motion Quilting-end of quilting session
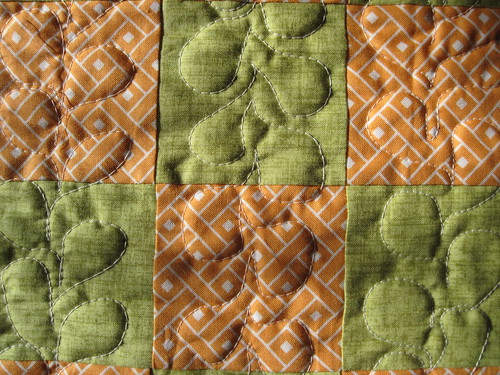
Vine: finally a block I am proud to show. Good spacing, shape, and sizing :o)

I did notice that since I was only quilting a top and batting (remember, there is no backing fabric on the blocks at this stage) there is more drag when moving the blocks around. I did use my Supreme Slider and it was a big help. However, even without a Supreme Slider this would not be too difficult given the small size of my blocks.

Overall QAYG was a great experience! It was so fun to quilt small blocks and to try different free-motion quilting patterns without having to wrestle with a large quilt. It was also exciting that it really did not take long at all to see improvement in my quilting - a big motivator!

I'll write up another post soon giving my thoughts and experience with assembling the quilted blocks and adding a backing, so stay tuned! In the meanwhile run, don't walk, to your sewing machine and give quilt as you go a try on some of your quilt blocks - you'll have fun! I promise :o)

Thursday, February 26, 2015

The Gauntlet Has Been Thrown Down

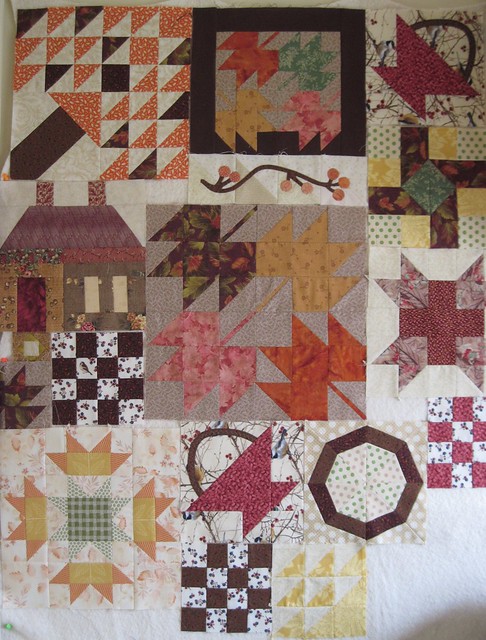
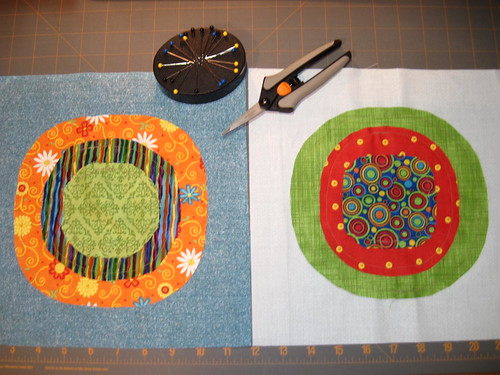
About a month ago I posted this picture on Instagram of blocks hanging on my design wall. These blocks belong to a quilt project named The Random Sampler. It was a quilt-along begun by my friend Anita from Bloomin' Workshop. Several of us started these blocks back in 2012 and to my knowledge only Lotje ended up with a finished quilt.


Random Sampler~Progress Shot
Random Sampler quilt blocks

Anita suggested we all pull our blocks back out in March and cheer each other on to a finish - effectively throwing out the challenge to the rest of us slackers :o) Now I have to admit, I love working on blocks for this quilt because I can toss in anything and everything I feel like making. And, this is a quilt I am making for myself so there is no right or wrong. Funny - We don't have any quilts I've made, except for a few small wall hangings, so this will be the first large-ish quilt I'd finish for our home. There are two other unfinished quilts that are also supposed to be for us. Seems the only quilts I manage to finish are those intended for others.

As much as I'd love to dive in and work on my Random Sampler I've got two projects I should finish first. I've been so good at working my way through the To Do list I wrote up some time last summer and I'm down to just the two quilts. Here they are:

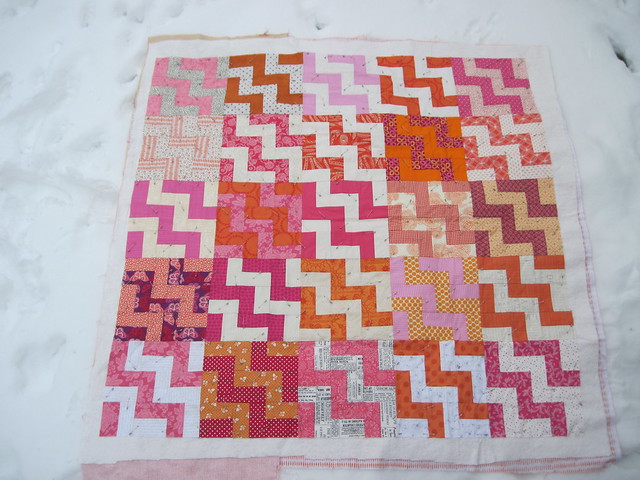
Social Climber is another Faith Circle quilt destined to be sent to Restore Innocence. This quilt is pin basted and ready for quilting. As of yet I have not decided how to quilt it...any suggestions are most welcome! Feel free to leave them in the comments. 


Faith Circle Social Climber - pin basted
Social Climber ~ A Faith Circle Quilt

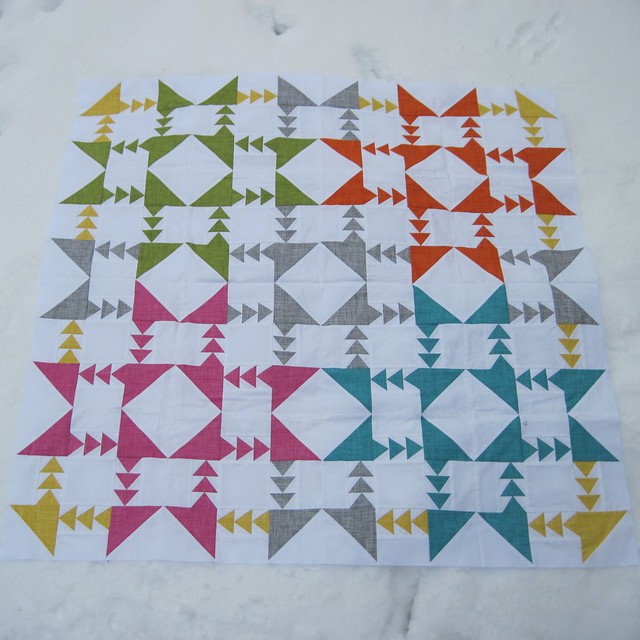
Then, I'm on a tight schedule to finish up my Mixed Flock quilt for a local show coming up in mid-April. I don't think I've introduced the Mixed Flock top on the blog...this is my original design using the Dashing Geese block I created for QuiltMakers 100 Blocks magazine, Volume 9. However, Mixed Flock puts a completely different spin on the block by mixing up the color placement. 


Mixed Flock - progress shot

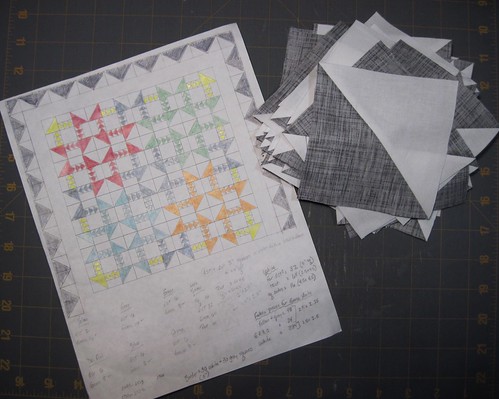
I'm hoping you can see four large, bright "interpretive" stars, and one gray star, too. In a way I think Mixed Flock has a bit of a Southwestern look to it. I'm in the process of piecing the outer borders to finish the quilt top. Here's a sketch to show where I'm heading with the final design:


Mixed Flock - the plan

So, the question is, "Will I be picking up the Random Sampler gauntlet?" Many times what I should do, and what I end up doing, are two different things...we'll see how the month of March plays out :o) 

What would you do?

Tuesday, December 30, 2014

Easy Free Motion Quilting?? Yes!!

Over the past year I've really felt a strong pull to grow my skills at quilting the quilts I make. I want to know that when I make a quilt I've not only made the quilt top, but quilted it, too, and can be proud of both.

It helps to take some time to learn about your sewing machine. In the five years I've had my machine I've learned a lot through trial and error. For instance: most of the free-motion quilting references say to lower your feed dogs. I never could get the tension to come out right on my machine when I did this. While researching tension problems I came across this post about feed dogs by Leah Day of the Free Motion Quilting Project, and it completely changed my experience with tension. On my Janome it is essential to leave the feed dogs up. If I put them down the tension is just a mess. I just have to set the stitch length to zero and all is well. I've also learned to get comfortable with the small harp space (it's about 6" wide and 5" tall) on my sewing machine, a Janome DC3018. This picture illustrates it pretty well, I think :o) Yes that is a grapefruit!


My Janome sewing machine
Janome DC3018
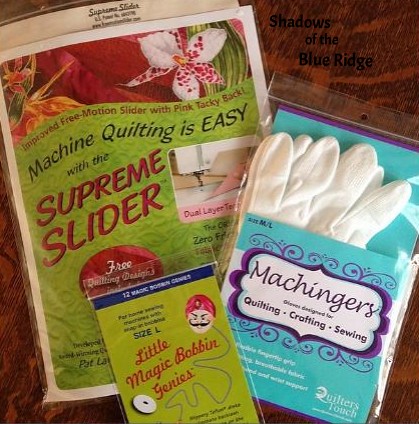
Back in March I ordered some supplies to seriously begin quilting practice. After reading recommendations from others I bought a Supreme Slider, a pair of Machingers gloves, and some Little Magic Bobbin Genies. They didn't see immediate action, but one by one I've started using them. 


Free Motion Quilting Supplies
Free-motion quilting supplies
I'm not certain my Janome likes the Little Magic Bobbin Genies. The bobbin holder is not very deep and it does raise the height of the bobbin...but I've continued using one anyway. I can say I like the Machingers gloves so much better than any other gloves I've tried-they are definitely worth investing in! They have a nice amount of grip to them, but are not heavy and hot. More recently I've been using the Supreme Slider - I like it a lot, too!

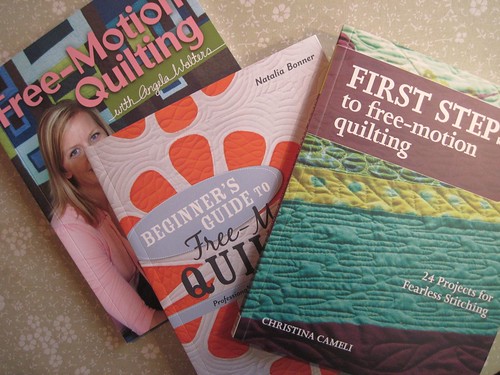
In addition, I used a few 40% off coupons at Joann Fabric to purchase several free-motion quilting books. 


Free-motion quilting books

If you are like me, and are truly starting from square zero I found it helpful to read through more than one book. Each author is so encouraging and shares many helpful suggestions. Each of these books divide quilting designs into categories and show how to build on previously taught skills. I also took their suggestion to use paper and pencil and draw out the design I wanted to use so my muscles would get used to the flow of creating it. 

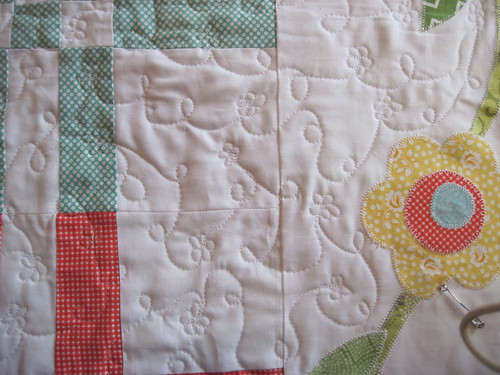
In the past I always thought that doing a stipple/meander design was where one should start when learning to free-motion quilt. I tried this on a few quilts with okay results, but just was not comfortable. Many times I would find myself backed into a corner - surrounded on all sides where I had already quilted and no way to get out. In Natalia Bonner's book, Beginner's Guide to Free-Motion Quilting, I selected a design called Loops and Poppies. It is similar to the stipple design, but just as the name implies it includes loops and flowers. 


Loops and Poppies all-over quilting
Loops and Poppies design by Natalia Bonner
This pattern has really freed me to enjoy quilting! As I'm stitching along I no longer have to worry about my quilting being surrounded on all sides. If I get into a "road block" I simply stitch a poppy and come right back out on the same side of the flower where I stitched in. Wow!! As you can see from the picture above, my little poppy flowers are not perfect, but they look cute, anyway :o) Fun. Fun. Fun.

I'm stitching this on a pretty large scale and I find I'm not so good at using my hands to frame the area I'm stitching...as a matter of fact, my "technique" definitely needs some work. I'd like to practice on some smaller items like pillows or wall hangings where the scale of the quilting can be a lot tighter. I think doing this will allow me to improve my hand/arm position while quilting. I'm actually looking forward to it!

I hope this has encouraged you if, like me, you have felt overwhelmed by learning to free-motion quilt. Sequential building of skills (and a few of the right tools) make a big difference! I'd love to hear any tips you have to share with me...we can continue to learn this together! Happy quilting :o)