Sunday, December 31, 2017

Year of the Quiet Craft Room

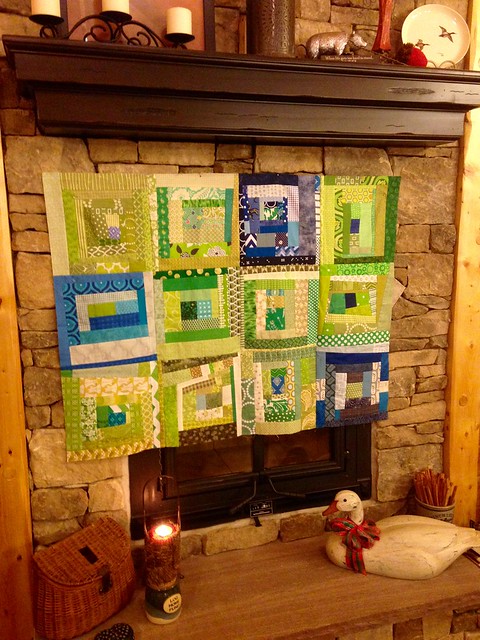
Reflection is something I do more in my head than on paper (or in this case on a screen), and yet I always enjoy going back and reading them, so here goes:  2017 has been a year like no other for my family as it seems the whole of it was consumed with moving. I wonder to myself how people can move all the time and make it look so easy. For us it has been an all consuming occurrence. As such, it was an unusually uncrafty year for me as I completed just five projects the whole year:

The Mostly Harmless crochet shawl by Kaylie Dawn on Ravelry is my most recent finish. I made this from three skeins of Lion Brand Amazing yarn in the Wild Flowers colorway. I have to say I am a self-confessed variegated yarn addict 😀 If I was forced to choose just one crafty outlet it would have to be crochet - it's my native crafting language.

Mostly Harmless Crochet Shawl
Mostly Harmless crochet shawl


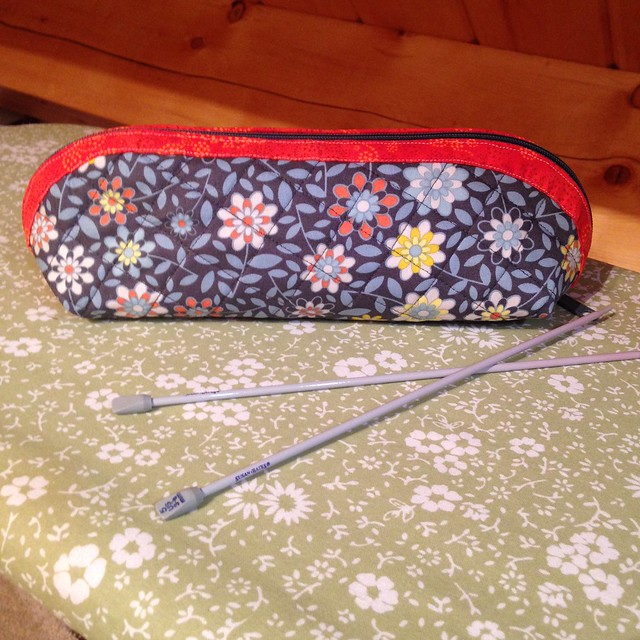
Next up is the Simple Little Pouch designed by Anita of Bloomin' Workshop. Anita posted this tutorial last year and I knew right away I wanted to make one. The opportunity presented itself when I was putting together a Christmas gift for my future daughter-in-law. She likes to knit and I just knew this fun pouch would be perfect to corral knitting needles.

Simple Little Pouch by Bloomin' Workshop
Simple Little Pouch

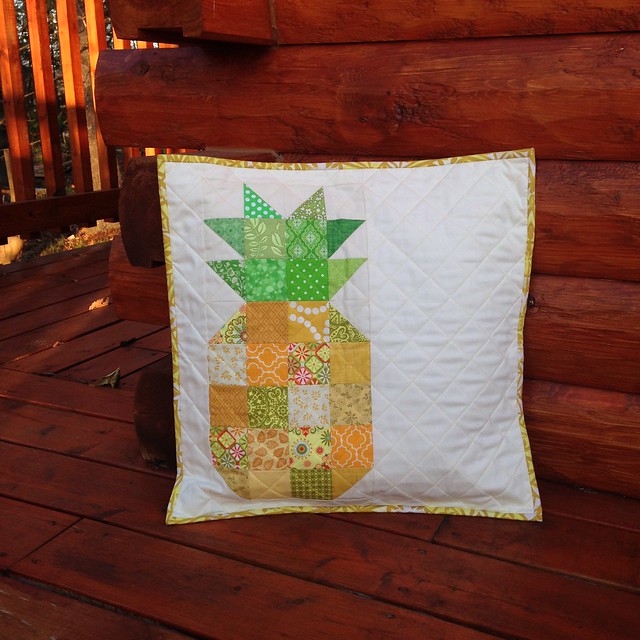
Over the summer, to take a break from unpacking, I was able to stitch up a fun little Patchwork Pineapple pillow to gift as a birthday present for my bestie, M. I always enjoy making things for her because she is just about one of the sweetest, most giving people I know. M is blessed with the gift of hospitality so a pineapple is just perfect for her. This tutorial comes from Sassafras Lane Designs. I enjoy little projects like this because they let me indulge in my love of scraps :o) I did my favorite grid quilting on this using painters tape as my guide.

Patchwork Pineapple Pillow for a friend
Patchwork Pineapple pillow

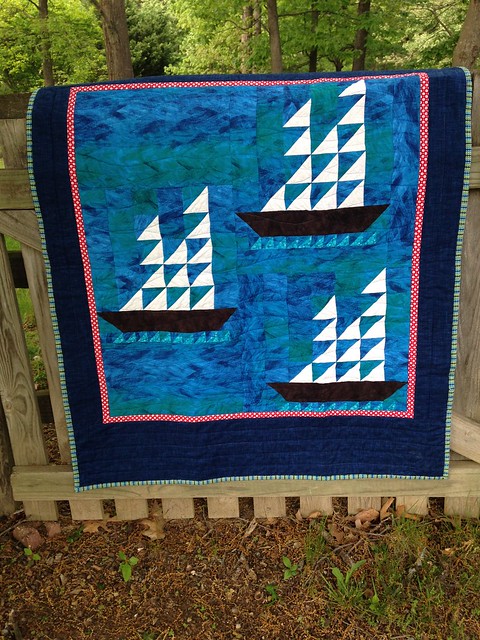
Early in the spring I made this sweet tall ships baby quilt for my great nephew. The inspiration for this quilt came from a picture of a quilt called The Fleet Is In from an old quilt book. The image of the tall ship with waves underneath served as inspiration, but I used my usual half-square triangle technique instead of the construction method featured in the book. I just love how this turned out with the watery fabric in the background.

Untitled
Tall Ships baby quilt

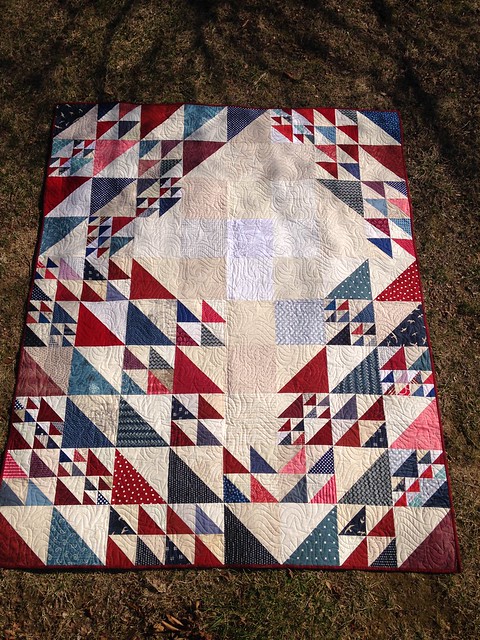
The first finish of the year does not belong to just me, but instead to the Faith Circle of do. Good Stitches. I was the assigned pattern selector/quilter for this beautiful Quilt of Valor that was gifted in March to a deserving veteran of our armed forces. You can read all about this quilt here.

Quilt of Valor - October 2016 Faith Circle Quilt
Quilt of Valor

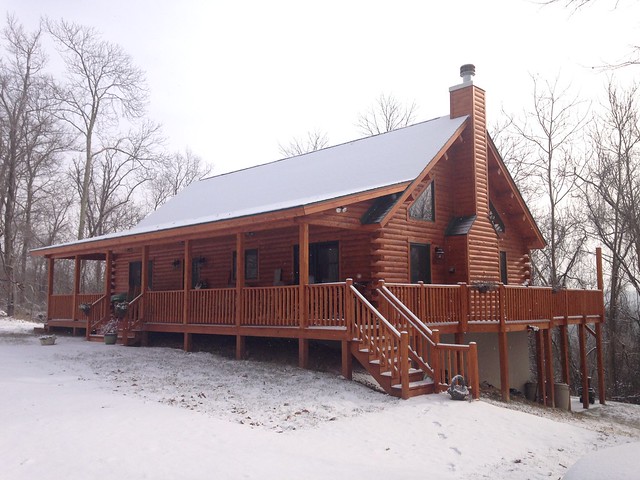
Perhaps my greatest finish of the year was getting our family settled in our new home. We are absolutely loving it! Sometimes it still seems surreal that we are actually moved in after so many years of dreaming, saving, planning, and building.

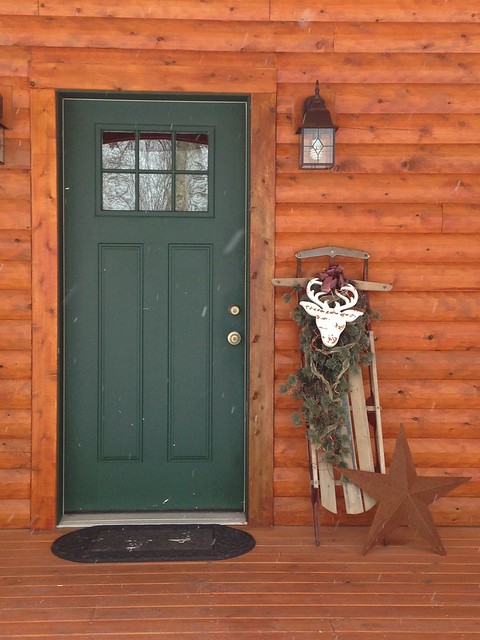
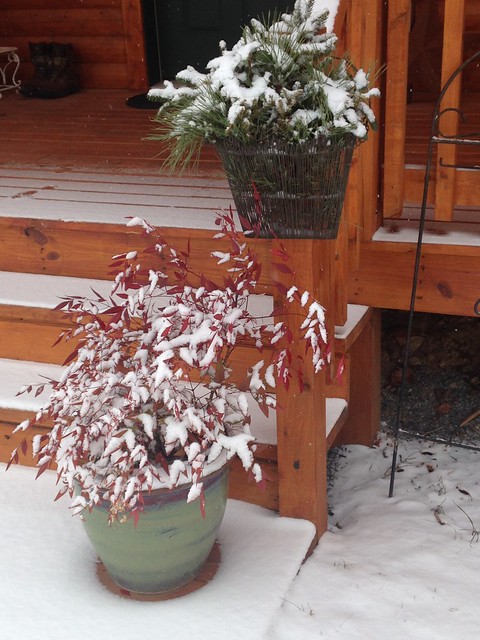
Our snowy home on the mountain
Cabin on the mountain

Welcome
Welcome in from the snow

Christmas Greetings
A snowy Christmas greeting

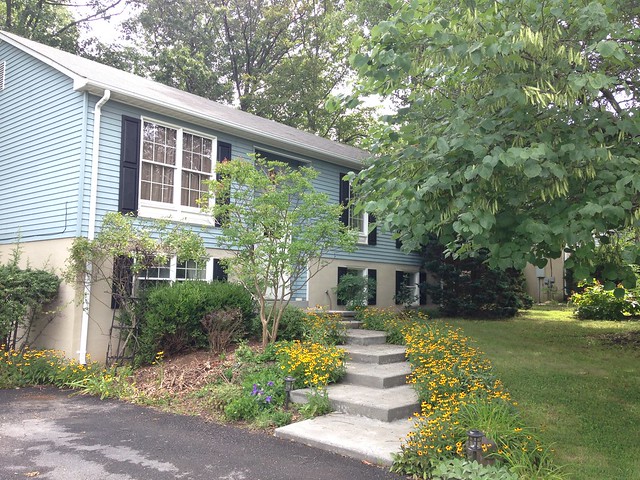
The home we left was this sweet little split-foyer. This was our home for the last 29+ years of our lives and it was the location of many milestones for our family. Little house - you served us well.

Untitled
Farewell to our little home


Won't it be fun to see where 2018 takes us? We won't have to wait long to find out! Happy New Year friends!

Tuesday, November 14, 2017

Quiltmaker's 100 Blocks Vol. 16 Road Rally Tour

Welcome friends! You have arrived in an area known as the Ridge and Valley Region of the East Coast just west of the Blue Ridge Mountains. I feel like I already know so many of you as you've stopped by to visit Shadows of the Blue Ridge during previous 100 Block's Tours and Rallies. It's a joy to welcome new visitors, as well! I'm so glad you are here.

November in the mountains makes me happy...because it's a beautiful time of year with the changing of the leaves...because yummy pumpkin flavors can be found everywhere...because Thanksgiving arrives with all it's fabulous decadence. Well, yes, but it also brings with it the fall issue of Quiltmaker's 100 Blocks, and this year Vol. 16 really takes the pie...I mean cake! 😆

I'm happy to introduce my newest block, Puzzled Geese. As you can see it has plenty of geese in it :o) Puzzled Geese is a compilation of elements from a couple of antique blocks: Dutchman's Puzzle, and Wild Goose Chase. Mashing them together lead to my design. Construction tip: when I have this many flying geese to make I usually use the Fast Flying Geese method shown on the Techniques pages in each issue of Quiltmaker's 100 Blocks.

Puzzled Geese quilt block

When I design blocks my method is to put myself into the shoes of quilters who lived maybe 100-200 years before me. I try to imagine them pulling out their precious scraps and combining them to invent layouts that document special events in their lives. My block, Puzzled Geese, is a tribute to my sweet mom. One of the things I fondly remember about my mom is that every fall, when the Canadian Geese were migrating, she would happily go outside to watch the V-formation fly overhead. We would listen to the encouraging honks and watch the geese fly through the gray November skies until they were out of sight. Puzzled Geese documents this cherished memory.

Puzzled Geese top assembled with sashing and cornerstones

To create my quilt top mock-up I inserted a picture of my block into Google Drawings and then used copy/paste to create the look of a completed top. It's a pretty easy way to get an idea of what a quilt will look like if you don't have access to design software. As I was moving the pictures around I decided that Puzzled Geese would look great with sashing and cornerstones. To accomplish this I simply used the drawing shapes to add the large black square, and the smaller gray cornerstones. Using the "order" command allows them to be layered over and under my pictures.

Another option is to make a table topper by using just four blocks. If the color placement is changed up it creates a friendship star in the center.

Puzzled Geese table topper

Giveaways:
Now it's time for a couple of giveaways! The editors of Quiltmaker's are generously giving one of my blog readers a free issue of 100 Blocks, Volume 16. Don't you love how they've varied the sizes of the block images on the cover? It reminds me of a modern sampler quilt.

Quiltmaker's 100 Blocks, Vol. 16

In addition to the magazine drawing, I'm going to give away this little fall-inspired scrap bundle. It's made up from scraps pulled from my stash (various sizes).

Scrap bundle

For a chance to win either the magazine, or the scrap bundle, leave a comment telling me about something that provided the inspiration for a quilt (or some other project) that you've made. I'll draw two random winners on Sunday morning, Nov. 18. Note: If you suspect you may be a "no reply" blogger please make sure to include your email address in your comment.

Well friends, thanks so much for stopping by and letting me tell you all about Puzzled Geese.  I'd love to see you back here again. If you'd like regular updates from Shadows of the Blue Ridge consider signing up for an email subscription (top right of your screen), or you can follow me on Bloglovin'. You can also find me on Instagram

I hope you soak in a lot of inspiration as you motor on through the blogs on the Road Rally tour. You can read about the tour and find links to the featured blogs on Quiltmaker's blog, Quilty Pleasures

PS. Honk if you like Puzzled Geese 😁

Friday, November 10, 2017

Fruits of a Productive Day

This past weekend my local quilt group met for a sew-in day. Wow! It's it's not often I have such a productive day. I knew this would be a great opportunity to join together blocks for the Faith Circle (do. Good Stitches) quilts I sponsored this year. I had set the blocks aside during our moving/unpacking journey, but now is the time to get these three quilt tops finished.

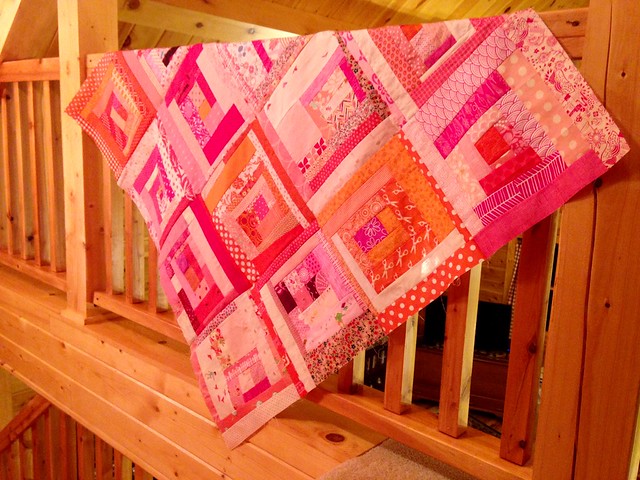
First I assembled tops from improve log cabin blocks. I asked the ladies to contribute blue/green blocks for a boy quilt and pink/orange blocks for a girl quilt. They did such a great job making the blocks fun and bright.

Untitled
Improve log cabin blocks for boy quilt

I had enough blocks to make a 36" x 48" top for a boy quilt. I may add borders to the sides of this one to make it just a bit wider.

Untitled
Pink/orange improve log cabin blocks for girl quilt

There were more of the pink/orange blocks, so this top measures out at 48" square. This will be a nice size for a young girl.

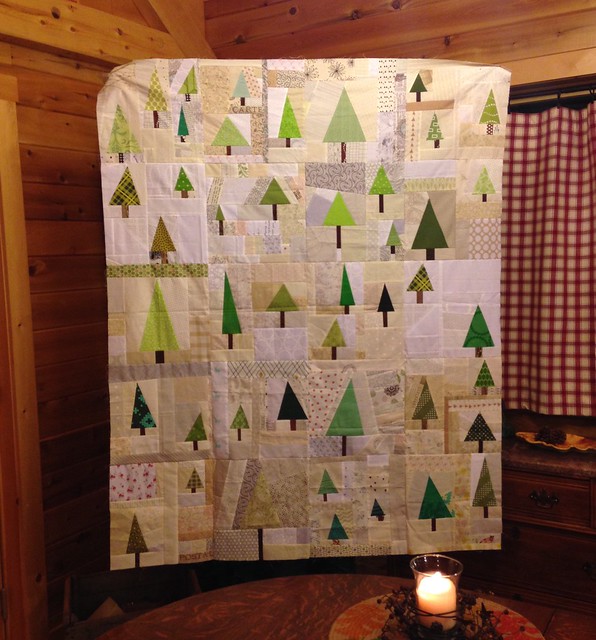
Finally, I joined the Scrappy Pine Forest blocks. I have to admit this is probably one of my favorite quilt tops. It turned out exactly as I was hoping, cozy and peaceful :o)

Untitled
Scrappy Pine Forest quilt top

How fun to have a quilt holder to help with this picture! My son and future daughter-in-law just happened to arrive while I was taking pictures and she asked if I needed some help. How wonderful she is ;o)

These three tops will be quilted up and then set aside to go to a Royal Family Kids Camp this coming summer. These camps are for children in the foster care system who often have little to no things of their very own. My local quilt group has committed to donating 40 quilts to be distributed to the children. I think it's a blessing that both my online quilt group (Faith Circle) and my local quilt group (Winchester Modern Quilters) are combined into this effort.

Now to keep the momentum going and get them sandwiched and quilted. Wish me luck!

As a side note: I'm trying to identify good photo locations in our new home. Log homes are interesting because all of the wood makes the lighting have golden undertones. These are my first efforts at photographing quilts indoors. I'll keep working with lighting and camera settings to see how to best take indoor pictures.

Wishing you a happy, warm, and productive weekend!

Saturday, September 2, 2017

Scrappy Pine Forest Block - Tutorial

As part of the Faith Circle of do. Good Stitches I choose the design for our quilt two times each year. Most of the time I lean toward a scrappy type of block because scrap quilts just speak to my heart. This month is no different. I have asked the Faith Circle ladies to each make (2) Scrappy Pine Forest blocks.

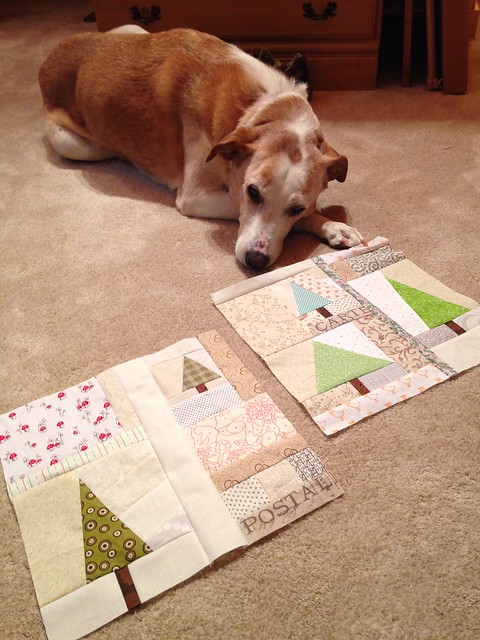
Shiloh in the pine forest :o)
My girl, Shiloh, looking over the Pine Forest blocks.

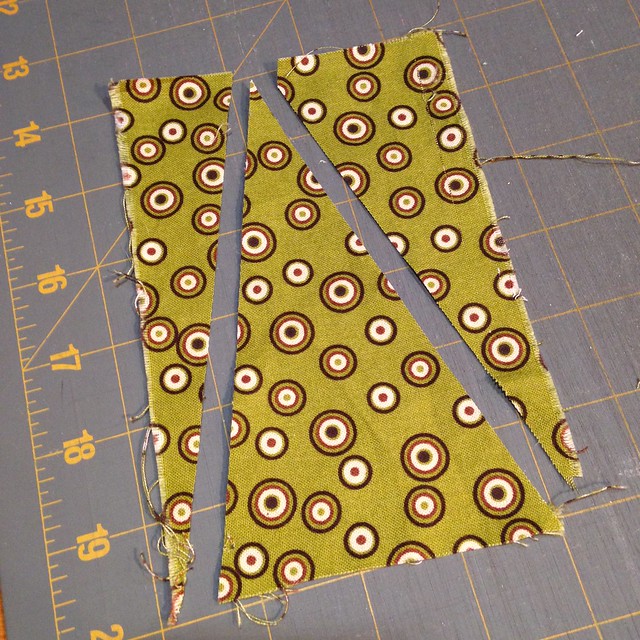
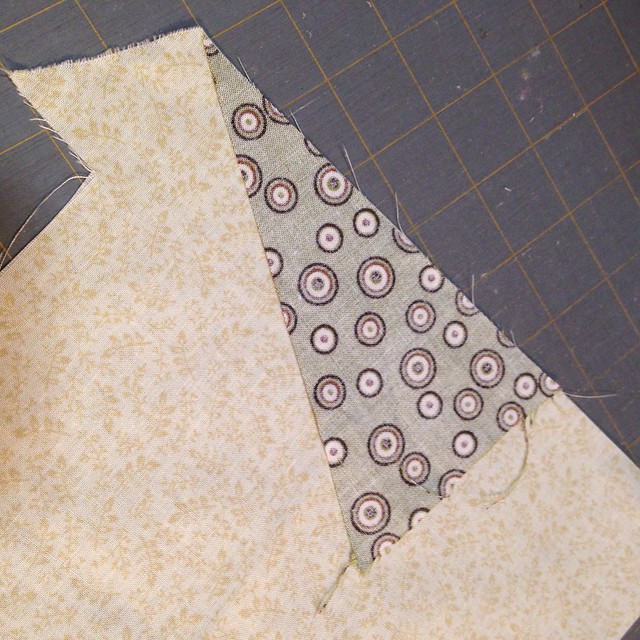
Here is a quick tutorial for how to make the pine tree part of the blocks. Start by pulling a scrap of green to blue/green fabric and cut it into a triangle.


Untitled
Cut fabric scrap into a triangle

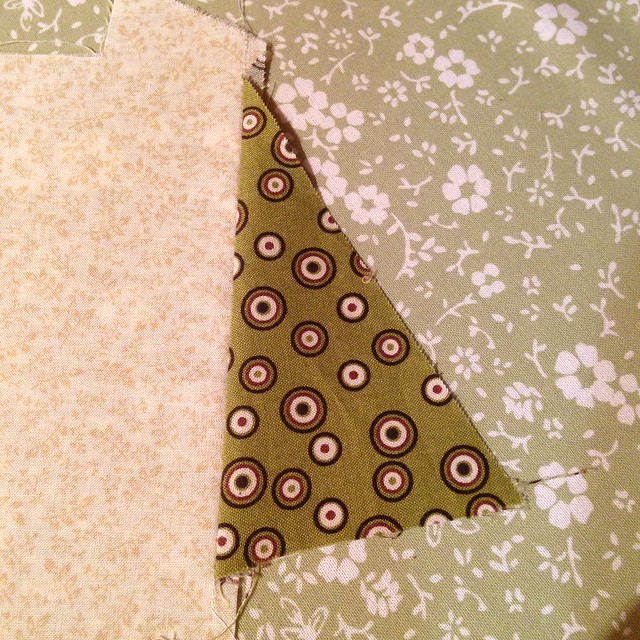
Sew the tree fabric onto a piece of background fabric.


Untitled
Tree fabric sewn onto a piece of background fabric

Flip the fabric over and press the seam toward the tree to make it stand out a bit.


Untitled


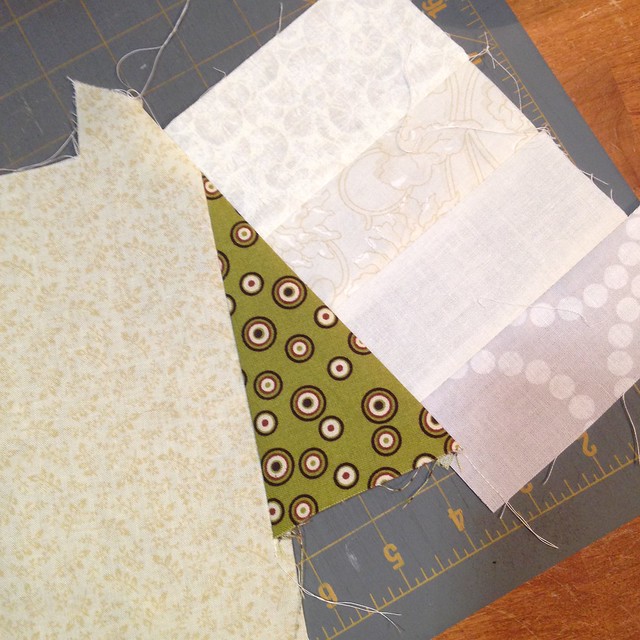
Sew fabric to the opposite side of the tree. When pressing turn the seam allowance toward the tree.


Untitled
Sew fabric to the opposite side of the tree

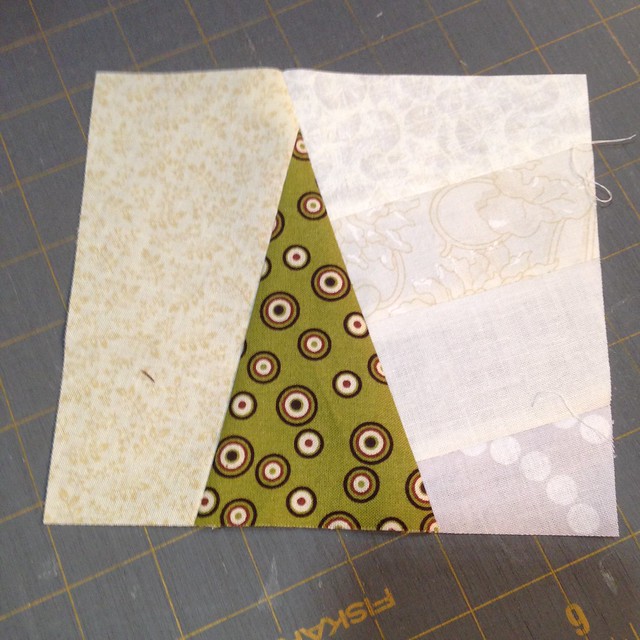
Trim up the side fabrics so the unit has a rectangular shape.

Untitled
Trim into a rectangle

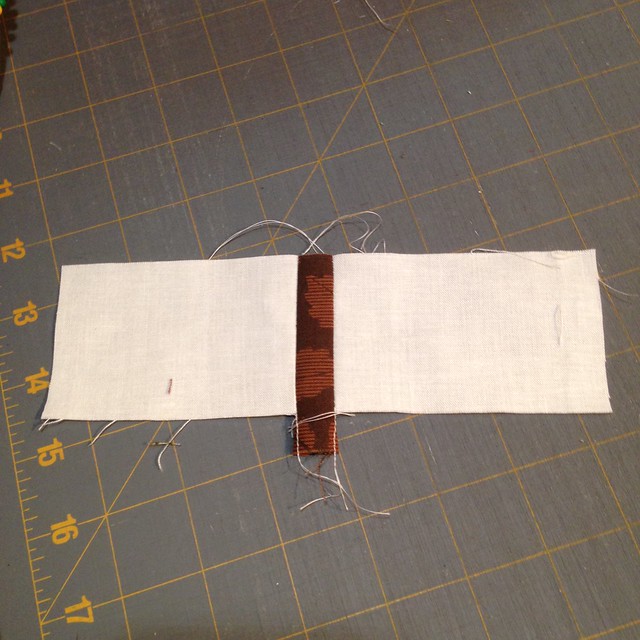
Make a tree trunk. I cut the brown fabric 1" wide.


Untitled
Trunk unit - brown fabric was cut to 1" wide before sewing

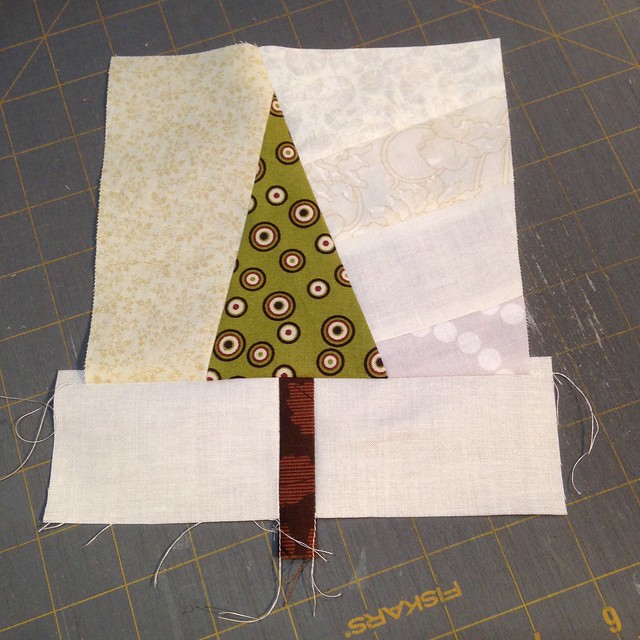
Finally - sew the trunk unit onto the tree unit and trim to a rectangular shape.


Untitled


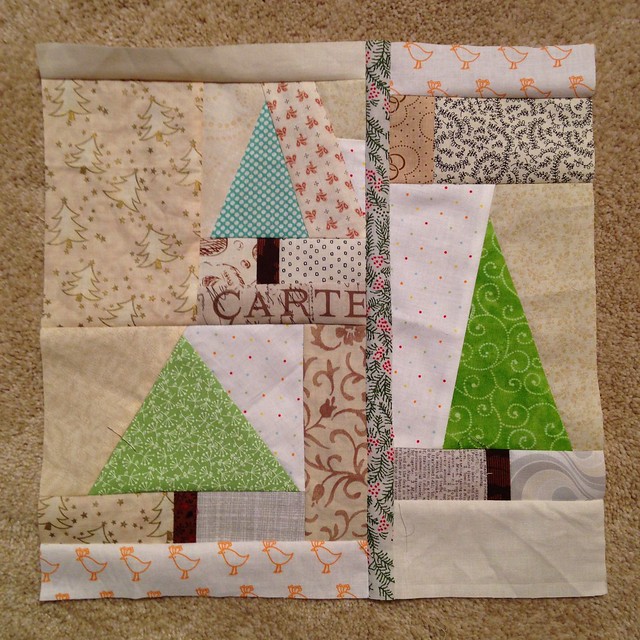
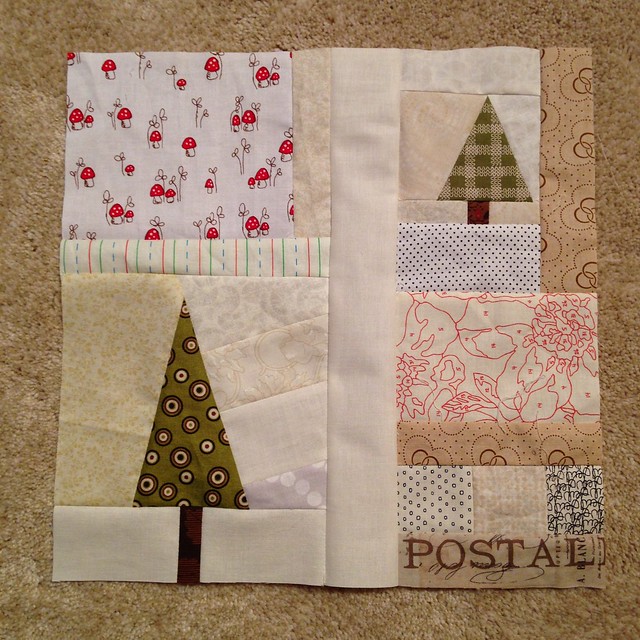
Use low volume fabrics (prints and solids) to finish making the blocks into a 12.5" square. Blocks can be made with as few as one tree, or as many as you'd like to include. Here are two samples I made up.


Scrappy Pine Forest

Scrappy Pine Forest


Hope you enjoy making Scrappy Pine Forest Blocks!


Monday, May 8, 2017

Blog Hop Wrap-up and Winners

Wow! As always Quiltmaker's blog hop was so much fun! I hope you enjoyed seeing all of the beautiful new blocks. If you end up making Boxed Star please tag me on Instagram, or flickr so I'll be sure to see it!

Boxed Star, Block No. 1477, Quiltmaker's 100 Blocks, Vol. 15

What an honor it is to participate in the blog hop. It's always so great to get to hear from so many readers and interact with you. I especially enjoyed reading all about your "silly" fears. Although, I'll be the first to admit that "silly" in no way means they aren't to be taken seriously, rather it means not something you'd immediately identify as causing someone anxiety. If you read through all the comments you discovered that many of us share the same fears. I found that to be both interesting, and comforting. We have much more in common with each other than meets the eye.

I promised to draw names for two winners using Random.org and I've already heard back from them both:

  • Winner of an issue of Quiltmaker's 100 Block, Vol. 15 (to be sent directly from the magazine editors) is Commentor No. 55, Beth! Congratulations!
  • Winner of a mini fat quarter bundle and Vol. 15 of Quiltmaker's 100 Blocks (to be sent by me) is Commentor No. 13, Quilting Tangent! Congratulations!

Both prizes should already be on the way. Thanks again for stopping by Shadows of the Blue Ridge, and I hope to see you again next time!

Happy quilting!
~Debbie

Thursday, May 4, 2017

Quiltmaker's 100 Blocks Vol. 15 Blog Tour


Welcome quilters! Thank you for stopping by Shadows of the Blue Ridge as you travel Quiltmaker's Road Rally! I hope you're having a great time this week visiting all the stops and soaking in the quilty goodness.

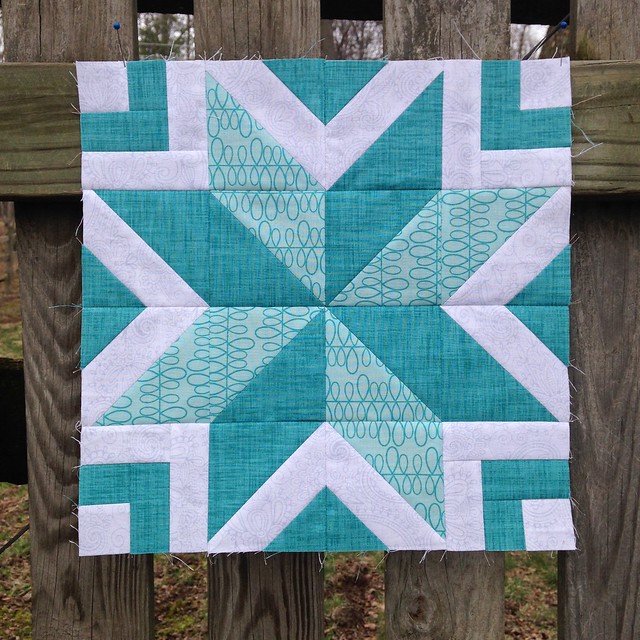
Today I get to share with you my newest block, Boxed Star. Boxed Star came about as I was experimenting with creating secondary design using the background space on a quilt block. The first few blocks I designed had plain backgrounds, but I've enjoyed learning how to add secondary patterns to my newest blocks. Here is what Boxed Star looks like as a single block:

Untitled
Boxed Star

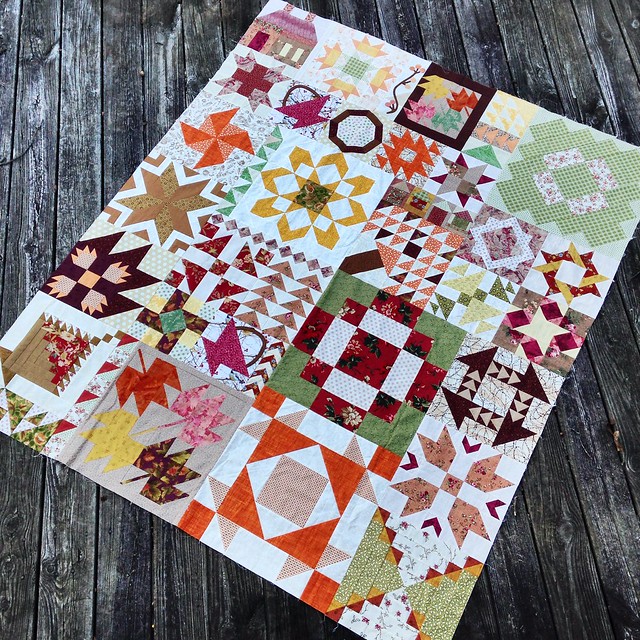
Not bad, and it can certainly be used as a stand alone block as it is here it is in my Random Sampler quilt (center of left edge-made using caramel and tan fabrics)

Random Sampler - completed quilt top
This is a sampler quilt top that I've recently finished


However, the magic really happens when Boxed Star is used across a quilt top either with or without sashing added. I created these two mock-ups by copying a picture of my block into Google Drawing and then copy/pasting it several times.

Boxed Star quilt top without sashing

When the Boxed Star block is used without sashing the background elements become the focus and the stars becomes the secondary design element. It's always so interesting to see this happen in a quilt. When sashing is used between the blocks (see picture below) the star remains as the focal point and the various boxes are the secondary design element.

Boxed Star quilt top with sashing

Boxed Star is my sixth block to appear in Quiltmaker's 100 Blocks. When I first thought to design a block I was a bit afraid to actually submit something. After all I'm not someone schooled in design. However, once I pulled out my colored pencils and graph paper and just started sketching ideas I had fun with it - and surprised myself! We all have things we're afraid of, or that make us nervous. Of course, the silliest fear I have is parking in a parking garage. Can you believe it?!? I'm so afraid I'll get my car parked in there and not be able to get back out again. I mean, what if it's an unmanned garage that only takes cash and I don't have correct change? Do you see where I'm going with this? I could be stuck in there with no way to get out! It makes my hands sweat just thinking about it...but, I digress.

Fat quarter giveaway!

Giveaways:
I think it's time for a couple of giveaways! I'm holding a drawing for a copy of 100 Blocks, Volume 15 plus this little spring-time inspired fat quarter bundle (shown above).

In addition, the editors of Quiltmaker's are generously giving one of my blog readers a free issue of 100 Blocks, Volume 15.

For a chance to win just leave a comment telling me about your silliest fear :o) I'll draw random winners on Sunday morning, May 7. Note: If you suspect you may be a "no reply" blogger please make sure to include your email address in your comment.

Well friends, thanks so much for stopping by and letting me tell you all about Boxed Star.  I'd love to see you back here again. If you'd like regular updates from Shadows of the Blue Ridge consider signing up for an email subscription (top right of your screen), or you can follow me on Bloglovin'. You can also find me on Instagram

I hope you soak in a lot of inspiration as you visit all the blogs on the tour. You can read about the tour and find links to the featured blogs on Quiltmaker's blog, Quilty Pleasures

Monday, April 17, 2017

Bear Garden Cabin - almost ready

It's been awhile since I've shared an update on our log home. I'm thrilled to report that it is almost ready for us to move! It's been such a journey to build this home. I'm writing this post as a bit of a journal to record details for myself, so you may want to skim if you just want to see the pictures :o)
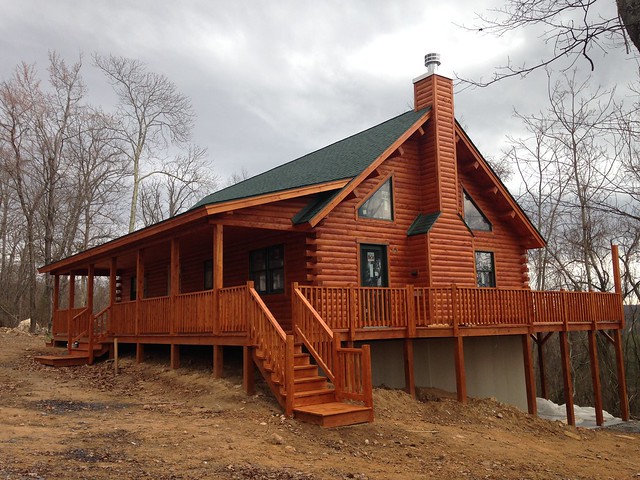
Bear Garden Cabin
Almost all the work on the exterior is now finished
This picture was taken a month ago - since then the gravel driveway has been put down and grass seed/straw cover the bare soil. The exterior of our cabin is stained with Perma-Chink in the Lifeline Ultra 7 Cedar color. I've read that this "reddish" color is traditional for the region we live in. We actually chose it because darker stain is supposed to provide more UV protection for the logs than lighter stain. We didn't want to go with a dark brown, so we selected Cedar since it is midway between the color choices. I love how rich it looks with the green trim.
Untitled
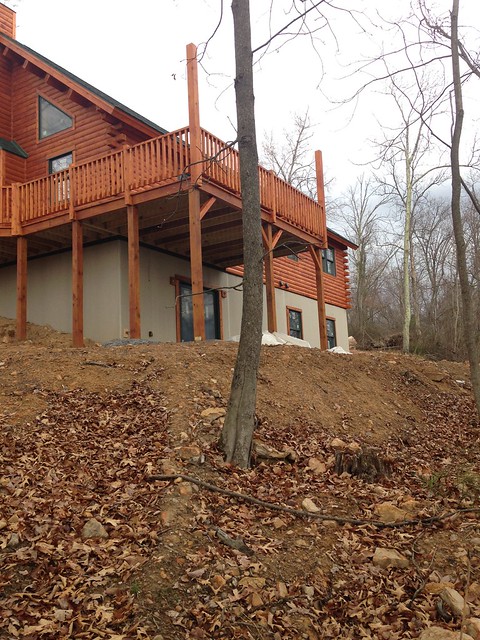
Steep drop-off behind the house

Behind the house our builder had to move a lot of soil so that there is a bit of space before it starts to drop off down the mountain. We will need to either plant ground cover, or put in some type of retaining wall to prevent the soil from eroding away. The tall corner posts up on the deck were my request. We have something similar at our current house so I can hang baskets of flowers. Currently, I also use them to hang bird feeders, however we don't want to attract bear onto our deck, so I won't hang bird seed on this deck.
Untitled
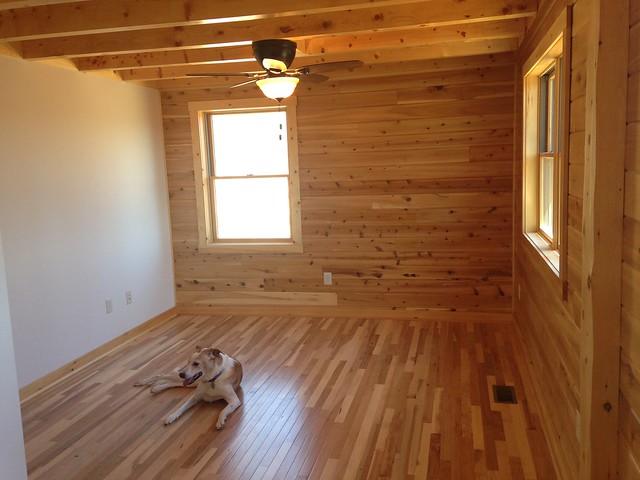
Completed master bedroom

The master bedroom is the only 100% complete room so far. The exterior walls and ceiling are northern white cedar. They are finished with a clear topcoat. It's amazing how much the clear sealer brought out the wood grain and knots. I'm also surprised at how much darker they are every time we go up to see the house. I guess the wood is seasoning. The entire main level (except master bath) has 2-1/4" hickory hardwood on the floor. We chose hickory for a few reasons: it's a very hard wood so that will aid in scratch resistance, the color variations will blend together the various woods used in the house, and the color variations combined with the narrow width will also help mask the inevitable scratches that will come with living in our home. I like the almost-tapestry appearance of it. I think our dog, Shiloh, approves.

I'm so glad we decided to use a little bit of drywall in the bedrooms and bathrooms. My first inclination was to go all wood on the walls, but my husband thought we might want the option to be able to add a bit of color. Now that I see this room finished I'm glad it's not wood all around - I think that might have been a bit much.
Untitled
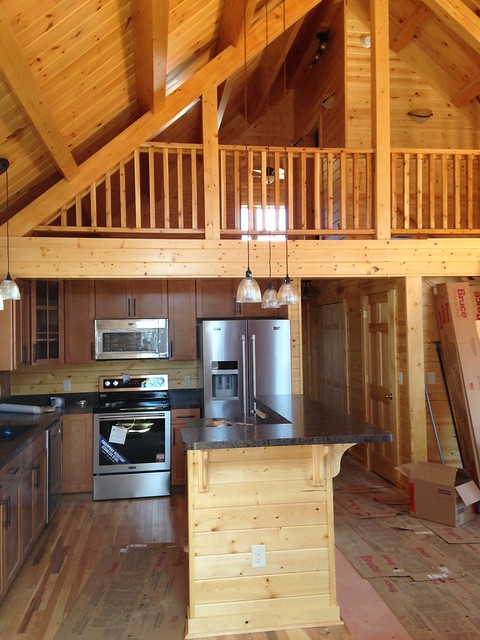
Kitchen with loft above

I've been most nervous about the kitchen. Since the house has a great room the kitchen is fully in view. It was so hard to pick out all the options (cabinets, counters, lights, appliances, sink, faucet, etc.) without knowing how the walls were going to look once they were stained, or how the hickory floors were going to look. The interior walls (and kitchen island) are all pine instead of cedar, like the exterior walls, and you can see the difference in color. I'm not sure why our builder mixes cedar and pine. It was hard to choose the stain color for the kitchen cabinets with so many different wood types. My husband did not want painted or black cabinets, so I had to choose a color to stain them. I really appreciate the advice given to me by the cabinet specialist I worked with at Lowes. She advised me not to try and match the various woods, but instead to think of them like furniture and let them all have a different grain pattern and stain color. Now that I see them all together I think it was sound advice.
Kitchen details
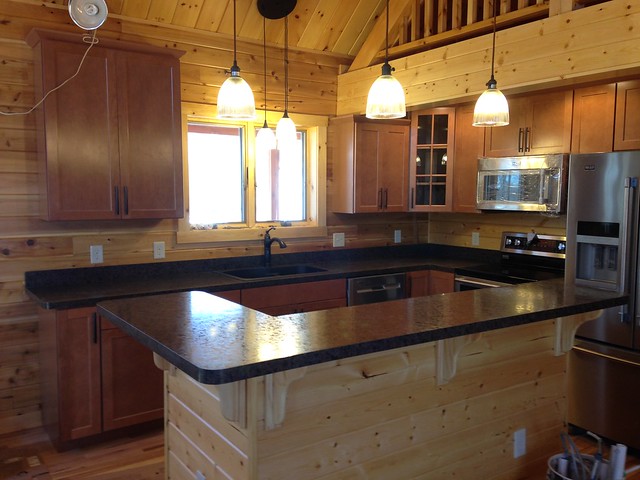
Details of the kitchen

Something I've learned about log homes is that they truly are custom - each step has to be figured out like a puzzle. For instance, look at the upper cabinets - can you see there are three different cabinet heights? The cabinets above the stove and refrigerator go right up to the ceiling (the loft is above). If you look closely at the cabinet to the right of the sink you can see it is shorter. That's because the main beam holding up the second floor is huge! Because of this we needed that cabinet to be shorter. Now look at the cabinet to the left of the sink - see how tall it is. That's because a shorter cabinet would look too small and like it was floating with the cathedral ceiling above it. I was so grateful to work with a knowledgeable (and reassuring) cabinet planner! She assured me that they would turn out looking great, and she was right :o) Just to add a focal point we added one glass front cabinet door in the corner.

Trying to stay within our budget we chose Wilsonart upgraded laminate counters in a finish called river gemstone. My thought was the dark counters would make a nice contrast to all the light wood in the rest of the great room. I paired them with a Franke granite finish sink and an oil rubbed bronze Moen faucet.

The lights were another difficult decision. The three over the island needed to hang approx. 13' down from the cathedral ceiling, which limited our choices. In the end we found these simple pendants that are suspended by their wiring and allowed us to choose any shades. To provide maximum light efficiency we chose glass instead of metal shades, so light will shine up as well as down. We've been told wood does not reflect light the way that painted surfaces do, so we wanted to make sure the kitchen is bright enough.

My initial plans did not include stainless steel appliances, but during the Black Friday appliance sales I was blessed to find this set. It had been purchased by someone else who never took delivery. Because of this they were offered at a super sales price. Lowes held them for us at no cost for over four months! Such a blessing!
The Great Room
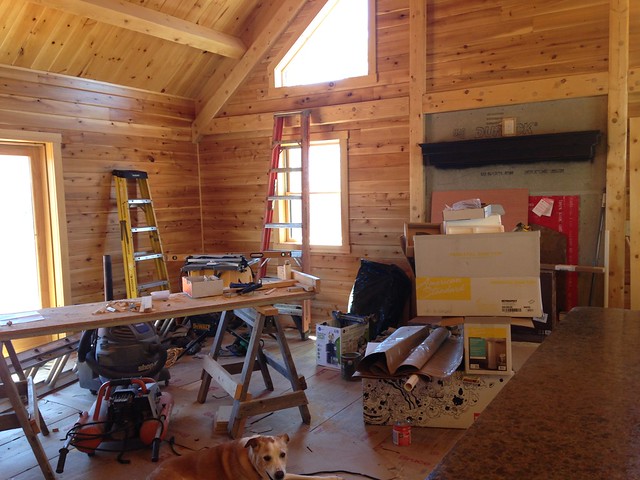
The great room - holding spot for all tools

Finally, we come to the great room. The walls and floors are all finished (floors are covered with cardboard to protect the wood). Just the ceiling fan and stone on the fireplace are left to complete. Stone will completely fill the area within the wall stiffeners shown in the upper right side of this photo. Once the fireplace is finished I'm pretty sure just some plumbing/water supply work needs to be done, then the house should be move in ready.
Untitled
Katahdin Cedar Log Homes

It's been almost an entire year since our builder, Cabin Run Construction, broke ground in May of 2016. At times it seems like things move fast, and at times it seems like they move slowly. But, all-in-all it has truly been a dream come true to build our log home and we are so very blessed to have this experience. I'll be sure to let you know when we move in :o)
Wednesday, March 15, 2017

Quilt of Valor - Faith Circle

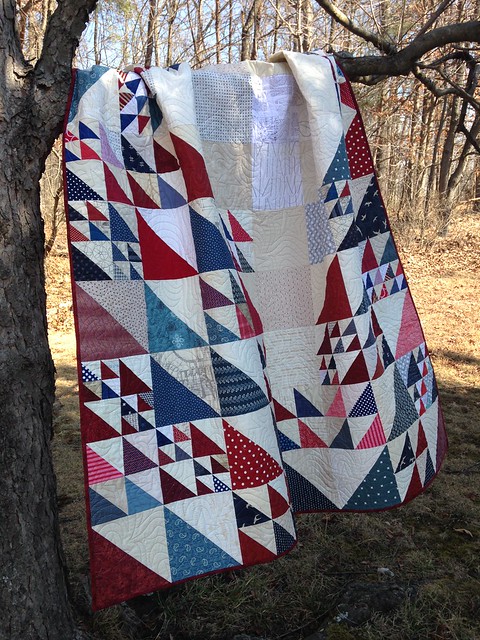
Twice a year I have the opportunity to select the quilt design and recipient for one of our Faith Circle quilts. Last fall I knew my turn was coming up, and I knew who I wanted to make a quilt for - a special soldier who fought for our country in Iraq. I have such respect for the Quilts of Valor Foundation as they strive to wrap in love members of our armed forces who have been touched by war.

Quilt of Valor - October 2016 quilt
Quilt of Valor

Quilts can often have a more feminine look to them, so I did quite a bit of looking to find a pattern/design with a more masculine appeal. As soon as I saw this quilt designed by the talented Ara Jane Olufson I knew it was the right one. She happily granted us permission to use her design for our quilt.

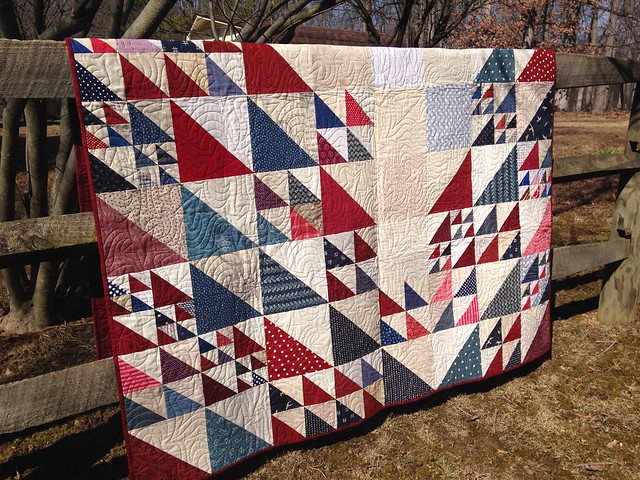
Quilt of Valor - October 2016 Faith Circle Quilt
A bit of breeze to add movement


The Faith Circle ladies were so wonderful to make extra blocks and send fabric squares so that our quilt would be of a nice size. It ended up at 64" x 80" before washing. Perfect size to snuggle up on the couch with!

Quilt of Valor - October 2016 Faith Circle Quilt
This picture shows off the nice texture added by the long arm quilting

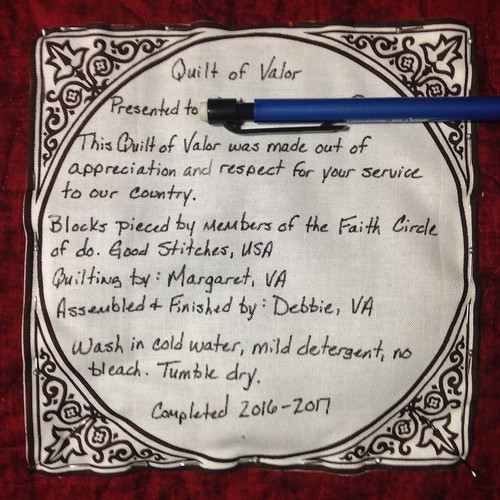
The long arm quilting was graciously done by a local friend - we agreed that an all over star pattern was the best choice.  The Quilts of Valor Foundation has guidelines they request you follow for all quilts, and included in that is the label. I usually struggle with what to put on a label, so I found their guidelines to be very helpful.

Faith Circle Quilt Label
I used a Pentel Gel Roller for Fabric pen to make the label

This was a very satisfying quilt to work on and finish. I hope it will be a blessing to it's intended owner.

The Faith Circle is a virtual quilt group operating under the guidelines of do. Good Stitches. If you are interested in finding out more, or joining, you can do so here.

The mission of the Quilts of Valor Foundation is to cover service members and veterans touched by war with comforting and healing

Sunday, January 1, 2017

Day One: Where to go from here

Well, here we are at Day One of a brand new year. In my sewing room are several work-in-process quilts at various stages of completion, in addition to supplies for a couple of projects not yet begun. One project I'd like to bring to a close this year is my Random Sampler Quilt. I finished the quilt top several months ago, but never shared a picture of it.

Random Sampler - completed quilt top
Random Sampler quilt top

This top was such an enjoyable journey. It began as a quilt-along and ended up including several quilt blocks I've designed. To round it out I thoroughly enjoyed searching for blocks I loved to fill in all the various spaces.

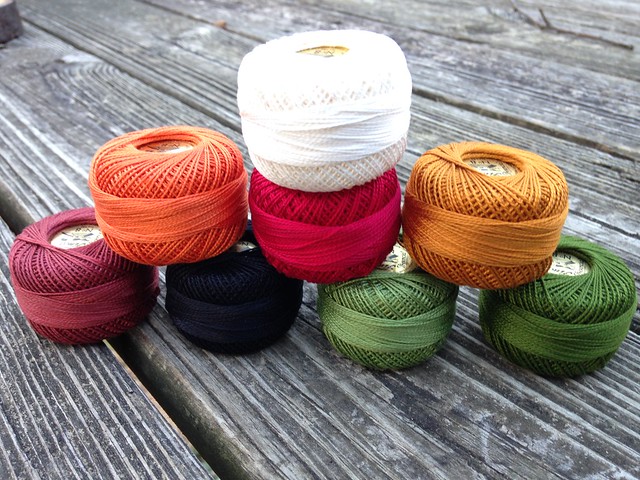
While sewing the blocks and filler strips needed for this top, I had time to mull over how to quilt it: machine quilting -vs- hand quilting. After working with perle cotton on my last two projects I decided I wanted the Random Sampler to be hand quilted using big stitches and No. 8 perle cotton. It's just hard to beat the beautiful texture created by hand quilting, and the slow pace is so relaxing. My local quilt shop has a great inventory of Presencia Finca and I had no problem matching colors with my quilt top.

Untitled
No. 8 perle cotton

As soon as I purchase batting suitable for hand quilting, a good thimble, and cozy flannel for the backing I'm all set to begin, and I can't wait!

For my family 2017 is a year that will see us realize the dream of moving into our log home in the not too distant future. This will be a great quilt for snuggling on the couch with my husband while we look out over the mountains and enjoy our new home.

Blessings!
~Debbie