Showing posts with label design. Show all posts

Monday, February 15, 2016

Flowers for the Cabin

Flowers for the Cabin...our cabin...our log home we would someday be building on top of the mountain. These were some of my thoughts as I worked on the design for this quilt block.

Flowers for the Cabin
Flowers for the Cabin ~ an original design

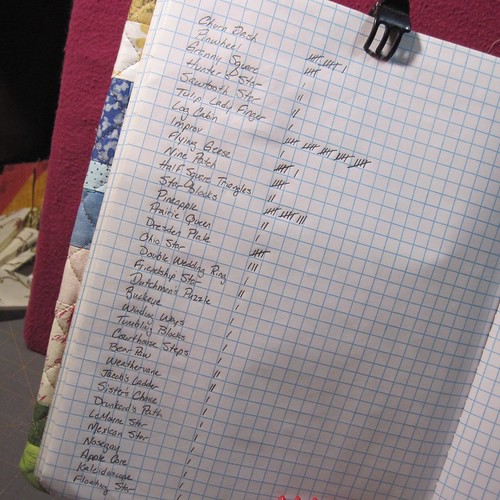
In the early summer of 2014 I was brainstorming on a new quilt block to submit to Quiltmaker's 100 Blocks magazine. I was fresh off my first success with my Dashing Geese block, and wondering if it was possible that I could come up with another original design. Was it just a fluke that I could actually come up with an original design? How on Earth was I ever to think up another one...because...because, well, I'm not a designer.

I was looking everywhere I could think for inspiration, flickr, Instagram, Pinterest. Search, search, search. And when I finally came up with an idea what if I just thought I was creating an original design and someone, somewhere, actually already came up with the same idea? How could I be positive it was really my design? And golly...just where was an idea going to come from?

One day I was looking at Pinterest and I came across a sweet little basket quilt block. At first glance I thought the basket was made up from a log cabin block. But on closer inspection I saw that it was not. All of a sudden I started thinking...what if I made a basket block with a log cabin construction and used floral fabric for half of it so it looked like a basket of flowers? A basket of flowers in a log cabin quilt block...a basket of flowers for our log cabin! Now I was really excited!

Untitled
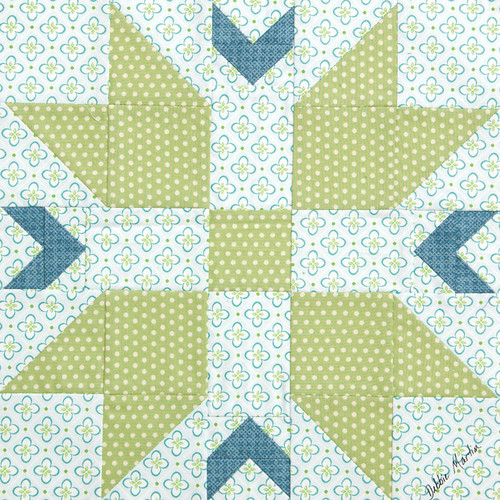
Log cabin block: half flowers and half basket

As I always do I pulled out my sketchbook and started to draw up my idea. Quiltmaker's requires all blocks to be 12.5" square and for this to work this block was going to require some mighty small pieces. Especially the 1" half square triangles. Wow...this was going to be hard!

Flowers for the Cabin - an original quilt block
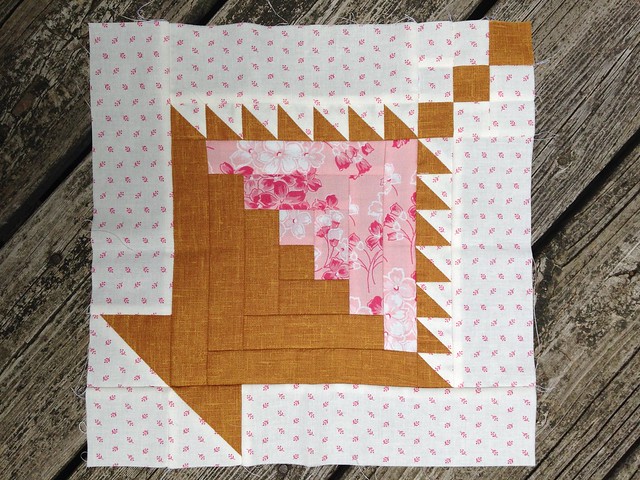
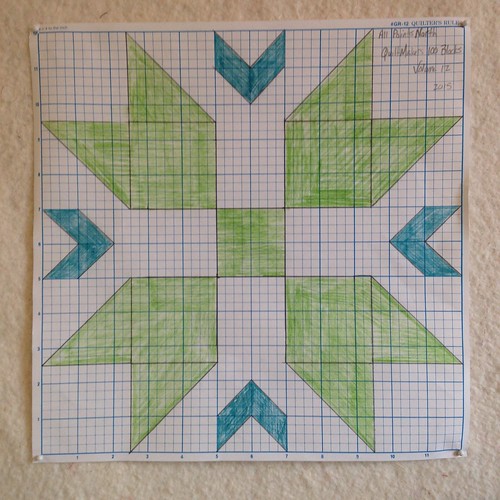
This is the actual block I submitted to the magazine


Even after I finally had it sketched out to the required size I still had to figure out how to assemble it. Goodness knows this kind of a challenge has got to be good for my brain! Once I actually got my block stitched together I was pretty proud of myself, and excited to send it to the magazine to see if they would include it in their next issue.

About four months later I heard back that it was not going to be included. They send a personal response to you noting how they receive many more blocks than can be included, and how a good balance of blocks (similarity/contrast to other blocks) is needed, and note space limitations for patterns (construction needs to be simple - limited to 1/2 a magazine page). I was disappointed, but understood that not every idea is going to be a good one or suitable for a particular magazine. My Flowers for the Cabin block has some small piecing, and for the floral log cabin part to work pretty specific fabric is needed. So, I tucked my pattern away with my other designs and moved on.

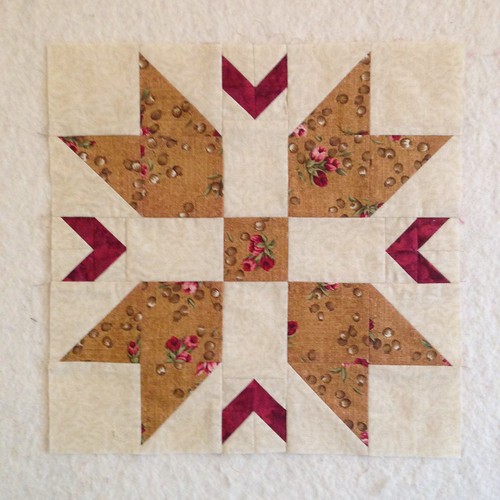
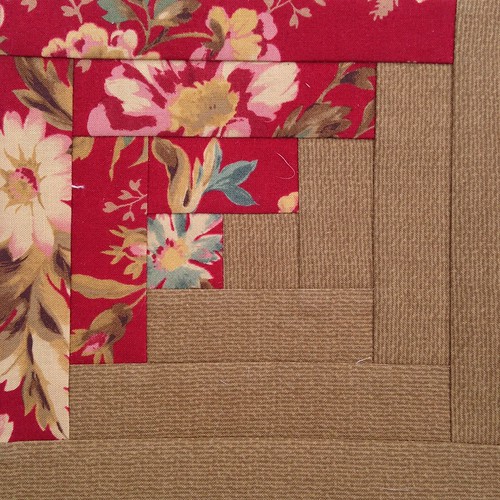
As I'm working on my Random Sampler I really want to include all of the blocks I've designed, including this one. I did a bit of shopping for floral fabric that looks more autumnal and made up another block - simplifying the construction a bit on the "chain" portion, and extending some flower vines and blooms into the half square triangles. I believe I like this block even better than my original. Flowers for the Cabin will be making it's way into the quilt I'm making for our log cabin home and I couldn't be happier!

Flowers for the Cabin
Cozy Flowers for the Cabin against the snow


Sunday, January 24, 2016

False Starts and the Design Process

What do these little cuties have in common? They are rejects...all three of them.

IMG_3110
3" Quilt blocks

Last November when I participated in the Quiltmaker's 100 Blocks blog hop for my block, All Points North, I asked readers to leave me a comment with the name of their favorite quilt block. I thought it would be fun to use one of the suggested blocks as a jumping off point for a new design. It was fun to read the suggestions and there was a nice variety of blocks named. I'd never heard of some of them and had fun looking the blocks up online to find pictures.

IMG_3111
Favorite blocks from my blog readers

As you can see from the list log cabin is the clear winner followed by star blocks and churn dash. Well gosh...it was hard to ignore the fact that the log cabin is so popular. Up to this point my method for designing quilt blocks has been to take a traditional block and find some way to modify it. But really, what could I do to change up a log cabin quilt block? I've already modified a star block (All Points North), and a churn dash (Dashing Geese) so I felt like I should give the log cabin block a try.

For two months I have been sketching and mulling over what I could do. I was just about ready to admit defeat and move on to a second choice when all of a sudden inspiration hit! Funny enough I was taking a shower...what is it about showers that helps to clarify thinking? This has happened to me more than once.

I sketched out a couple different variations of my idea in my sketch book then got to sewing. In the process I made the three little reject blocks up at the top of this post. My dear friend, M, was pulled into the review process for a second set of eyes :o) On the first couple tries either the colors just were not right, or the pattern didn't look the way I thought it would in the finished block. It took a bit of ripping and replacing elements to get everything just right. I also put to good use Leanne's (She Can Quilt) post for how to replace a piece in a completed quilt block. Thank goodness I could refer to this post so I didn't have to start from scratch!

I'm so excited to say I have a block stitched up and ready to send in the mail for possible inclusion in Quiltmaker's 100 Blocks Volume 14 which will come out next November. It will be several months before I hear whether or not it is selected ~ wish me luck :o)

Friday, November 20, 2015

Blog Tour ~ Quiltmaker's 100 Blocks Volume 12

Welcome quilting friends! I'm so happy to have you visit my blog :o) Quiltmaker's blog tours are always a good time ~ you're sure to find lots of inspiration as you visit all the stops!

All Points North is the name I chose for my block, and you can find it in 100 Blocks Volume 12 as block No. 1186. About the time I was planning a new block to submit to Quiltmaker's I was admiring all the Nordic snowflake blocks that were cropping up around quilting social media sites, so I used that basic block design as my jumping off point. My block is a cross between the snowflake block and a Tulip Lady Finger block. I combined dimensions from the snowflake block with the piecing method of the Tulip Lady Finger.  Then, as has become my design method I evaluated the negative (background) areas to see what I could add to the block and ended up with the chevrons.

QM1550-MARTIN
All Points North ~ designed by Debbie Martin

My goal was a block that would create a secondary design, or a totally different look when repeated across a quilt top. In order to see what it would look like as a complete quilt top I inserted a photo of All Points North into Google Slides. Then I copied and pasted multiple times to create a mock-up of a top.

All Points North Quilt Layout
All Points North ~ quilt top mock-up

I was delighted to see that when the block is repeated over the quilt top the background almost becomes the noticeable pattern and the Tulip Lady Fingers become the background! So fun!!

Untitled
My quilting sketch book ~ drafts of All Points North
My typical design process begins with my grid paper composition notebook and a package of colored pencils. I sketch out my idea and begin coloring. If you look at this page you can see I used half-square triangles the first time I added the chevrons. The second time I changed to flying geese.

I also experimented with the placement of the chevrons. I chose to keep them closer to the edge of the block (top drawing) since my goal was to create a secondary design. I thought this would be more evident if the chevrons matched points when multiple blocks are sewn together.


Once I have the design finalized I draw it again on 12" square Quilter's Rule paper so I can see what it looks like at full size. Doing this helps ensure I cut my fabric to the correct dimensions when I make a test block.

Untitled
Full size sketch of All Points North


Here's a picture of All Points North the first time I made it. If you look closely you can see I used the half-square triangles for the chevrons. It was after making this test block I decided to switch to the flying geese in order to reduce the number of seams.

Untitled
All Points North using traditional fabric


Maybe seeing how a piece of grid paper and colored pencils are all you need to design a quilt block has inspired you to try your hand at design. If so, I hope you'll let me know! 

Quiltmaker's is generously giving one of my blog readers a free issue of 100 Blocks, Volume 12. To be entered into the drawing just leave me a comment telling me what is your favorite quilt block - maybe I will use it as a jumping off point for a new design :o) If you suspect you may be a "no reply" blogger please make sure to include your email address in your comment. I'll draw a random winner on Sunday evening, November 22.

I hope you've enjoyed stopping by :o) Don't miss out on all the other blogs featured in the tour. They can be found on Quilty Pleasures blog.