Welcome quilting friends! I'm so happy to have you visit my blog :o) Quiltmaker's blog tours are always a good time ~ you're sure to find lots of inspiration as you visit all the stops!
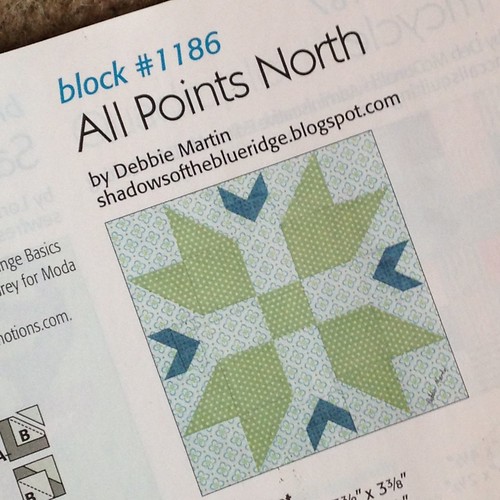
All Points North is the name I chose for my block, and you can find it in
100 Blocks Volume 12 as block No. 1186. About the time I was planning a new block to submit to
Quiltmaker's I was admiring all the Nordic snowflake blocks that were cropping up around quilting social media sites, so I used that basic block design as my jumping off point. My block is a cross between the snowflake block and a Tulip Lady Finger block. I combined dimensions from the snowflake block with the piecing method of the Tulip Lady Finger. Then, as has become my design method I evaluated the negative (background) areas to see what I could add to the block and ended up with the chevrons.
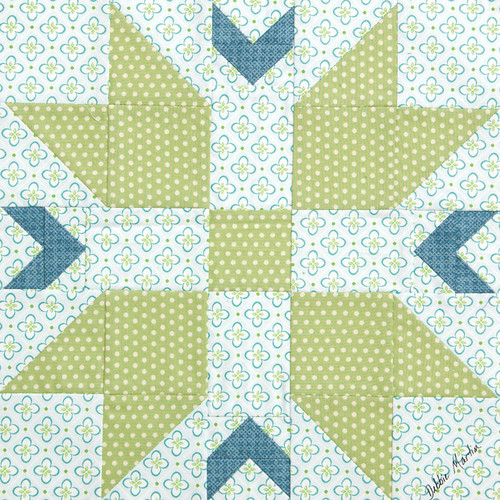 |
| All Points North ~ designed by Debbie Martin |
My goal was a block that would create a secondary design, or a totally different look when repeated across a quilt top. In order to see what it would look like as a complete quilt top I inserted a photo of
All Points North into Google Slides. Then I copied and pasted multiple times to create a mock-up of a top.
 |
| All Points North ~ quilt top mock-up |
I was delighted to see that when the block is repeated over the quilt top the background almost becomes the noticeable pattern and the Tulip Lady Fingers become the background! So fun!!
 |
| My quilting sketch book ~ drafts of All Points North |
My typical design process begins with my grid paper composition notebook and a package of colored pencils. I sketch out my idea and begin coloring. If you look at this page you can see I used half-square triangles the first time I added the chevrons. The second time I changed to flying geese.
I also experimented with the placement of the chevrons. I chose to keep them closer to the edge of the block (top drawing) since my goal was to create a secondary design. I thought this would be more evident if the chevrons matched points when multiple blocks are sewn together.
Once I have the design finalized I draw it again on 12" square Quilter's Rule paper so I can see what it looks like at full size. Doing this helps ensure I cut my fabric to the correct dimensions when I make a test block.
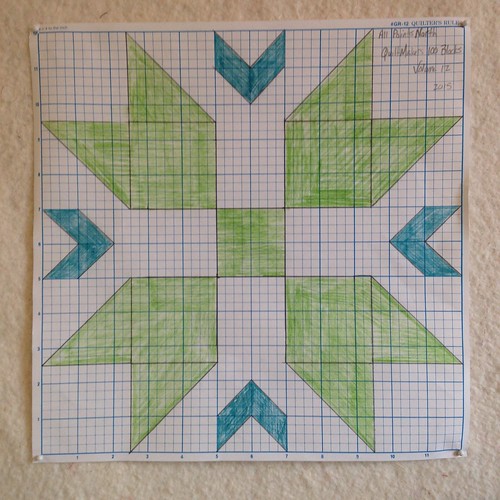 |
| Full size sketch of All Points North |
Here's a picture of
All Points North the first time I made it. If you look closely you can see I used the half-square triangles for the chevrons. It was after making this test block I decided to switch to the flying geese in order to reduce the number of seams.
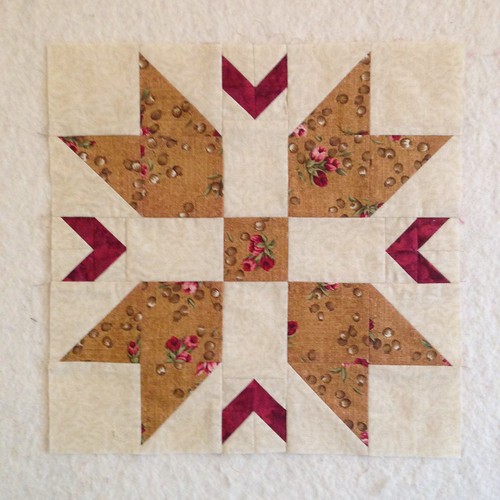 |
| All Points North using traditional fabric |
Maybe seeing how a piece of grid paper and colored pencils are all you need to design a quilt block has inspired you to try your hand at design. If so, I hope you'll let me know!
Quiltmaker's is generously giving one of my blog readers a free issue of 100 Blocks, Volume 12. To be entered into the drawing just leave me a comment telling me what is your favorite quilt block - maybe I will use it as a jumping off point for a new design :o) If you suspect you may be a "no reply" blogger please make sure to include your email address in your comment. I'll draw a random winner on Sunday evening, November 22.
I hope you've enjoyed stopping by :o) Don't miss out on all the other blogs featured in the tour. They can be found on
Quilty Pleasures blog.