
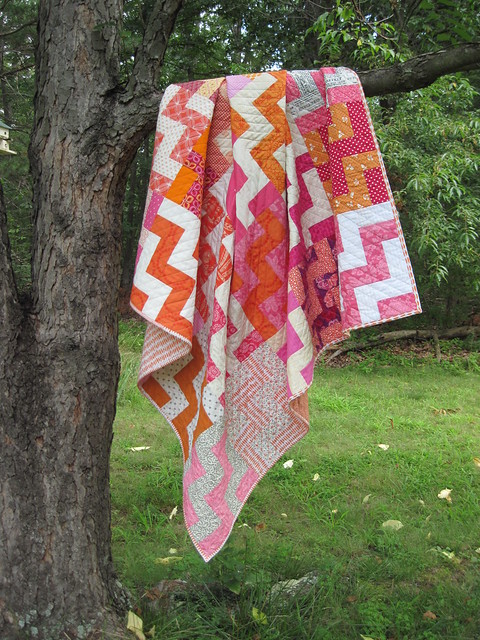
Well, I'm so pleased to be able to say Social Climber is now complete!
 |
| Social Climber - pattern by Villa Rosa Designs |
With a burst of dedicated effort I was able to finish the quilting, binding, washing, and photographing in a two day period. How's that for getting a second wind on this project?
My inspiration for the quilting came from a Craftsy class I bought, Creative Quilting with Your Walking Foot, taught by Jacquie Gering. One of the lessons teaches how to do sectioned curves. Needing something a little more at my comfort level I divided quilt into three sections and did straight line quilting instead of curves. I used masking tape to space the lines at 1" intervals - just moving the tape with each line of quilting.
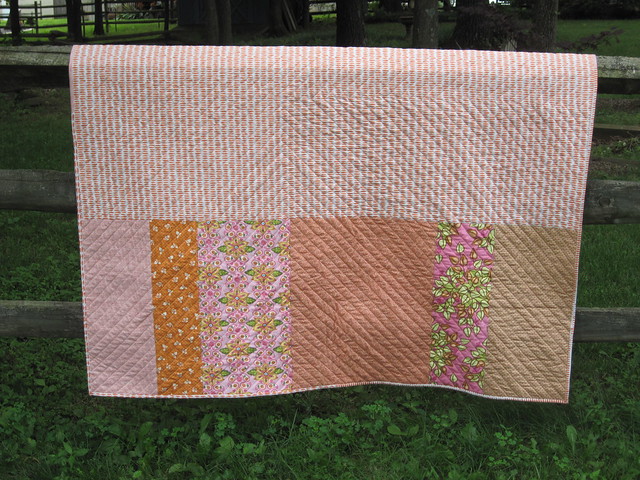 |
| Pieced back for Social Climber |
For the back I used one large piece of My Sunshine, a Riley Blake Designs fabric and then finished out with several smaller cuts from my stash. This photo of the quilt back also shows the quilting better. I was looking through my stash trying to find enough fabric to do the binding, however there just was nothing that would work. As I trimmed down the quilt top I noted that there was significant backing fabric on all sides being cut away. It turned out I had enough fabric to cut down into binding strips - Hooray! No extra scraps created!
All in all this turned out to be a lovely quilt and I'm so happy to have it finished!
The Faith Circle donates it's quilts to Restore Innocence. A Colorado based non-profit which aids in the restoration of young women rescued from human trafficking. You can read more about them here. Thank you Faith Circle ladies for your work on these blocks - you're a great group of ladies to sew with :o)
It is beautiful and you did a great job. I'm sure whomever receives it will absolutely love it.
ReplyDeleteoh this is lovely! I'm sure it's a relief to have this finish behind you. LOVE the quilting you chose!
ReplyDeleteYour quilt turned out beautifully! I also love the quilting and will definitely check out that Craftsy class you took.
ReplyDeleteGorgeous work! The quilting is perfect! I have that class, also, and really like it.
ReplyDeleteIt turned out great! Love it!
ReplyDeleteIt's a great quilt. I bought that class too, and it's been great to get me to take a few extra steps that make a big difference. Well worth it!
ReplyDeleteVery nice,,,
ReplyDelete