Monday, December 30, 2019

Finishing What Was Begun

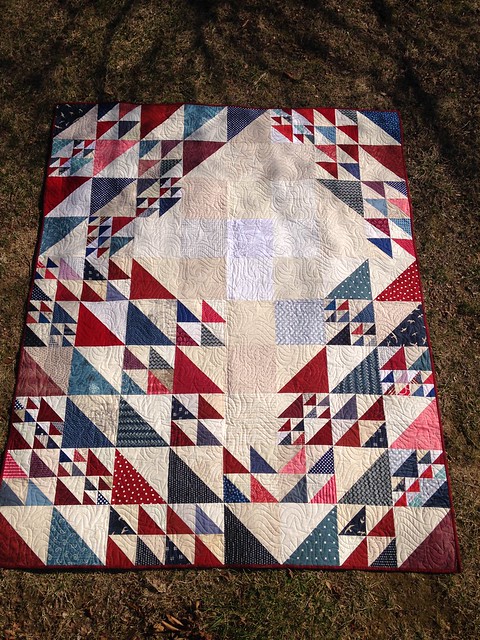
Recognizing that my blogging has been spotty, at best, for the past couple years I am writing this post mostly for my own purposes. My intention is to pick back up with blogging when my day job becomes a bit less demanding, or I retire. Whichever happens first :o) All that being said, I didn't want to close out the year without documenting that the wedding quilt I was making for my son G, and his bride, C did in fact get completed and gifted.

Untitled
All Points North Wedding Quilt
When fabrics were chosen and purchased, and I thought I knew where the design was headed. Along the way things changed up a bit. My initial plan had been to use my Boxed Star quilt block. However, after making up a test block I soon realized that Boxed Star was not going to be the best choice for these fabrics. So, I changed over to my All Points North block and never looked back.

This quilt ended up measuring out at 80" square. Much too large for me to consider quilting on my small domestic machine. So I worked with a local long arm quilter to pick out an all-over pattern that seemed a best fit. I wanted the blocks to remain the focal point, and the quilting to be present, but not too dense. This picture might give the best perspective on the size of the quilt:

All Points North quilt top
Quilt top before being sent to for long arm quilting
It was so special to be able to make this quilt for this sweet couple, and I hope it will be cherished throughout their lives. Here's a peak at them opening it up. I never did get a picture of them with it all spread out.

Untitled
The quilt back is a soft flannel


Thursday, August 1, 2019

Rebranding - Bluebell Ridge Handworks

Untitled

I began my online life at a time when the recommendation was to create an online persona that did not include the use of your name or a photo of what you actually looked like. That was 2010 and living online was looked at with quite a wary eye. Fast forward to 2019 where it's difficult to imagine not having an online presence. In fact, in many careers it is pretty much essential to your job. Mine included.

For these past ten years my online persona has been Blue.Ridge.Girl and I named this blog Shadows of the Blue Ridge (read about that here). These names have served me well; however, looking forward I feel the need to make a change. I am renaming this blog: Bluebell Ridge Handworks.

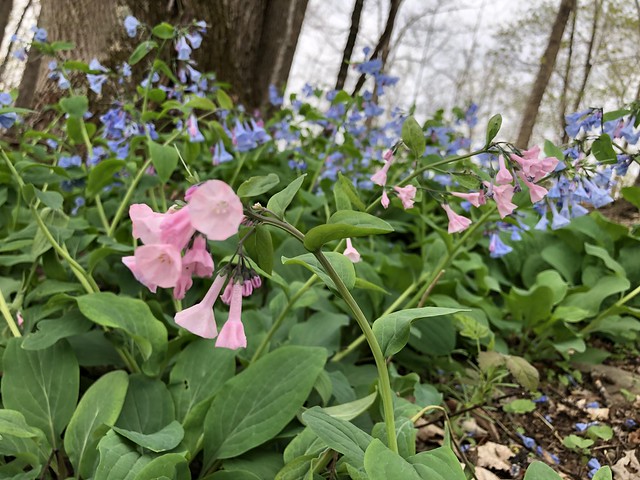
Again, I think it's fun to learn where a name comes from. Well, we live on the top of a small, sandy mountain which is part of the Ridge and Valley Appalachian Mountains. I'd never heard of a sandy mountain before, but that's exactly what our soil is like: sand and rocks. After purchasing our lot we set about choosing a location for our house to be built. It was during this process my husband discovered Virginia Bluebells growing right on top of the mountain close to our chosen house site. This was such a surprise to us because Virginia Bluebells are most often found in moist woods and river bottoms. Neither of which describe our sandy mountain soil.

Since this is such a distinct and fun part of our new home it seems to be a good way to continue building my online identity. In the future I'd like to share not only my creative adventures, but also a bit of the peaceful pleasures we've discovered come with living in a log home.

I'll be changing over the blog name and address, as well as my Instagram and flickr account names in the next few days.

Let's have a look at a few more of these beautiful mountaintop Virginia Bluebells - some of them remain pink even after opening!

Untitled

Thursday, January 25, 2018

A Wedding on the Way!

There's a wedding on the way in our family!! Can you sense the excitement here? Our son G, and his bride-to-be, C will be married this coming fall. Of course, there has to be a quilt made for the soon to be established new family :o)

Knowing the young bride it was easy to select fabrics. She is drawn to earth colors, and things that have a bit of sparkle and shine to them. Can you imagine fabrics more perfect than Shimmer by Jennifer Sampou? The fabrics are made in Japan and come in beautiful shades of blue, gray, taupe, and creams. Each contain a shimmer of silver, gold, or both. Since I'm a bit late to the Shimmer rollout we'll happily go with a mix of Shimmer, Shimmer 2, and Shimmer On :o)
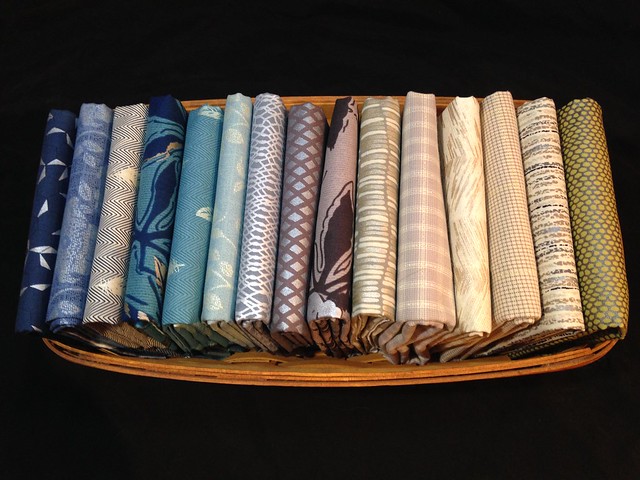
Combination of fabrics by Jennifer Sampou
Half yard cuts from Shimmer, Shimmer 2, and Shimmer On

Because of the metallic ink used on these fabrics they are a bit less drapy than regular quilting cottons, but I think in a large lap quilt with fluffy batting and a flannel backing they will lend a nice substance to the quilt. I was able to find a nice assortment of these fabrics on Etsy.
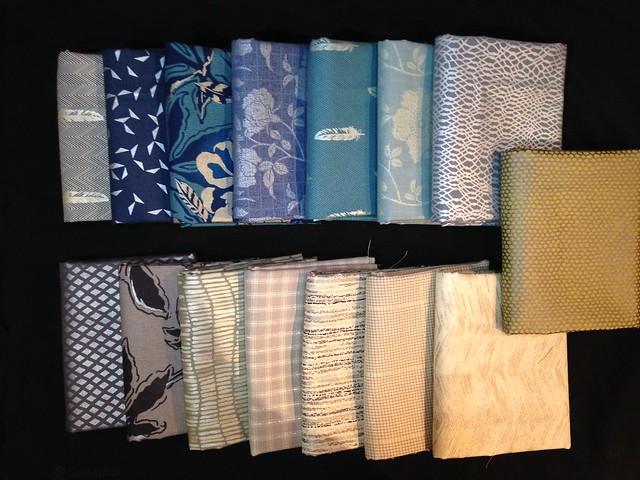
Earth tones in blues, grays, and taupe
It's difficult to show the lovely metallic in a photograph 

Although the fabrics quickly made themselves evident to me I was initially unsure of what pattern to use. I narrowed my thoughts down to three ideas which I showed the bride and groom. (Although it is tempting to make the quilt as a surprise I really feel that with something requiring this much time I'd prefer to make sure I am creating something that matches their tastes.) Here are the three ideas I came up with for them to preview. First up was the wonderfully modern Octagon Shimmer quilt designed by Jennifer Sampou to go with her fabric line. Obviously this would be a great choice since it was designed especially for these fabrics. Next I pitched the idea of a triangle quilt like this one. I've wanted to make a triangle quilt for some time now and have had this QAL bookmarked on my computer. I think these fabrics would be great in a triangle quilt! Then, to round things out I added in a more traditional quilt design, the Dreamcatcher pattern by Denyse Russart - really a beautiful quilt!

A bit to my surprise the traditional style Dreamcatcher quilt turned out to be their favorite. I almost jumped right in and bought the pattern, but then got to looking at it and thinking...it looks very similar to my Boxed Star quilt block that I designed for Quiltmaker's 100 Blocks, Volume 15.
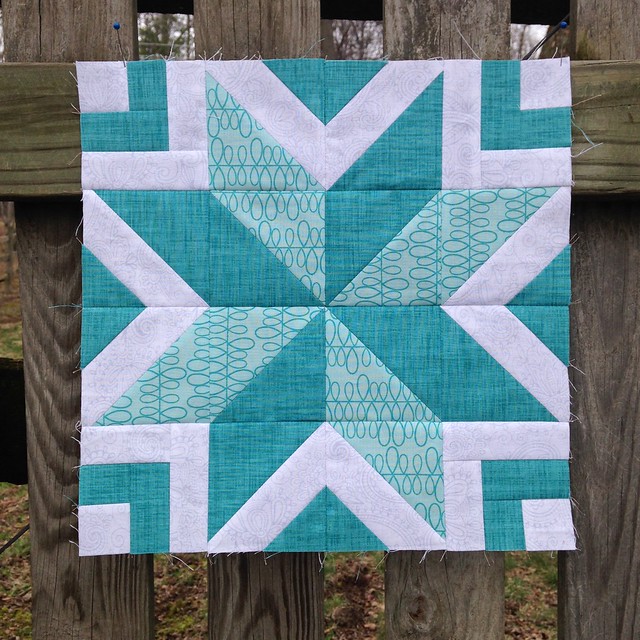
Boxed Star
Boxed Star quilt block designed by me :o)

How fun it would be to have a reason to make a quilt using one of my very own designs! In the magazine each of the blocks must be 12" square. However, I am going to resize my block up to 18" square and go with a 4 x 4 layout. This will allow for a generous 72" square quilt - a good size for cuddling on the couch.
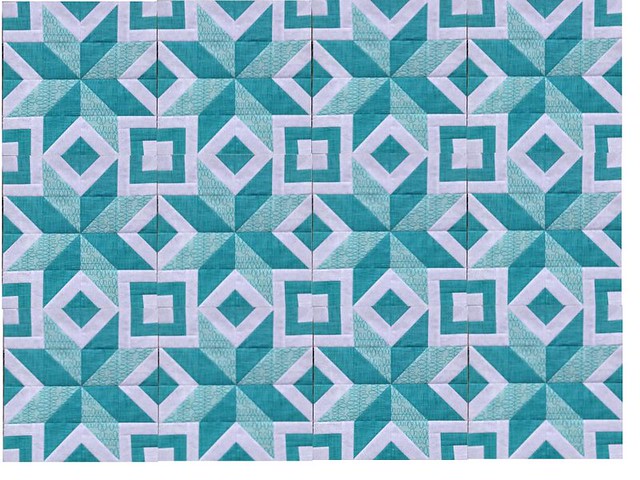
Boxed Star Quilt
Mock-up of 12" Boxed Star blocks


In my previous post I shared this mock-up of a quilt top using the Boxed Star block. I was thrilled to see the secondary design made by the boxes and squares of blue since secondary design was what I was hoping to achieve. However, I don't want those boxes and squares to be quite as prominent in this wedding quilt, so I'm going to try making them with a lighter contrasting color. That way they will be a completely separate design element from the stars.

I will be combining blue fabrics with the gray and taupe fabrics and each star will be a different combination, thus yielding a more scrappy look to the quilt. (No surprise there, right 😁) As soon as I get a sample block made up I'll be back to share more!

Untitled
Combinations of blues and gray/taupes

Here's a picture of our sweet couple :o) We can't wait to add C to our family!
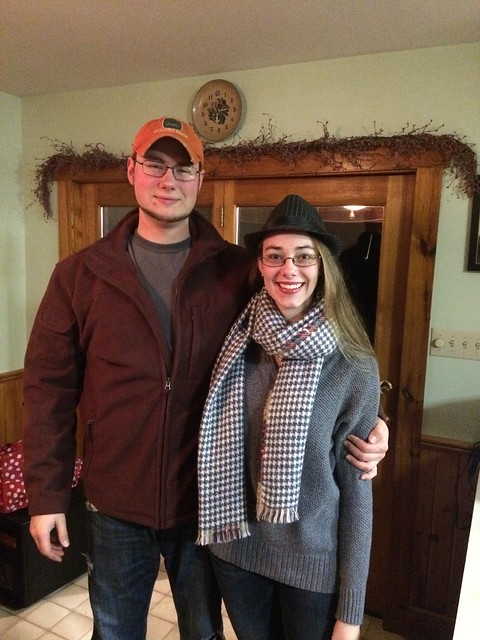
Untitled
Our engaged couple!


Hope you are somewhere warm! It's a cold, windy January day here. Happy sewing!


Monday, January 15, 2018

Gentle Winter Mornings

I'm already reading it online - people yearning for the arrival of spring. It seems each year as soon as Christmas and New Years have passed there is a general feeling that winter should be over. I find I enjoy the fragile wintertime mornings when the sun shines with a gentleness not found during the other seasons of the year.

Untitled
Quiet tablescape

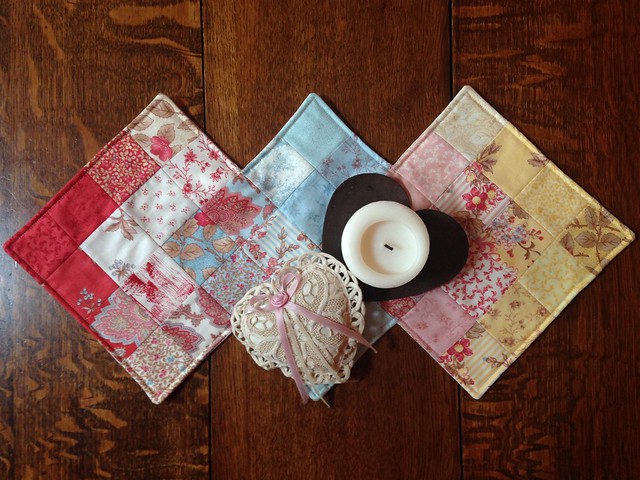
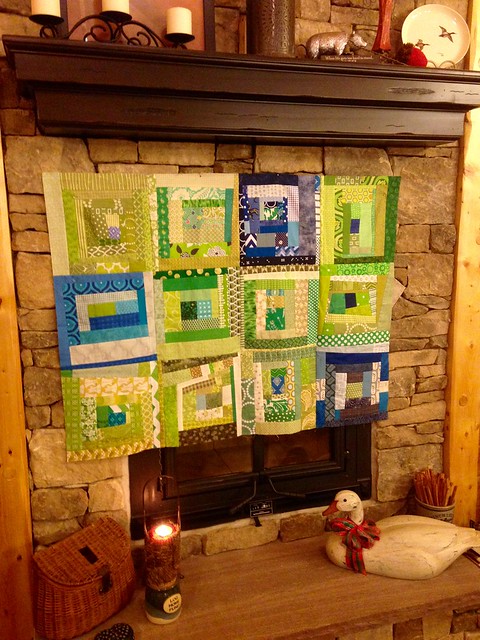
In my sewing loft I have been quilting away on the green & blue Faith Circle log cabin quilt - and making good progress, too! Every time I get to the point of actually quilting something I remember how much fun it is to free motion quilt, but it's also quite a workout for the arms and shoulders. To take a break from the quilting I wanted to do a little sewing, but didn't want to begin something new and add to the already robust collection of unfinished projects. I went through my various stacks and bags and came across this small mat I had begun using fabric from a mini charm pack I'd received as part of a swap.

Untitled
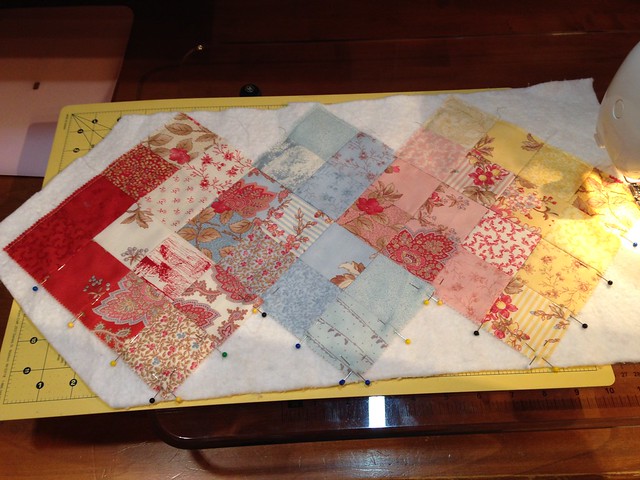
Basting the small mat onto a batting scrap

When I first received the mini charm pack I had no quick ideas of what to do with it, so it sat on my shelf for quite a while. Then, while online one day I came across a photograph showing a layout similar to this where the fabric colors flow from one to another giving the illusion of merging squares. The mini charms would be perfect since there were a good variety of colors and shades within the package. Then it sat unfinished for just over 2-1/2 years. Last night I pinned the mat top onto a batting scrap and basted around it. Then the extra batting was trimmed away.

Untitled
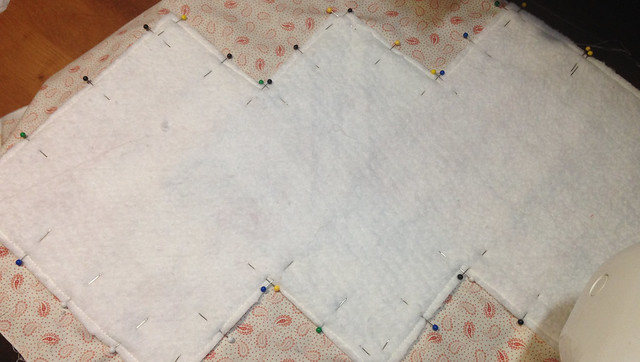
Mat pinned face down onto backing fabric

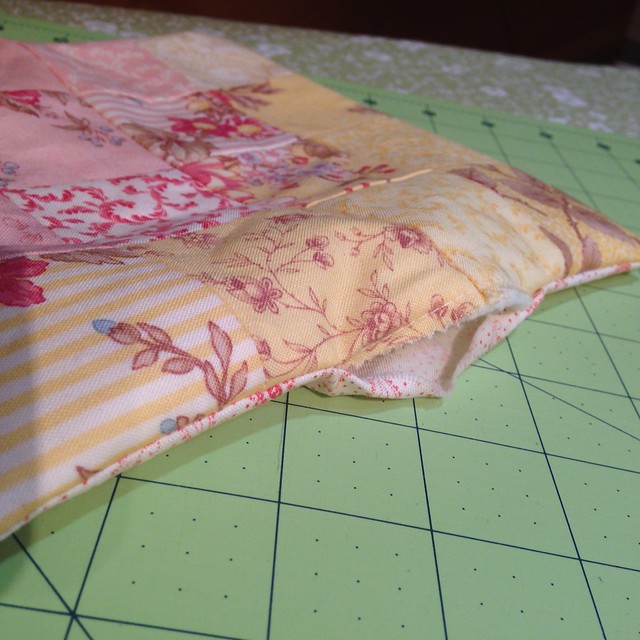
Next this was pinned, face down, onto a fat quarter that was to be the backing. I stitched around the shape again using a quarter inch seam. I left a three inch opening to feed through so it could be turned right-side out.

Untitled
Small opening to turn piece right-side out

I carefully clipped all of the points and corners and used a pointy stick to get them all turned nicely. Them I ironed both the front and back so it would flatten out nicely. Finally, I top stitched all the way around to secure the top and bottom layers, and close up the opening.

Untitled
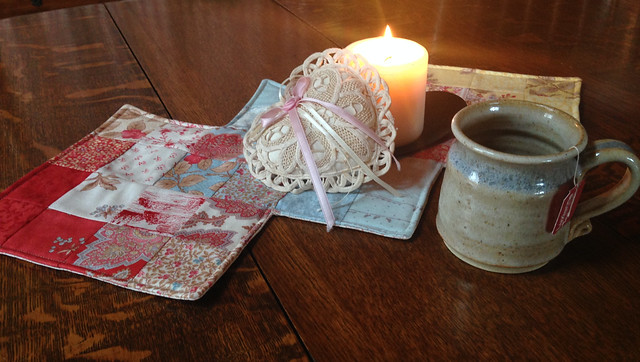
Completed table mat

The soft, gentle colors in this mat remind me of the fragile winter sun in the early morning. Quiet, peaceful, contemplative. Let's not rush headlong into spring and miss this opportunity to enjoy this special time of year.


Saturday, January 6, 2018

Formulating a Quilting Plan

In my last post I made reference to joining in with Aby Quilts to complete an unfinished quilt each quarter. I'm actually hoping to complete three this first quarter - all of them for the Faith Circle of do. Good Stitches. Last year, with moving to our new home, I was able to coordinate the planning of these quilts from my circle, but not able to pull off getting them completed. Now that the new year is upon us I will be coordinating two quilts in 2018, so I need to get myself in gear and finish the 2017 quilts.

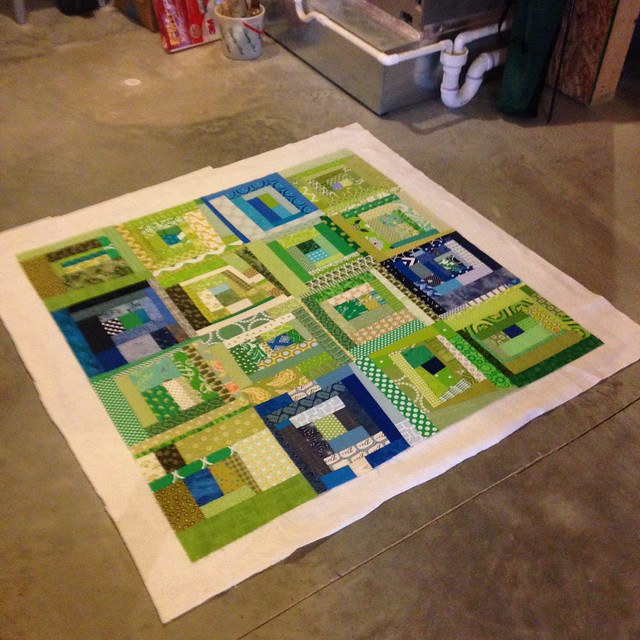
First up is the green and blue improv log cabin quilt. I am thrilled with how saturated the colors are in this quilt top. Yesterday I got it pin basted using a nice open space on the basement floor. It just took a little over an hour to baste this 48" square quilt. The challenge was to keep our dog from walking back and forth on it while I was working. At one point she even decided to lay down on it. Maybe that means it's snuggle worthy?

Sandwiching the quilt
All smoothed out and ready to pin baste

As it was spread out on the floor I mulled over how I'd like to quilt it. Options considered include:
  • Edge to edge straight line quilting using painters tape as a guide
  • Grid quilting using painters tape as a guide
  • All over meander/stipple and possibly include loops
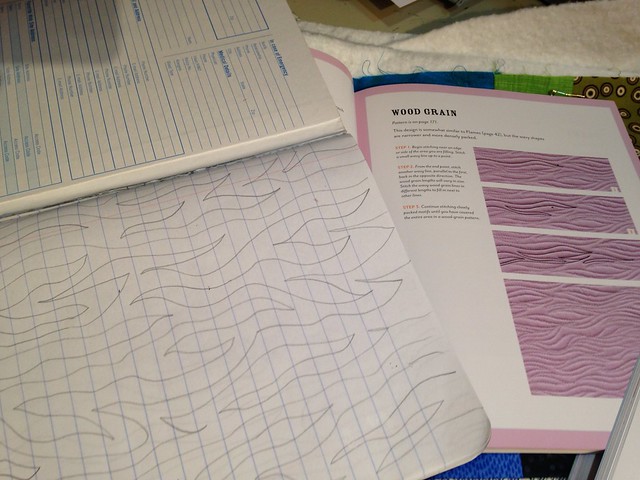
  • Flame/wood grain quilting the individual squares
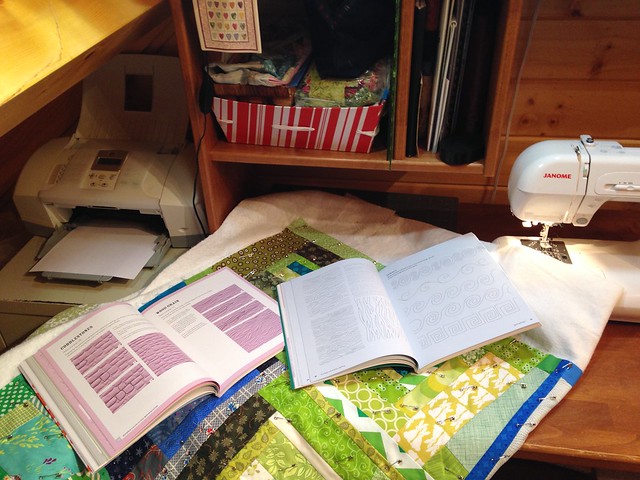
It's been a while since I've done any free-motion quilting so I think it's time to give it some practice again. As I've written about before, I have a pretty small Janome domestic sewing machine. It can be a challenge to use it for quilting; however, for the most part I've been pretty happy with what I've been able to do with this machine. I decided to try the flame/wood grain design in each individual square. This saves me from having to feed large sections of the quilt through my machine as I will only be working on one square at a time. I'll start by stitching-in-the-ditch along the seams where the blocks are joined. This will stabilize the quilt sandwich, and allow me to stitch along this same line as I work back and forth in the wood grain design. 

Planning out the quilting design
Searching for quilting options in my reference books

I have a couple of great books I've written about before that are so helpful with learning about developing the skills needed with free-motion quilting. I pulled them out along with an old composition book (left over from my son's schooling days!) and practiced sketching out the design.

Practicing my quilting design
Sketching out the wood grain design


I'm thinking I will alternate the direction of the wood grain stitching from block to block. I also plan to use up various shades of blue and green thread I was gifted from a friend whose mother used to quilt. Here's to a good plan, now wish me luck as I get started! 


Tuesday, January 2, 2018

Scrap Busting

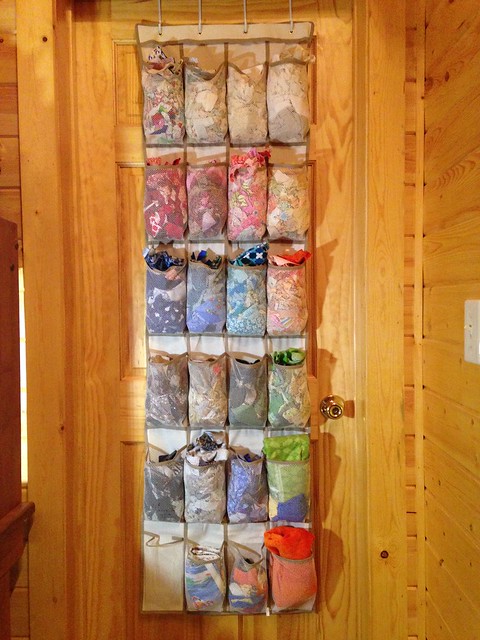
At the start of Christmas break off school I decided I wanted to do a little bit of "just because" sewing using my scraps (no surprise there!) I like to make sure my scraps don't exceed their storage space and several of the colors are getting pretty overstuffed. Here's a picture of how I store my scraps:

Scrap storage
Over-the-door shoe organizer/scrap storage

I've used this shoe organizer for several years now. It's been a great way for me to corral scraps without taking up floor or shelf space in my small sewing area. Granted this storage method would not work for someone who does a high volume of sewing.

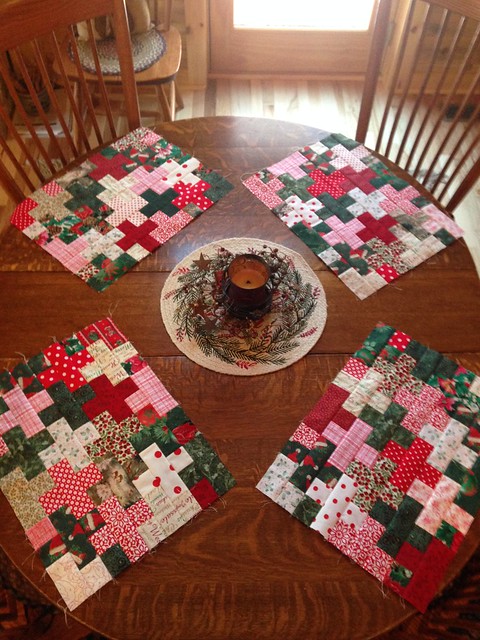
I pulled out Christmas fabrics left over from previous projects with the intention of making placemats. It's been on my mind to make another set of scrappy plus placemats similar to this set I made a few years ago. Over the course of my time off school I was able to get the tops sewn for a set of four mats. It's fun to mingle the various fabrics together!

Plus block placemat tops
Plus block tops for placemats

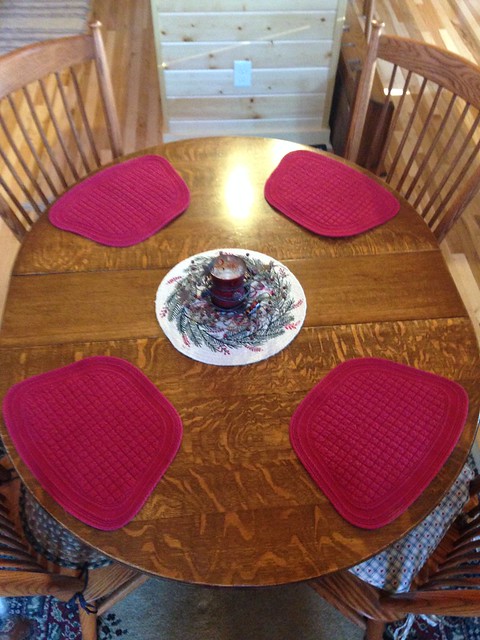
Now I'm going to decide if I want to leave them as rectangles or trim them into a wedge shape. As you can see we have an oval table which makes standard shaped placemats a little less than desirable. Several years ago I purchased a set of wedge mats specifically made for round tables from Improvements Catalog. I love the shape, however, they are just a bit smaller than I'd prefer. See how nicely they fit a round/oval table:

Untitled
Wedge mats from Improvements Catalog

I've got time before next Christmas to make my decision. In the meantime I've decided to join in with Aby of Aby Quilts and try to complete one unfinished project each quarter this year. First up are the three charity quilts for Faith Circle of do. Good Stitches. The tops are complete and ready to be sandwiched and quilted. I'm excited to get started!

How about you? Do you have any unfinished projects ready to queue up? Why don't you join us!


Sunday, December 31, 2017

Year of the Quiet Craft Room

Reflection is something I do more in my head than on paper (or in this case on a screen), and yet I always enjoy going back and reading them, so here goes:  2017 has been a year like no other for my family as it seems the whole of it was consumed with moving. I wonder to myself how people can move all the time and make it look so easy. For us it has been an all consuming occurrence. As such, it was an unusually uncrafty year for me as I completed just five projects the whole year:

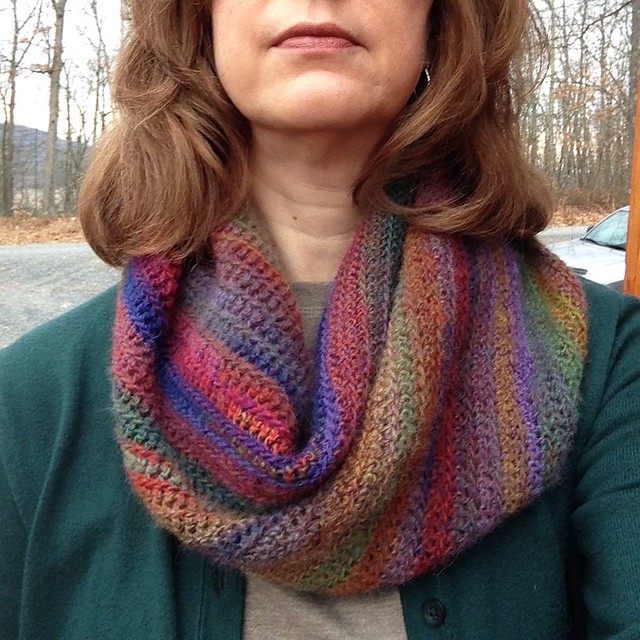
The Mostly Harmless crochet shawl by Kaylie Dawn on Ravelry is my most recent finish. I made this from three skeins of Lion Brand Amazing yarn in the Wild Flowers colorway. I have to say I am a self-confessed variegated yarn addict 😀 If I was forced to choose just one crafty outlet it would have to be crochet - it's my native crafting language.

Mostly Harmless Crochet Shawl
Mostly Harmless crochet shawl


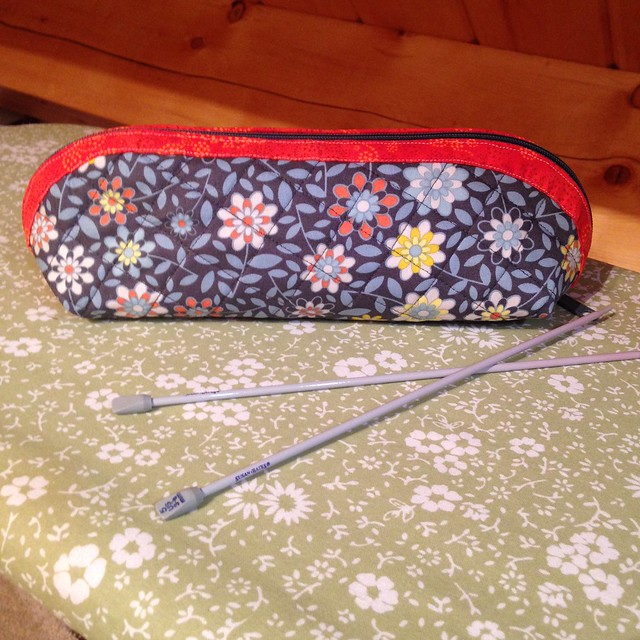
Next up is the Simple Little Pouch designed by Anita of Bloomin' Workshop. Anita posted this tutorial last year and I knew right away I wanted to make one. The opportunity presented itself when I was putting together a Christmas gift for my future daughter-in-law. She likes to knit and I just knew this fun pouch would be perfect to corral knitting needles.

Simple Little Pouch by Bloomin' Workshop
Simple Little Pouch

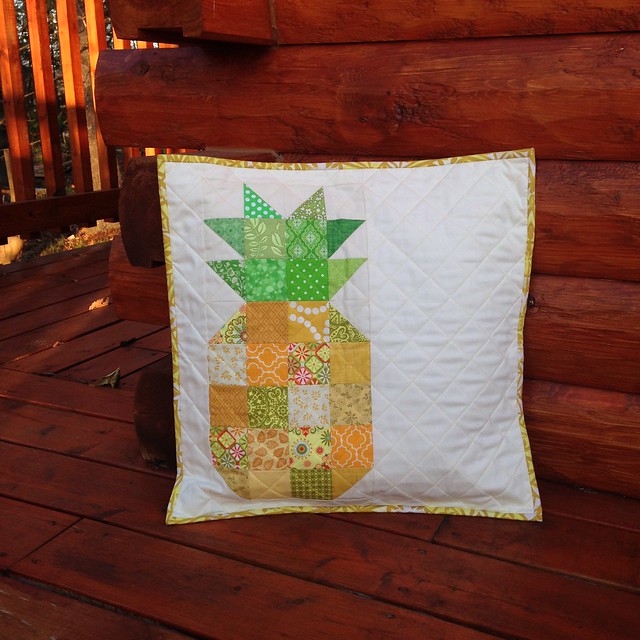
Over the summer, to take a break from unpacking, I was able to stitch up a fun little Patchwork Pineapple pillow to gift as a birthday present for my bestie, M. I always enjoy making things for her because she is just about one of the sweetest, most giving people I know. M is blessed with the gift of hospitality so a pineapple is just perfect for her. This tutorial comes from Sassafras Lane Designs. I enjoy little projects like this because they let me indulge in my love of scraps :o) I did my favorite grid quilting on this using painters tape as my guide.

Patchwork Pineapple Pillow for a friend
Patchwork Pineapple pillow

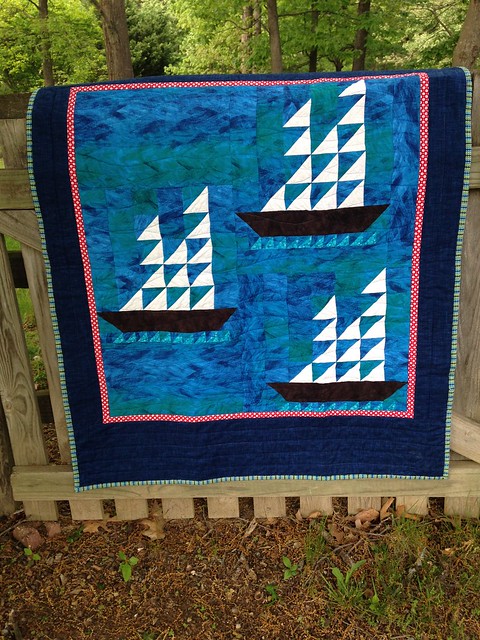
Early in the spring I made this sweet tall ships baby quilt for my great nephew. The inspiration for this quilt came from a picture of a quilt called The Fleet Is In from an old quilt book. The image of the tall ship with waves underneath served as inspiration, but I used my usual half-square triangle technique instead of the construction method featured in the book. I just love how this turned out with the watery fabric in the background.

Untitled
Tall Ships baby quilt

The first finish of the year does not belong to just me, but instead to the Faith Circle of do. Good Stitches. I was the assigned pattern selector/quilter for this beautiful Quilt of Valor that was gifted in March to a deserving veteran of our armed forces. You can read all about this quilt here.

Quilt of Valor - October 2016 Faith Circle Quilt
Quilt of Valor

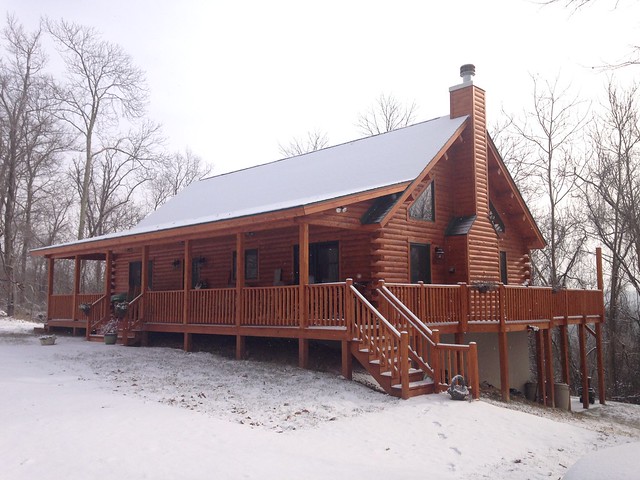
Perhaps my greatest finish of the year was getting our family settled in our new home. We are absolutely loving it! Sometimes it still seems surreal that we are actually moved in after so many years of dreaming, saving, planning, and building.

Our snowy home on the mountain
Cabin on the mountain

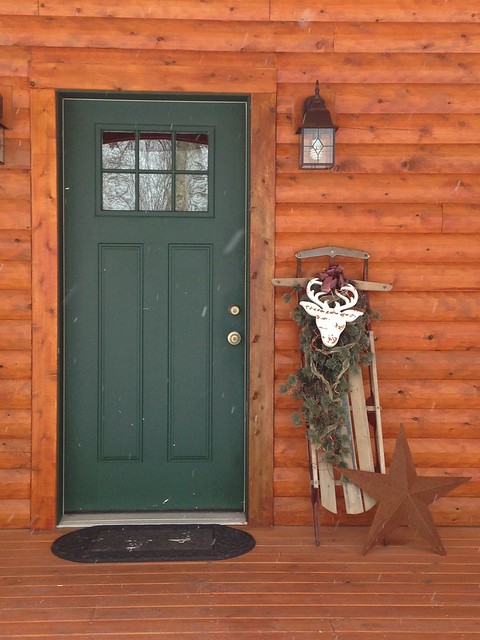
Welcome
Welcome in from the snow

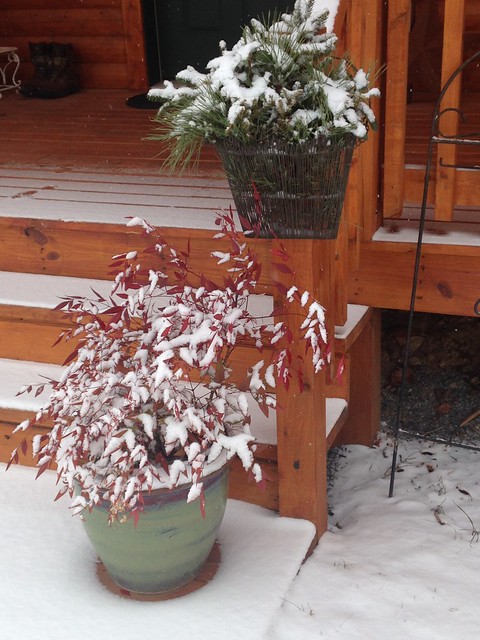
Christmas Greetings
A snowy Christmas greeting

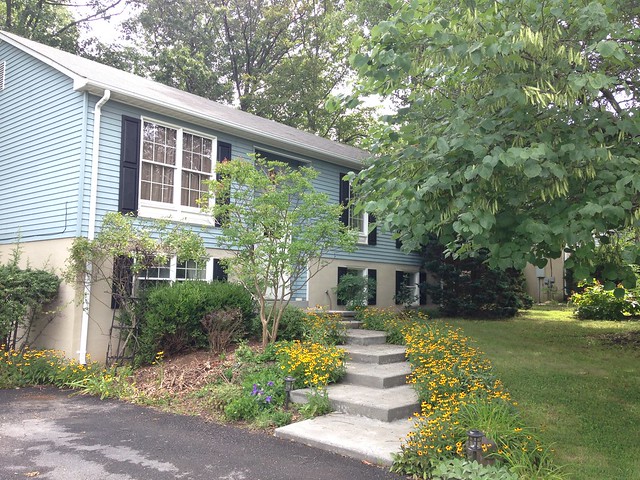
The home we left was this sweet little split-foyer. This was our home for the last 29+ years of our lives and it was the location of many milestones for our family. Little house - you served us well.

Untitled
Farewell to our little home


Won't it be fun to see where 2018 takes us? We won't have to wait long to find out! Happy New Year friends!

Tuesday, November 14, 2017

Quiltmaker's 100 Blocks Vol. 16 Road Rally Tour

Welcome friends! You have arrived in an area known as the Ridge and Valley Region of the East Coast just west of the Blue Ridge Mountains. I feel like I already know so many of you as you've stopped by to visit Shadows of the Blue Ridge during previous 100 Block's Tours and Rallies. It's a joy to welcome new visitors, as well! I'm so glad you are here.

November in the mountains makes me happy...because it's a beautiful time of year with the changing of the leaves...because yummy pumpkin flavors can be found everywhere...because Thanksgiving arrives with all it's fabulous decadence. Well, yes, but it also brings with it the fall issue of Quiltmaker's 100 Blocks, and this year Vol. 16 really takes the pie...I mean cake! 😆

I'm happy to introduce my newest block, Puzzled Geese. As you can see it has plenty of geese in it :o) Puzzled Geese is a compilation of elements from a couple of antique blocks: Dutchman's Puzzle, and Wild Goose Chase. Mashing them together lead to my design. Construction tip: when I have this many flying geese to make I usually use the Fast Flying Geese method shown on the Techniques pages in each issue of Quiltmaker's 100 Blocks.

Puzzled Geese quilt block

When I design blocks my method is to put myself into the shoes of quilters who lived maybe 100-200 years before me. I try to imagine them pulling out their precious scraps and combining them to invent layouts that document special events in their lives. My block, Puzzled Geese, is a tribute to my sweet mom. One of the things I fondly remember about my mom is that every fall, when the Canadian Geese were migrating, she would happily go outside to watch the V-formation fly overhead. We would listen to the encouraging honks and watch the geese fly through the gray November skies until they were out of sight. Puzzled Geese documents this cherished memory.

Puzzled Geese top assembled with sashing and cornerstones

To create my quilt top mock-up I inserted a picture of my block into Google Drawings and then used copy/paste to create the look of a completed top. It's a pretty easy way to get an idea of what a quilt will look like if you don't have access to design software. As I was moving the pictures around I decided that Puzzled Geese would look great with sashing and cornerstones. To accomplish this I simply used the drawing shapes to add the large black square, and the smaller gray cornerstones. Using the "order" command allows them to be layered over and under my pictures.

Another option is to make a table topper by using just four blocks. If the color placement is changed up it creates a friendship star in the center.

Puzzled Geese table topper

Giveaways:
Now it's time for a couple of giveaways! The editors of Quiltmaker's are generously giving one of my blog readers a free issue of 100 Blocks, Volume 16. Don't you love how they've varied the sizes of the block images on the cover? It reminds me of a modern sampler quilt.

Quiltmaker's 100 Blocks, Vol. 16

In addition to the magazine drawing, I'm going to give away this little fall-inspired scrap bundle. It's made up from scraps pulled from my stash (various sizes).

Scrap bundle

For a chance to win either the magazine, or the scrap bundle, leave a comment telling me about something that provided the inspiration for a quilt (or some other project) that you've made. I'll draw two random winners on Sunday morning, Nov. 18. Note: If you suspect you may be a "no reply" blogger please make sure to include your email address in your comment.

Well friends, thanks so much for stopping by and letting me tell you all about Puzzled Geese.  I'd love to see you back here again. If you'd like regular updates from Shadows of the Blue Ridge consider signing up for an email subscription (top right of your screen), or you can follow me on Bloglovin'. You can also find me on Instagram

I hope you soak in a lot of inspiration as you motor on through the blogs on the Road Rally tour. You can read about the tour and find links to the featured blogs on Quiltmaker's blog, Quilty Pleasures

PS. Honk if you like Puzzled Geese 😁

Friday, November 10, 2017

Fruits of a Productive Day

This past weekend my local quilt group met for a sew-in day. Wow! It's it's not often I have such a productive day. I knew this would be a great opportunity to join together blocks for the Faith Circle (do. Good Stitches) quilts I sponsored this year. I had set the blocks aside during our moving/unpacking journey, but now is the time to get these three quilt tops finished.

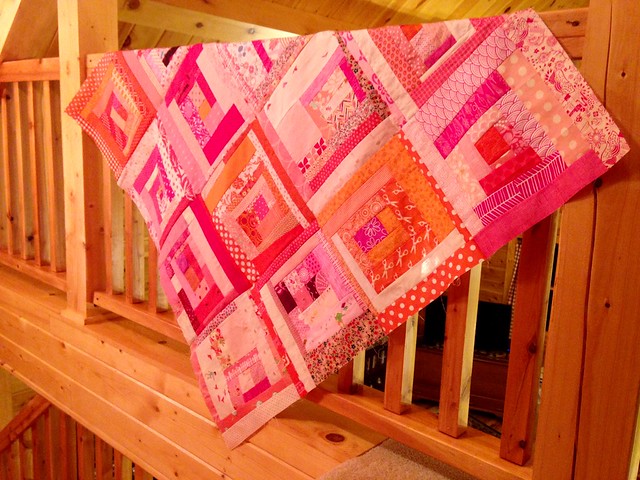
First I assembled tops from improve log cabin blocks. I asked the ladies to contribute blue/green blocks for a boy quilt and pink/orange blocks for a girl quilt. They did such a great job making the blocks fun and bright.

Untitled
Improve log cabin blocks for boy quilt

I had enough blocks to make a 36" x 48" top for a boy quilt. I may add borders to the sides of this one to make it just a bit wider.

Untitled
Pink/orange improve log cabin blocks for girl quilt

There were more of the pink/orange blocks, so this top measures out at 48" square. This will be a nice size for a young girl.

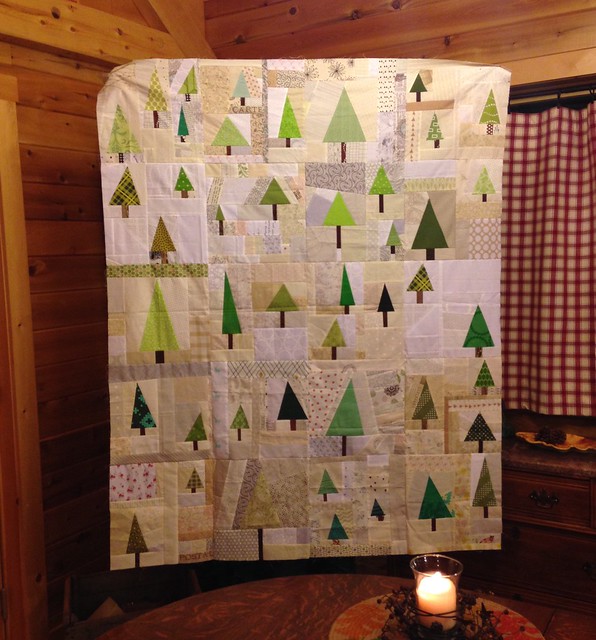
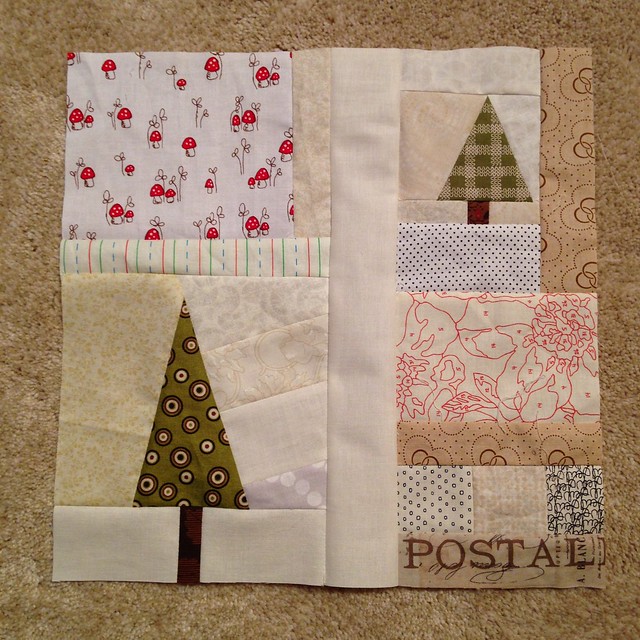
Finally, I joined the Scrappy Pine Forest blocks. I have to admit this is probably one of my favorite quilt tops. It turned out exactly as I was hoping, cozy and peaceful :o)

Untitled
Scrappy Pine Forest quilt top

How fun to have a quilt holder to help with this picture! My son and future daughter-in-law just happened to arrive while I was taking pictures and she asked if I needed some help. How wonderful she is ;o)

These three tops will be quilted up and then set aside to go to a Royal Family Kids Camp this coming summer. These camps are for children in the foster care system who often have little to no things of their very own. My local quilt group has committed to donating 40 quilts to be distributed to the children. I think it's a blessing that both my online quilt group (Faith Circle) and my local quilt group (Winchester Modern Quilters) are combined into this effort.

Now to keep the momentum going and get them sandwiched and quilted. Wish me luck!

As a side note: I'm trying to identify good photo locations in our new home. Log homes are interesting because all of the wood makes the lighting have golden undertones. These are my first efforts at photographing quilts indoors. I'll keep working with lighting and camera settings to see how to best take indoor pictures.

Wishing you a happy, warm, and productive weekend!

Saturday, September 2, 2017

Scrappy Pine Forest Block - Tutorial

As part of the Faith Circle of do. Good Stitches I choose the design for our quilt two times each year. Most of the time I lean toward a scrappy type of block because scrap quilts just speak to my heart. This month is no different. I have asked the Faith Circle ladies to each make (2) Scrappy Pine Forest blocks.

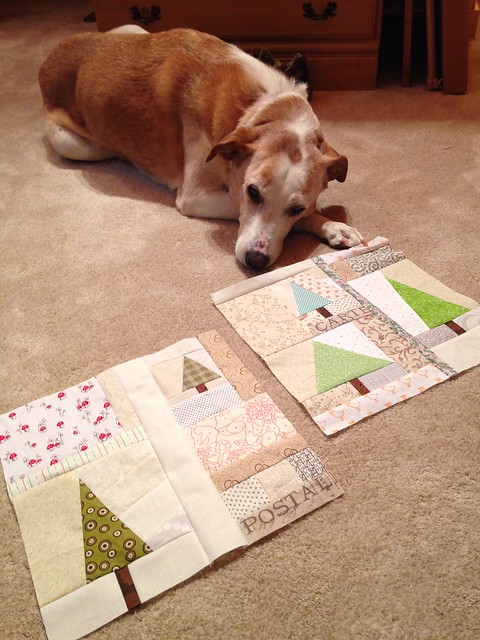
Shiloh in the pine forest :o)
My girl, Shiloh, looking over the Pine Forest blocks.

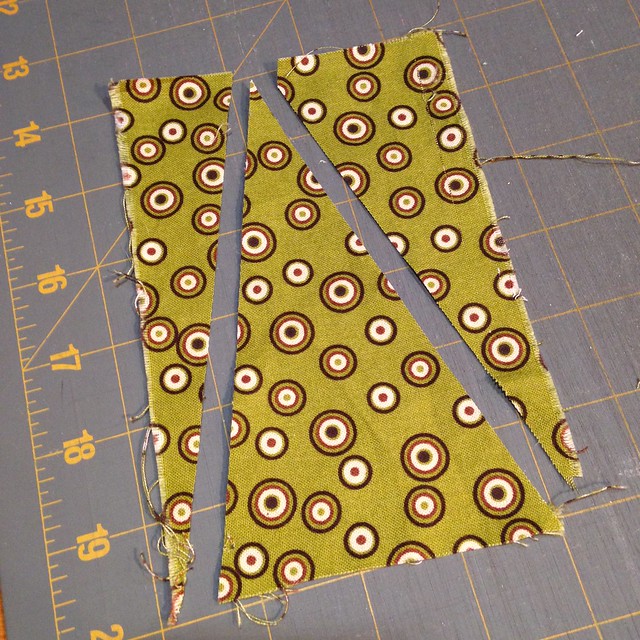
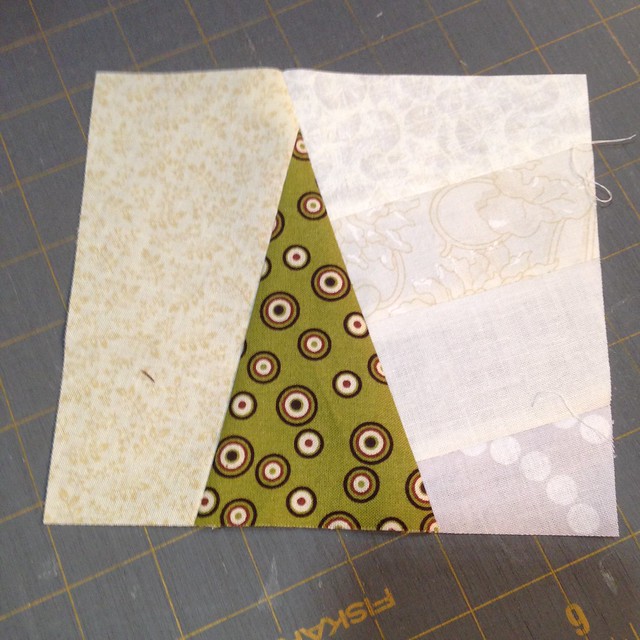
Here is a quick tutorial for how to make the pine tree part of the blocks. Start by pulling a scrap of green to blue/green fabric and cut it into a triangle.


Untitled
Cut fabric scrap into a triangle

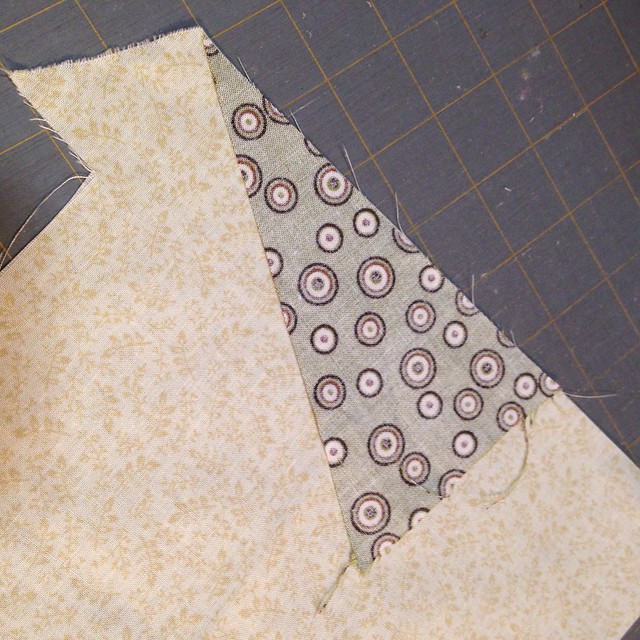
Sew the tree fabric onto a piece of background fabric.


Untitled
Tree fabric sewn onto a piece of background fabric

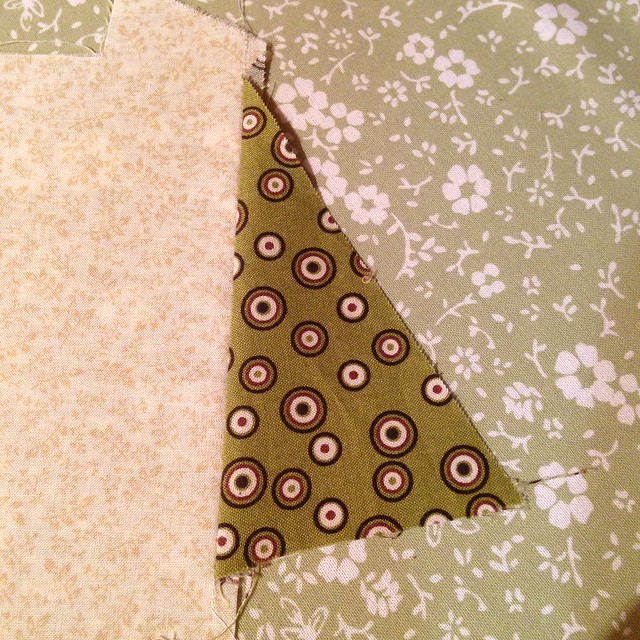
Flip the fabric over and press the seam toward the tree to make it stand out a bit.


Untitled


Sew fabric to the opposite side of the tree. When pressing turn the seam allowance toward the tree.


Untitled
Sew fabric to the opposite side of the tree

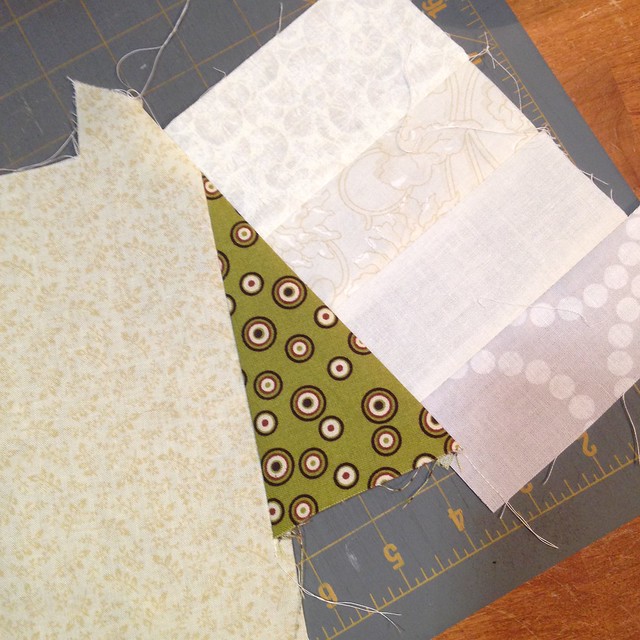
Trim up the side fabrics so the unit has a rectangular shape.

Untitled
Trim into a rectangle

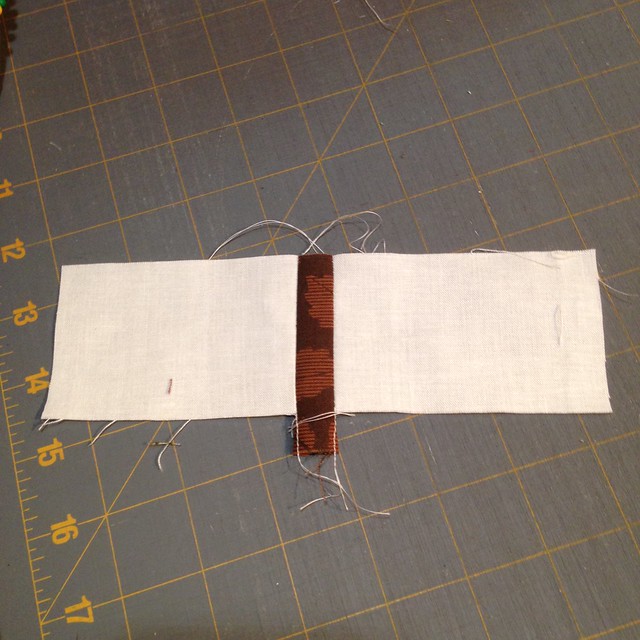
Make a tree trunk. I cut the brown fabric 1" wide.


Untitled
Trunk unit - brown fabric was cut to 1" wide before sewing

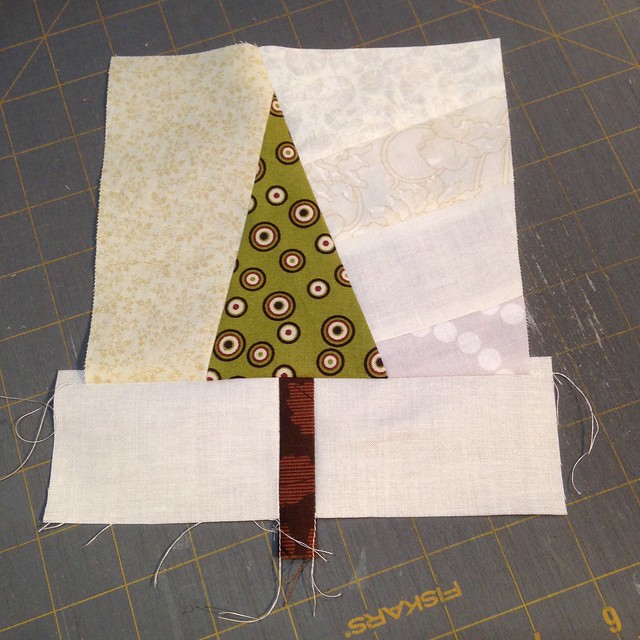
Finally - sew the trunk unit onto the tree unit and trim to a rectangular shape.


Untitled


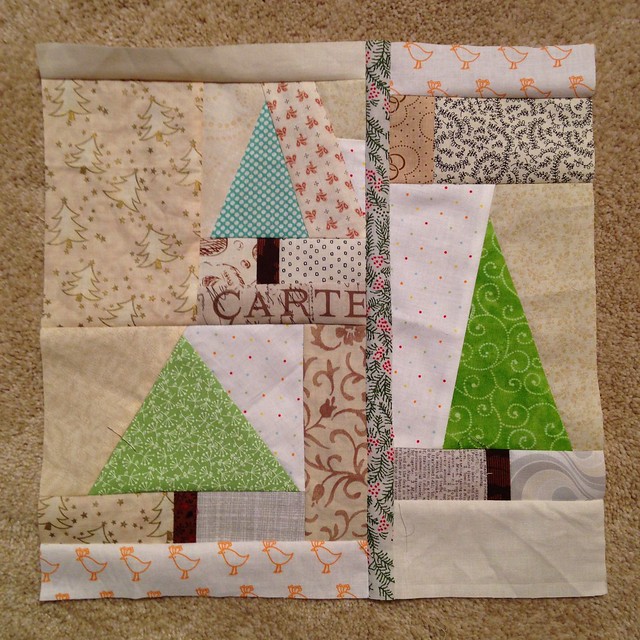
Use low volume fabrics (prints and solids) to finish making the blocks into a 12.5" square. Blocks can be made with as few as one tree, or as many as you'd like to include. Here are two samples I made up.


Scrappy Pine Forest

Scrappy Pine Forest


Hope you enjoy making Scrappy Pine Forest Blocks!


Monday, May 8, 2017

Blog Hop Wrap-up and Winners

Wow! As always Quiltmaker's blog hop was so much fun! I hope you enjoyed seeing all of the beautiful new blocks. If you end up making Boxed Star please tag me on Instagram, or flickr so I'll be sure to see it!

Boxed Star, Block No. 1477, Quiltmaker's 100 Blocks, Vol. 15

What an honor it is to participate in the blog hop. It's always so great to get to hear from so many readers and interact with you. I especially enjoyed reading all about your "silly" fears. Although, I'll be the first to admit that "silly" in no way means they aren't to be taken seriously, rather it means not something you'd immediately identify as causing someone anxiety. If you read through all the comments you discovered that many of us share the same fears. I found that to be both interesting, and comforting. We have much more in common with each other than meets the eye.

I promised to draw names for two winners using Random.org and I've already heard back from them both:

  • Winner of an issue of Quiltmaker's 100 Block, Vol. 15 (to be sent directly from the magazine editors) is Commentor No. 55, Beth! Congratulations!
  • Winner of a mini fat quarter bundle and Vol. 15 of Quiltmaker's 100 Blocks (to be sent by me) is Commentor No. 13, Quilting Tangent! Congratulations!

Both prizes should already be on the way. Thanks again for stopping by Shadows of the Blue Ridge, and I hope to see you again next time!

Happy quilting!
~Debbie