Showing posts with label Faith Circle. Show all posts

Saturday, January 6, 2018

Formulating a Quilting Plan

In my last post I made reference to joining in with Aby Quilts to complete an unfinished quilt each quarter. I'm actually hoping to complete three this first quarter - all of them for the Faith Circle of do. Good Stitches. Last year, with moving to our new home, I was able to coordinate the planning of these quilts from my circle, but not able to pull off getting them completed. Now that the new year is upon us I will be coordinating two quilts in 2018, so I need to get myself in gear and finish the 2017 quilts.

First up is the green and blue improv log cabin quilt. I am thrilled with how saturated the colors are in this quilt top. Yesterday I got it pin basted using a nice open space on the basement floor. It just took a little over an hour to baste this 48" square quilt. The challenge was to keep our dog from walking back and forth on it while I was working. At one point she even decided to lay down on it. Maybe that means it's snuggle worthy?
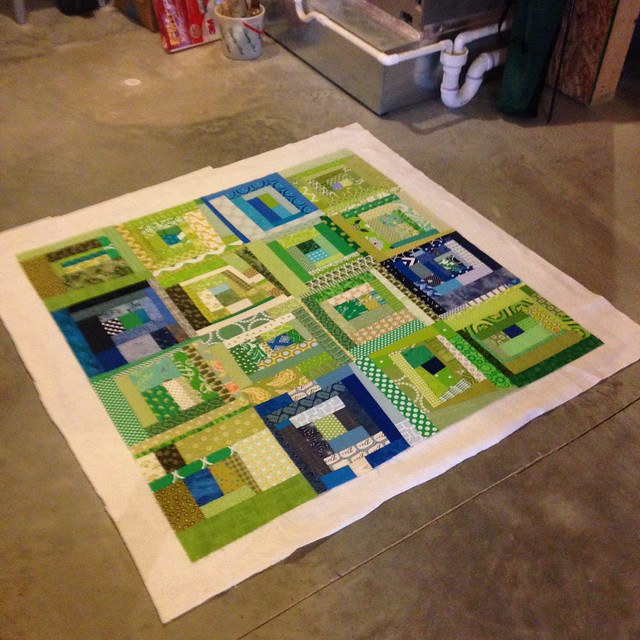
Sandwiching the quilt
All smoothed out and ready to pin baste

As it was spread out on the floor I mulled over how I'd like to quilt it. Options considered include:
  • Edge to edge straight line quilting using painters tape as a guide
  • Grid quilting using painters tape as a guide
  • All over meander/stipple and possibly include loops
  • Flame/wood grain quilting the individual squares
It's been a while since I've done any free-motion quilting so I think it's time to give it some practice again. As I've written about before, I have a pretty small Janome domestic sewing machine. It can be a challenge to use it for quilting; however, for the most part I've been pretty happy with what I've been able to do with this machine. I decided to try the flame/wood grain design in each individual square. This saves me from having to feed large sections of the quilt through my machine as I will only be working on one square at a time. I'll start by stitching-in-the-ditch along the seams where the blocks are joined. This will stabilize the quilt sandwich, and allow me to stitch along this same line as I work back and forth in the wood grain design. 
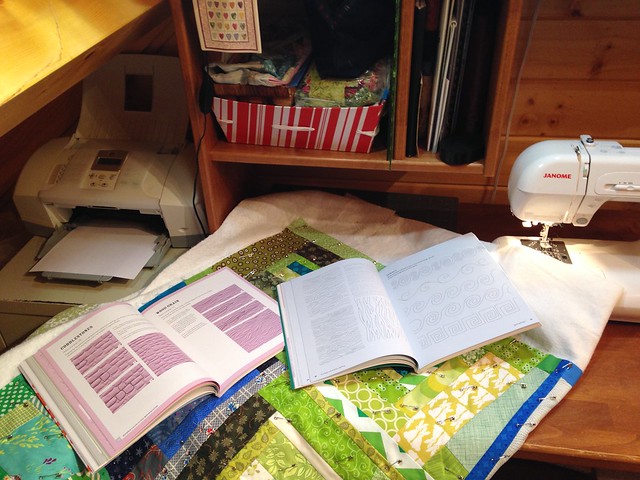
Planning out the quilting design
Searching for quilting options in my reference books

I have a couple of great books I've written about before that are so helpful with learning about developing the skills needed with free-motion quilting. I pulled them out along with an old composition book (left over from my son's schooling days!) and practiced sketching out the design.
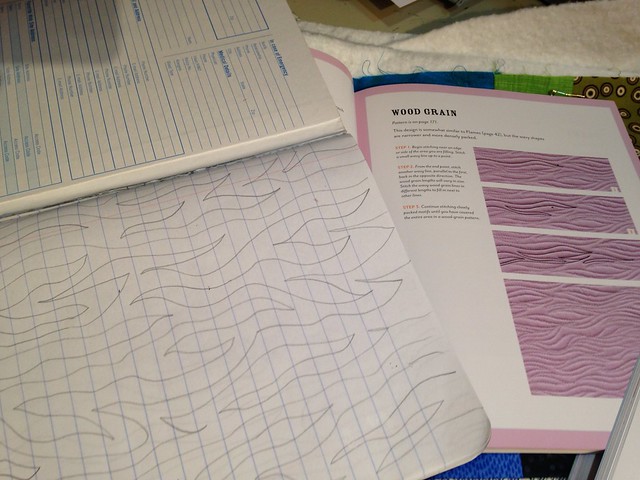
Practicing my quilting design
Sketching out the wood grain design


I'm thinking I will alternate the direction of the wood grain stitching from block to block. I also plan to use up various shades of blue and green thread I was gifted from a friend whose mother used to quilt. Here's to a good plan, now wish me luck as I get started! 


Wednesday, March 15, 2017

Quilt of Valor - Faith Circle

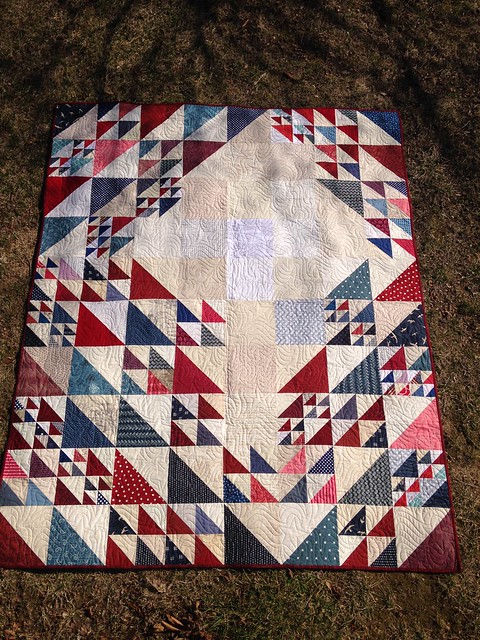
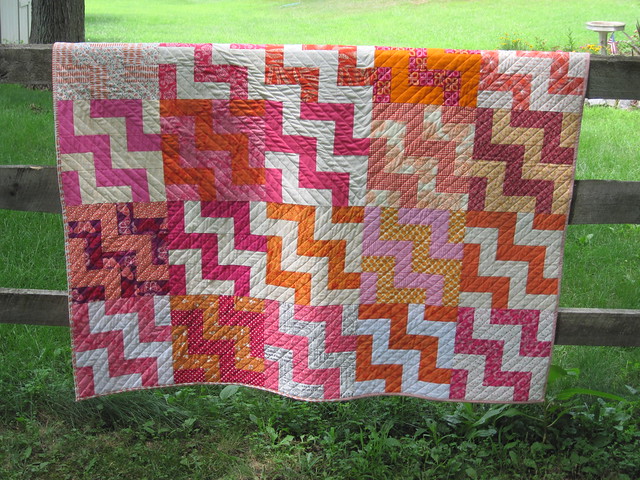
Twice a year I have the opportunity to select the quilt design and recipient for one of our Faith Circle quilts. Last fall I knew my turn was coming up, and I knew who I wanted to make a quilt for - a special soldier who fought for our country in Iraq. I have such respect for the Quilts of Valor Foundation as they strive to wrap in love members of our armed forces who have been touched by war.

Quilt of Valor - October 2016 quilt
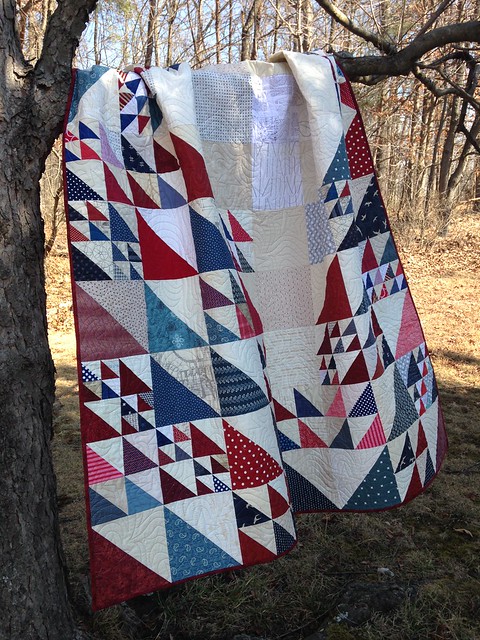
Quilt of Valor

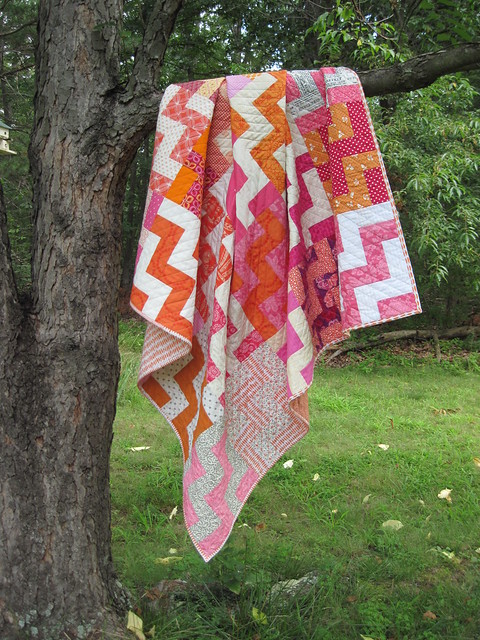
Quilts can often have a more feminine look to them, so I did quite a bit of looking to find a pattern/design with a more masculine appeal. As soon as I saw this quilt designed by the talented Ara Jane Olufson I knew it was the right one. She happily granted us permission to use her design for our quilt.

Quilt of Valor - October 2016 Faith Circle Quilt
A bit of breeze to add movement


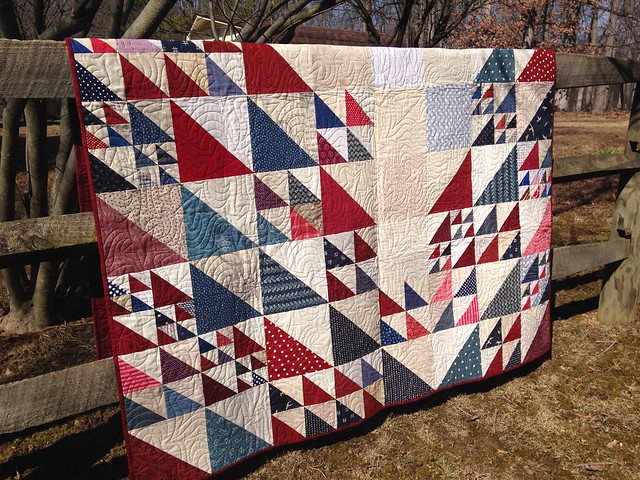
The Faith Circle ladies were so wonderful to make extra blocks and send fabric squares so that our quilt would be of a nice size. It ended up at 64" x 80" before washing. Perfect size to snuggle up on the couch with!

Quilt of Valor - October 2016 Faith Circle Quilt
This picture shows off the nice texture added by the long arm quilting

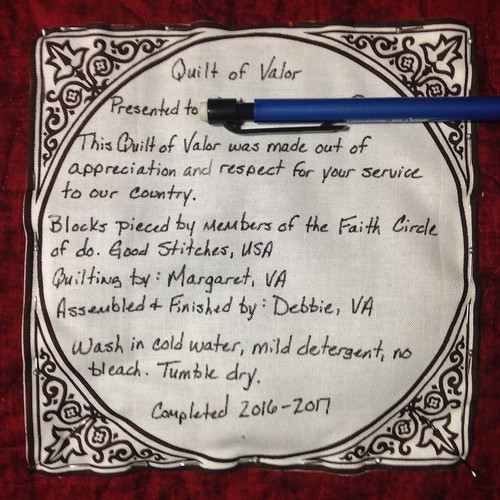
The long arm quilting was graciously done by a local friend - we agreed that an all over star pattern was the best choice.  The Quilts of Valor Foundation has guidelines they request you follow for all quilts, and included in that is the label. I usually struggle with what to put on a label, so I found their guidelines to be very helpful.

Faith Circle Quilt Label
I used a Pentel Gel Roller for Fabric pen to make the label

This was a very satisfying quilt to work on and finish. I hope it will be a blessing to it's intended owner.

The Faith Circle is a virtual quilt group operating under the guidelines of do. Good Stitches. If you are interested in finding out more, or joining, you can do so here.

The mission of the Quilts of Valor Foundation is to cover service members and veterans touched by war with comforting and healing

Wednesday, December 30, 2015

Final Finish for 2015

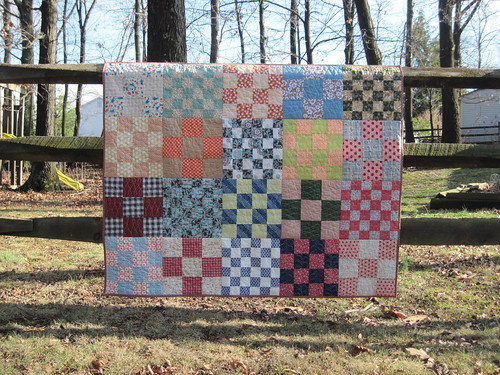
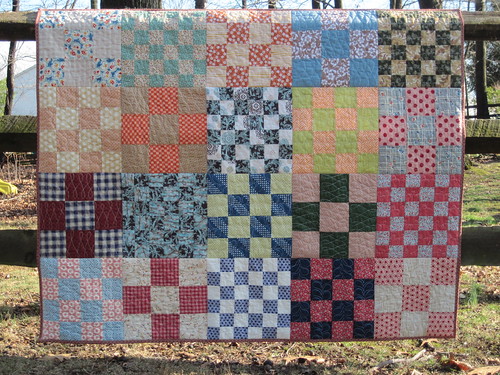
Great grandmother's patchwork quilt - not the typical quilt you see me working on for the Faith Circle of do. Good Stitches.

Great Grandmother's Patchwork ~ a Faith Circle quilt

Early in 2015 it was my turn to choose the design for the month of March. I got it in my mind that I'd like to go with sweet and easy, but with a twist. Instead of all the blocks being the same I asked my circle mates to sew a mix of 9, 16, and 36 patch blocks. Here are the instructions I gave them:

This month I'm going to turn us temporarily away from our usual modern quilts and head, instead, in a "passed down through the generations" look. I'm calling it Great-Grandmother's Quilt. I've no idea how this will look actually made up, but we are going to give it a whirl and find out :o) ...please use fabrics with a tan/grayish undertone. 

Great Grandmother's Patchwork ~ a Faith Circle quilt
Beautiful old-timey quilt blocks

One of the circle members reflected that her blocks reminded her of the house dresses her Grandma used to wear - Perfect!! As you can see they did a great job on these blocks - a great way to practice that ever-important 1/4" quilt seam.

For this quilt I used the quilt-as-you-go method of assembly. This was a first for me and I'm going to write about it in a separate blog post soon so stay tuned.

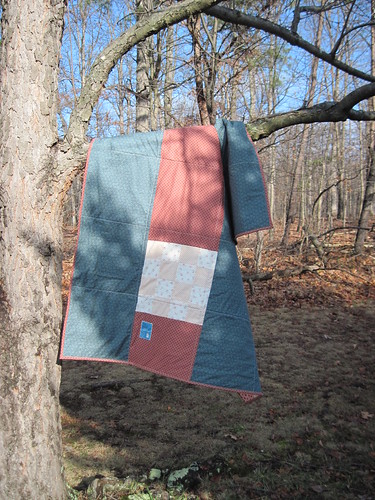
For the quilt back and binding I used a couple of Thimbleberries prints that have lived in my stash for a while. This was the perfect project to put them to use. In addition, I had one extra block left from the front that I included...my motto: leave no blocks unused.

Great Grandmother's Patchwork ~ a Faith Circle quilt
Thimbleberries quilt fabric on the back

I am so happy to have this one finished and on it's way to Restore Innocence - an organization providing aid to the victims of human trafficking. I hope that as it is used it will bring comfort and perhaps a sense of endurance and grit passed down from those who came before us.

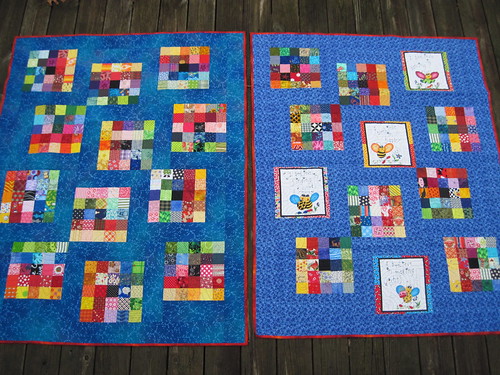
I'd also like to share two quilts made by my local quilt group, Winchester Modern Quilters. These quilts are also on their way to Restore Innocence. They were created from Quilto (Bingo) squares we used in one of our meetings. One of our members then took the squares and created these two cheerful quilts.

Bingo Quilts by Winchester Modern Quilters
Bingo square quilts - Winchester Modern Quilters

Hoping, as we transition to 2016, you enjoy a year of making meaningful gifts for those you love and hold dear. Happy New Year!

Monday, July 27, 2015

Social Climber - Faith Circle Style

I just finished reading a post by Debbie at A Quilter's Table about how quickly a quilt can be made from start to final binding stitch. It seems that 7 hours is a real possibility for a baby quilt. Contrast that with my decidedly un-quick work on the Social Climber quilt. The Faith Circle ladies stitched up the blocks last October and mailed them off to me. At that same time I was spending every free moment working on the Snowflake Among the Stars wedding quilt for a dear couple. It had to be ready for a December wedding date. Then, of course, came Christmas and New Years - not a good time for finishing large quilt projects. As soon as the holiday season was over I knew I'd need to dedicate all my time to completing Mixed Flock in time for the Northern Shenandoah Valley Quilt Show in April. Fast forward to the end of the school year and another wedding gift (soon to be revealed) and Social Climber was just not getting the attention it so deserved.

Well, I'm so pleased to be able to say Social Climber is now complete!

IMG_2992
Social Climber - pattern by Villa Rosa Designs

With a burst of dedicated effort I was able to finish the quilting, binding, washing, and photographing in a two day period. How's that for getting a second wind on this project?

My inspiration for the quilting came from a Craftsy class I bought, Creative Quilting with Your Walking Foot, taught by Jacquie Gering. One of the lessons teaches how to do sectioned curves. Needing something a little more at my comfort level I divided quilt into three sections and did straight line quilting instead of curves. I used masking tape to space the lines at 1" intervals - just moving the tape with each line of quilting.

IMG_2995
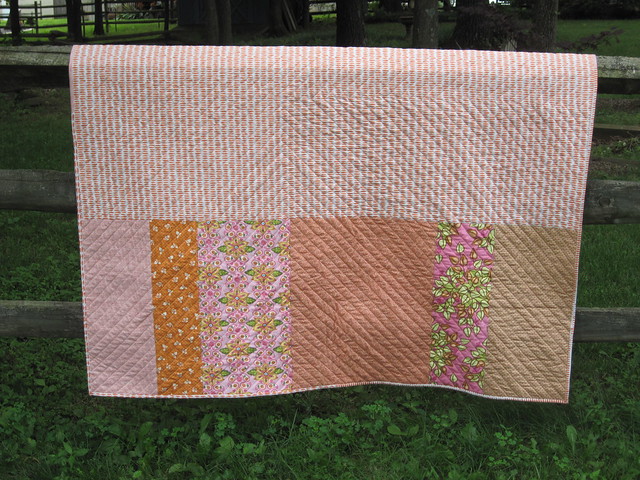
Pieced back for Social Climber

For the back I used one large piece of My Sunshine, a Riley Blake Designs fabric and then finished out with several smaller cuts from my stash. This photo of the quilt back also shows the quilting better. I was looking through my stash trying to find enough fabric to do the binding, however there just was nothing that would work. As I trimmed down the quilt top I noted that there was significant backing fabric on all sides being cut away. It turned out I had enough fabric to cut down into binding strips - Hooray! No extra scraps created!

All in all this turned out to be a lovely quilt and I'm so happy to have it finished!

IMG_2994


In the interest of ensuring a sturdy binding I machine stitched it - folding to the front so I could make sure it had the best results possible. I went ahead and used straight stitching and although not perfect, it's not bad! My sewing skills have greatly improved since my last attempt to attach a binding using this method.

The Faith Circle donates it's quilts to Restore Innocence. A Colorado based non-profit which aids in the restoration of young women rescued from human trafficking. You can read more about them here. Thank you Faith Circle ladies for your work on these blocks - you're a great group of ladies to sew with :o)

Thursday, February 26, 2015

The Gauntlet Has Been Thrown Down

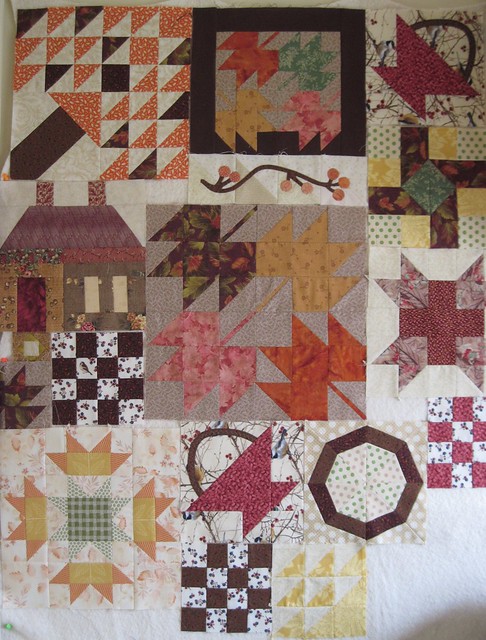
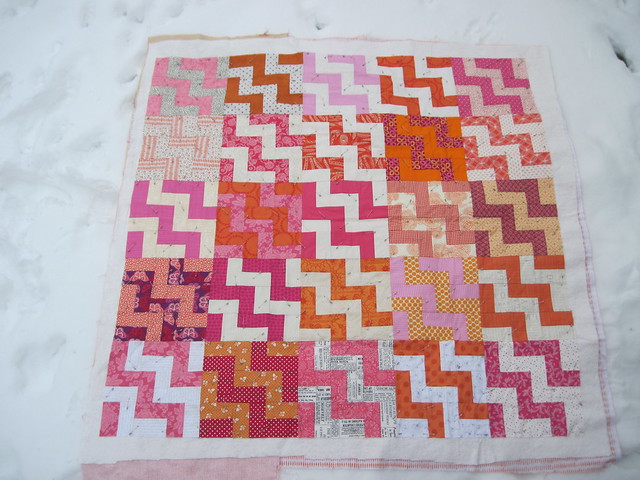
About a month ago I posted this picture on Instagram of blocks hanging on my design wall. These blocks belong to a quilt project named The Random Sampler. It was a quilt-along begun by my friend Anita from Bloomin' Workshop. Several of us started these blocks back in 2012 and to my knowledge only Lotje ended up with a finished quilt.


Random Sampler~Progress Shot
Random Sampler quilt blocks

Anita suggested we all pull our blocks back out in March and cheer each other on to a finish - effectively throwing out the challenge to the rest of us slackers :o) Now I have to admit, I love working on blocks for this quilt because I can toss in anything and everything I feel like making. And, this is a quilt I am making for myself so there is no right or wrong. Funny - We don't have any quilts I've made, except for a few small wall hangings, so this will be the first large-ish quilt I'd finish for our home. There are two other unfinished quilts that are also supposed to be for us. Seems the only quilts I manage to finish are those intended for others.

As much as I'd love to dive in and work on my Random Sampler I've got two projects I should finish first. I've been so good at working my way through the To Do list I wrote up some time last summer and I'm down to just the two quilts. Here they are:

Social Climber is another Faith Circle quilt destined to be sent to Restore Innocence. This quilt is pin basted and ready for quilting. As of yet I have not decided how to quilt it...any suggestions are most welcome! Feel free to leave them in the comments. 


Faith Circle Social Climber - pin basted
Social Climber ~ A Faith Circle Quilt

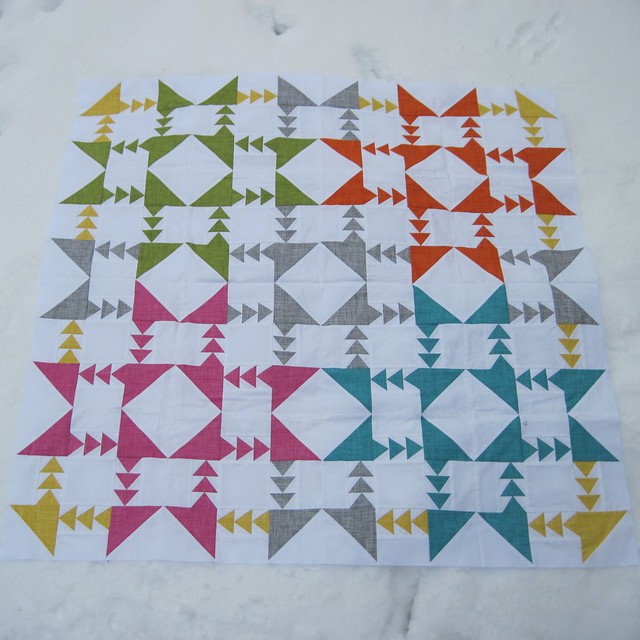
Then, I'm on a tight schedule to finish up my Mixed Flock quilt for a local show coming up in mid-April. I don't think I've introduced the Mixed Flock top on the blog...this is my original design using the Dashing Geese block I created for QuiltMakers 100 Blocks magazine, Volume 9. However, Mixed Flock puts a completely different spin on the block by mixing up the color placement. 


Mixed Flock - progress shot

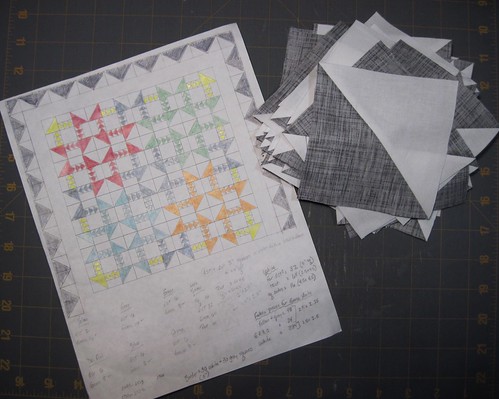
I'm hoping you can see four large, bright "interpretive" stars, and one gray star, too. In a way I think Mixed Flock has a bit of a Southwestern look to it. I'm in the process of piecing the outer borders to finish the quilt top. Here's a sketch to show where I'm heading with the final design:


Mixed Flock - the plan

So, the question is, "Will I be picking up the Random Sampler gauntlet?" Many times what I should do, and what I end up doing, are two different things...we'll see how the month of March plays out :o) 

What would you do?

Saturday, March 1, 2014

Tutorial: Wonky Disappearing 4 Patch

For awhile now I've wanted to try my hand at writing a tutorial. This month I am the quilter for the Faith Circle March quilt which means I'm in charge of selecting the quilt block, the color scheme, directions, and once I receive everyone's blocks...final assembly of the quilt. So, this is a nice opportunity to try writing a tutorial. 

Tutorials are an important part of the Modern Quilt Movement. Sharing information with one another through social media has helped fuel the growth of modern quilting. Most of my quilting knowledge has been gained via the excellent tutorials I've followed on blogs. Two talented tutorial writers who come to mind are Anita @ Bloomin' Workshop, and Rachel @ Stitched in Color. I always learn something new about quilting when I follow along with their detailed instructions.

The block I chose for the Faith Circle March Quilt is a wonky block. Wonky can translate into lower stress quilting because there is not as much pressure to have everything match up just so. This tutorial will produce two matching Disappearing 4 Patch blocks.

Please note: I am not the creator of this fun block. I just wanted to try my hand at writing a tutorial and thought this would be a good opportunity since I needed to provide instructions to the Faith Circle for our March quilt.


Wonky Disappearing 4 Patch

Since it is almost Spring I want to use softer colors for the Faith Circle quilt to go along with the season. 

Color Palette

If you have a Kona Color Card here is a list of colors that match up with my fabric samples...sometimes it's hard to tell color shading on a computer screen.

Colors:

  • True white (please do not use off-white)
  • Salmon
  • Mango
  • Banana
  • Azure
  • Pistachio
The fabrics can have any scale for print size, but please do not use solids except for the white. Prints can be tone-on-tone or have small bits of other color, but overall the fabric should "read" as the colors shown/listed above.

Wonky Disappearing 4 Patch {D4P} - Tutorial

Fabric Squares
Materials

(4) White squares cut 7" x 7"

(4) Print squares cut 7" x 7"

(Note the squares can be cut to any size depending on your how large you want your final block. For this quilt the Faith Circle will be using 7" x 7" blocks.)


1. Sew one white square to each print using a 1/4" seam allowance. Press seams toward the darker fabric.

2. Take two of the sewn units and sew them together with the colored fabric rotated to opposite ends. Take care to match up the center seam.

Matching Seams

3. I like to pin generously. I find I get much better results from my sewing if I pin...especially when matching seams.

Ready to sew seams

After stitching I iron this seam open to reduce bulk at the intersection of the center seam. Now there are two 4-patch quilt blocks.

4. Lay the blocks out on a cutting mat, one on top of the other. However, rotate the top block 45 degrees so a white section is over top of a print section on the block below (see picture).

Rotating Blocks

Try to make sure the seams of the top block are lined up directly over top of the seams in the block below (both horizontally & vertically). Now we are ready to make some wonky cuts using a long ruler.

Measuring for cuts  

5. Using a long ruler measure over from the center seam. The cut will be a wonky one, not completely parallel with the seam. Do not go over more than 2" from the center seam, nor less than 1". A good tip to keep in mind is, "A little wonky goes a long way." So, I try have about a 1/4" difference between the top and bottom measurements on the ruler. 


Squares all cut

6. Make a total of two vertical cuts and two horizontal cuts.

Swap pieces

7. Now take the four pieces indicated with red arrows and pull the stitched unit from the bottom and put it on top. 

8. Stitch the rows of the block back together using a 1/4" seam. Iron the seams toward the darker fabric. Keep in mind that since the cuts we made are wonky the pieces will not align perfectly.

Aligning pieces

Line up the "inside" edge of each piece as best you can and allow the edge which will form the outside of the block to be off.

9. When working with the center sections I do pin to match up the seam at the center intersection as I think this makes the final block look neater once it is completely assembled. I iron these seams open to reduce bulk.

Matching seams

10. Once the three rows are joined then finish final assembly of the block. Iron these seams open to reduce bulk.

11. Once the blocks are reassembled they should look like "twins" however, the color placement will be opposite each other. Because the block construction is wonky the blocks will need to be trimmed down to the desired size. Use the horizontal and vertical seam to center your blocks as you square them up.

Faith Circle: please do not trim or square-up your finished blocks. Send them to me as is and I will trim as I construct the quilt top.

I hope you found this to be an easy, fun block to construct! Here is an example of what the layout for the Faith Circle quilt may be:

Finished Wonky D4P Blocks

I look forward to seeing some Wonky Disappearing 4 Patch blocks cropping up this Spring! Happy sewing :o)


Thursday, February 13, 2014

Clever?!

Do you ever marvel at the clever creations found all around us? It can be seen everywhere. For example, here is a fabulous succulent wreath from the Christmas display at Longwood Gardens in Pennsylvania. This wreath is so amazing because of the the precise placement of texture and color...so clever!


#longwoodgardens Succulent wreath

Debbie of A Quilters Table is the host for the February Faith Circle quilt. She selected the Vice Versa block by Gen X Quilters. This block design is just so clever! I love it :o) Here are the two I made for our bee quilt:


vice versa block

I look at things like this and I wonder...how did AnneMarie think of this? Was it a sudden inspiration or did she ponder, sketch, cross out, and finally arrive at this Vice Versa block? She says blocks for this series were studied for positive and negative space and the inverse relationship that can be created. Clever, clever, clever. 

In one of my previous posts I mentioned my desire to someday be a designer. I've tried a bit of designing while crocheting socks. I've combined toe, heel and cuff construction from various patterns, and used my favorite stitches for the foot and ankle/leg sections to make these socks. 


New Socks :o)
Socks I made for me :o)
Mean Green Hunting Socks
Socks made for my brother-in-law :o)
It's been fun (and at times frustrating) and takes me quite a while to get a finished product that actually fits. I find that one of the hardest parts of the design process is writing down what I did so I can actually replicate it again. I might call this mish-mash of sock parts a kind of franken-pattern for socks (taking from several different sources), but is it clever? I don't know. 

Back in the fall I started sketching out some ideas for my own quilt block design and then creating layout options for it. I've found that it take time, and it takes quiet. One of my layout options is pretty straight-forward and what might be expected of the block, but dare I say it...I think my second layout option just might be clever :o) It will be fun to make up these quilts and see just where they stand. 

Meanwhile, here are a couple of pictures from the huge snowstorm we had today. I just love snow and never tire of the beauty and wonder it creates in the world. Enjoy!


February snowstorm

February Snow


Sunday, January 12, 2014

Exciting Big News...

Okay, okay...it's really little news, but may grow into something big :o)

For quite a while now I've been mulling over joining a quilt guild. Here, where I live, in the heart of Civil War country, modern quilting is really not the vogue. There are several traditional guilds in the area with lovely quilters which I am not opposed to joining. However, most of them meet on weekdays during the hours when I'm at school (I'm a teacher) so that makes involvement with them pretty much impossible. There is a modern quilt guild that meets about an hour+ from where I live (big Shout Out to the NOVA Modern Quilt Guild!) who is just now officially joining The Modern Quilt Guild...Exciting! But, distance can become an issue. 

I've so enjoyed getting involved in the online quilting community and finding my little niche through flickr, instagram, and do. Good Stitches.  But, I would love to get to know some quilters in my own community and enjoy some face-to-face camaraderie. So...here's where the exciting news comes in! 

Yesterday I was talking to my friend, Kelley, owner of The Scrappy Apple quilt shop and we discussed trying to begin a guild for local modern quilters! We are aiming for an inaugural meeting the third Thursday in February. I'll keep you posted!!

Now, since no blog post should be without picture, I'll include my latest picture of the Faith Circle Row Quilt for do. Good Stitches. 

Quilting is finished!


I just finished free motion quilting it in a meander stitch. I am happy to say I actually enjoyed free motion quilting this quilt! Hooray!! It's taken several quilts for me to reach this comfort level and I'm so happy to get to this point in my skills! Next up is some hand stitching around the word "hope" with yellow #8 perle cotton. After that just the binding is left.

Happy stitching!

Monday, January 6, 2014

Basting Tools

Progress on the Faith Circle Row Quilt has reached the point of pin basting. Wow so many pins are used in the process of basting a quilt!


It can be pretty hard on fingers to close all of these pins as they are put into the quilt sandwich. I was wishing I had one of the tools people use to close pins. I've tried using a spoon in the past, but was not totally sold on that method. As I was thinking about this I tried to come up with something I might already have on hand to help close the pins. I got to thinking about the sharpener for my kitchen knives, but it was too large in diameter. Then, I thought of the awl-type tool I have for use with beads. it worked great! 


This is actually called a Bead Reamer and is used to enlarge and round out the opening in beads. However...it is also perfect for closing basting pins!


The texture of the tool really makes it easy to use with the pins! It really helped to make quicker work of basting this quilt!


Do you pin baste, and if so, how do you close the pins?

Friday, January 3, 2014

Setting Goals

With a new year comes the promise of fresh starts...and hopefully, for me, several finishes! I've decided to jump on board with the wonderful group of quilters participating in A Lovely Year of Finishes as it fits right into what I've set before myself to accomplish. When I look around my sewing room I don't want to see so many unfinished projects...and so much fabric just sitting there. I just don't think these things lend themselves to being a good steward of the things I've been blessed with. 

A Lovely Year of Finishes encourages a goal be set to finish at least one project each month. At this point in time I have enough unfinished projects that I don't need to begin anything new in order to come up with 12 finishes for the year. My January goal is to complete the September Faith Circle quilt for do. Good Stitches. (I wrote about this row quilt in my previous post.) 


Often, by the time it comes to the quilt back am ready to just be finished with the quilt and begin something new. While I do love a scrappy back I challenged myself to come up with a design that would allow me to use fabric I already had in my stash. I started by doing a search in the flickr Quilt Backs group to find some inspiration. I found several pictures where the quilter had created a plaid design with fabric and I really liked the look. Next I got out my sketch notebook and worked out a plan:


Working out the measurements is not a strong area for me and I was a bit nervous I would get the back finished only to discover I'd made a mistake. I'm happy to report that I got all of the dimensions correct and now have a completed quilt back made entirely of stash fabric!

I'm so excited to have actually planned out and completed my own quilt back! Whenever people talk to me about things that I've made I am quick to point out that most of the time I am just following a pattern and it is the designer of that pattern who is truly the talented one. I'd love to be a designer one day...maybe with this quilt back I can now say I am :o)

I'd love to hear about something you've designed!

Wednesday, July 24, 2013

Measuring progress & fun new swap!

Little by little I'm making progress on the scrappy triangles quilt. I've had some requests to see a picture of the entire quilt back so here it is. 
May Faith Circle Quilt Back
It's quite bright and I hope cheerful! I bought the butterfly fabric because butterflies are the symbol for Restore Innocence. I knew I'd like to try my hand at some improve piecing so I bought 1.5 yards of the butterfly print and added additional fabrics from my stash. I'm hoping the finished product comes across as modern and fun. 

IMG_2169

In case you are wondering I ended up using spray basting. It's just so quick! I had the backing, batting, and top laid out and basted up in about 30-40 minutes...so fast! When the weather is nice I spray baste outside on our deck. I sweep it off well and then have a nice large area to work on. 

Free Motion Quilting on a home machine

Before I started quilting I did a quick refresher on free motion quilting using a home machine since I've not done it in a while. I really like this great tutorial posted by Oh FranssonIt's a learning process to quilt on my home machine. I have a Janome DC3018 sewing machine and I really like it. It's not one of the large Janome machines which makes it a bit of a challenge during the quilting process because the harp opening is quite small (just 4.5" x 6.5".) This causes a lot of "stuffing" when trying to move the quilt around while meandering/stippling. 

Quilting close-up
It's hard to post this close-up picture because the "oops" areas are glaring out at me. As you can see it's not perfect, but hopefully the young lady who receives this quilt will know it was made with love and that things in life are rarely perfect. Just a few more quilting sessions and I should have this quilt all ready to bind!
Fat Quarter Blender Swap
I'll leave you with this announcement...there's a fun new swap if you're interested! flickr member, Rockislander, is putting together a Fat Quarter Blender Swap.  Requirements are basically to have a flickr account and agree to the swap rules.  All of the details can be found here

Monday, July 22, 2013

Oh those quilt backs

The sticking point for me on most quilts ends up being the quilt back. By the time I get to this point I'm just ready for the quilt to be finished. I often turn to the Quilt Backs flickr group to find inspiration. This is the back for a quilt I am making for the Faith Circle of do. Good Stitches.

The final yard.

The front is called Scrappy Triangles. Each of the ladies in the Faith Circle made triangles using scraps from their fabric stash. This quilt is a good way to put tiny fabric scraps to good use. This fun block was designed by Ashley who blogs at Film in the Fridge. The tutorial can be found here

Scrappy Triangles Top~May, do. Good Stitches

Next up is the basting process. I'm still mulling over pin basting or spray basting. I really like how securely the quilt is held together using spray, but at the same time it leads to a more "structured" feel when quilting. I've toying with idea of doing an all over stipple pattern. I've never done free motion quilting (FMQing) on a quilt this large and I'd kind of like to give it a try. If not, there is always straight lines...I like them, too!

Here's a scripture verse to inspire me to finish this quilt...maybe it will inspire you, too!
Better is the end of a thing than its beginning...  Ecclesiastes 7:8a

Thursday, July 18, 2013

Doing good stitches...over a lifetime

In truth I can't remember when I was not sewing, crocheting, and quilting; it seems like I've been doing these things all my life. When we were growing up my mom taught my sister and I how to sew clothes for our Barbie dolls, make bean bag toys, and crochet scarves. Next came 4-H and learning to sew culottes-anyone remember those? Later was junior high home economics class with Mrs. McMurtray. She taught us how to cook without actually touching any of the food (a practice I do not continue) and how to sew tea towels and skirts. My skirt was a lovely burnt orange ultra suede wrap around - documented in a photograph that I cannot locate...too bad, I know :o)


Cross Stitch & Needlepoint


     Next came years of cross stitch and needlepoint. Just like with my quilts I have projects in various stages of ever being finished. For a time the go-to wedding gift was a cross stitch sampler. 


Working on the tulips cross stitch
I was so proud to make my mom the cross stitch tulips. I secretly worked on it while at college. Now that she is gone it has found it's way back to me.

Then, combined with lots of gardening and computer work, my hands began to suffer fatigue. So, I pulled out my $99 Singer sewing machine and decided to try a log cabin quilt. With some help on fabric placement from a new neighbor I made my first quilt top (no picture, darn!) It was a Christmas present for a dear friend who I knew would graciously receive it - wonky sewing and all. Not having any idea how to quilt it I tied it with red yarn. 


Quilt blocks for Faith Circle of do. Good Stitches
Fast forward about 15 years and I'm still quilting. It was my desire that God could lead me to use quilting and sewing as a way to be His hands and feet in this world...even in very small ways. One way I've been blessed to be able to do this is through the Faith Circle of do. Good Stitches a virtual bee. Through participation in this group I've been a part of 20 quilts so far. Initially the Faith Circle made quilts to meet needs found in our local churches. Earlier this year we adopted Restore Innocence as the recipient of our quilts. "Restore Innocence restores victims of child trafficking back to the innocent children God created them to be." -quote from the Restore Innocence Web site. 

do. Good Stitches is the brain-child of Rachel of Stitched in Color and I believe there are currently 19 circles - including international! Periodically, as members come and go, there are openings in the current circles. In addition, when there are enough quilters, Rachel will begin a new circle. If you are interested check out the information here