Showing posts with label handwork. Show all posts

Wednesday, November 26, 2014

Debbie's Sewing Class :o)

Untitled
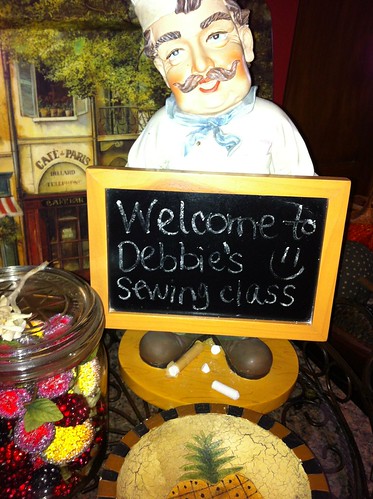
Welcome to Debbie's Sewing Class :o)

I don't think it's a secret to anyone who reads my blog that I love doing hand work. We live in such a busy world and often I find myself compelled to finish things as fast as I can in order to begin the next new project. Hand work slows all that down. Sitting quietly and focusing on the small project between my hands brings such peace and allows time for reflection.

A few years ago my dear friend, M, and I decided to choose a project to work on that would encourage us to schedule time to get together and invest in our friendship. Life can get so busy that having a reason to get together helps make it happen. We chose this beautiful Poinsettia Basket pattern Leah Smith of The Country Cupboard. As we worked our way through this pattern I taught M how to do the blanket/buttonhole stitch on wool felt.
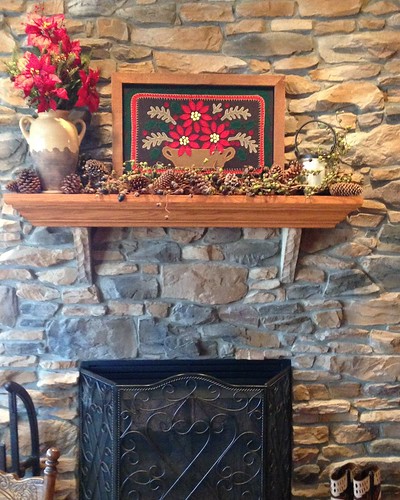

The picture that inspired the class
This beautiful fireplace is at my friend, M's, house.

Each Christmas M displays her lovely wool felt picture on her mantle where the beauty of the pattern has drawn many admirers. (Her husband made the great frame for her picture!) This fall M asked me if I would teach a wool felt class to friends and family and we chose a Saturday morning in November. 

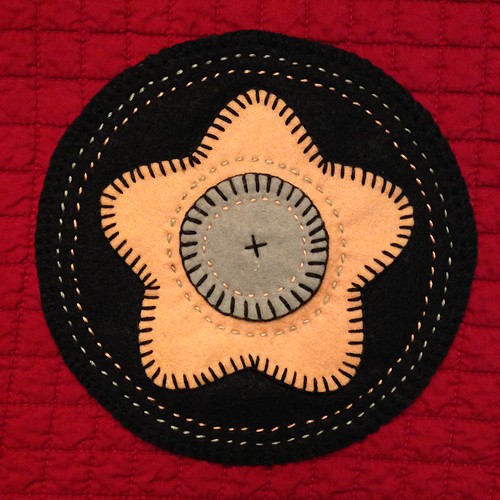
I set about working on a pattern to use as I taught the basics of making wool felt pictures. I wanted the design to have gentle curves with no sharp angles so first time stitchers could build their confidence. Using round objects from around my home and a star-shaped cookie cutter I came up with the following pattern:

Untitled
Wool star candle mat.

These small candle mats use both the blanket/buttonhole stitch and a decorative running stitch. The circles and chunky star are so easy to stitch and I like how the running stitch adds to the texture. We had several different colored pieces for the students to choose from. 

I was a bit nervous teaching eight people at the same time how to hand stitch, but they were great students! It turns out that previous experience mending soccer shorts translated right over to working with wool felt for my friend, R. He happens to be my supervisor when I'm a technology resource teacher at school...I thought we should just use this sewing class for my formal teacher evaluation and be done with it :o) 

Here's a short video I made using Animoto to show you the fun we had :o)


Each student was able to complete the project in one morning and seemed to enjoy the process. We had some great laughs as new skills were learned :o) I'm looking forward to teaching again!

Monday, June 30, 2014

Little Lone Star and other June Adventures

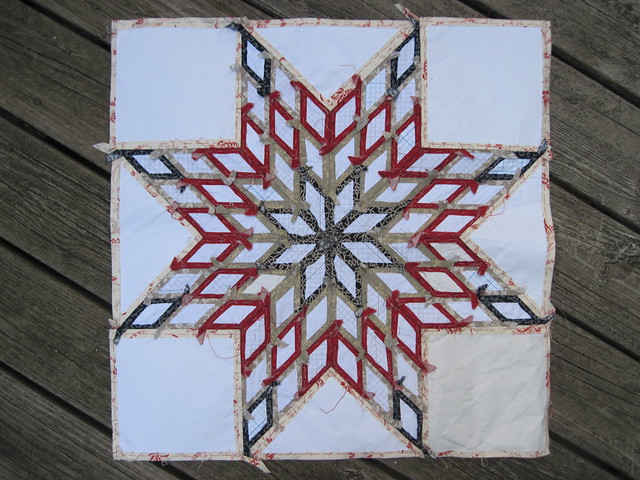
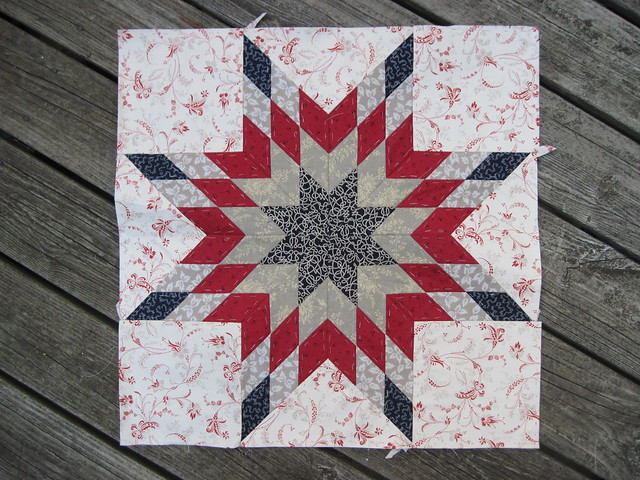
June has been a busy month with the school year drawing to a close and a much anticipated trip to New England. I was not sure just how much time I'd be able to devote to sewing so I made sure I set my June ALYoF (A Lovely Year of Finishes) goal very do-able. Previously I'd stitched together a little lone star using English paper piecing, however it sat for more than a year waiting for the background pieces to be attached. So, my goal for June was to get the background attached so the star would be finished.

Little Lone Star 

Now I love it more than ever. Quite a while ago I purchased a half yard of the Etchings print by 3 Sisters just to stash. As I was looking through my fabrics for background for this patriotic lone star it stood out as the perfect choice. I'm so happy to be using this lovely fabric on something I really like :o) I'm not sure what the next step will be for this little lone star...will I just leave it this size and turn it into a wall hanging, or will more be added? I'm going to hang it on my design wall and look at it for awhile to see where inspiration leads.

Little Lone Star 

I always think it's fun to see what the back of a quilt top looks like, so here's how the back of Little Lone Star looks. The paper templates are still basted in...I have to admit I like the back as much as the front! I'm linking this post up to the June Finishes Party over at Sew Bittersweet Designs.

So, what else have I been doing this month? I'm so glad you asked because I have a couple fun things to share :o) 

Charley Harper & Jane Market Bag

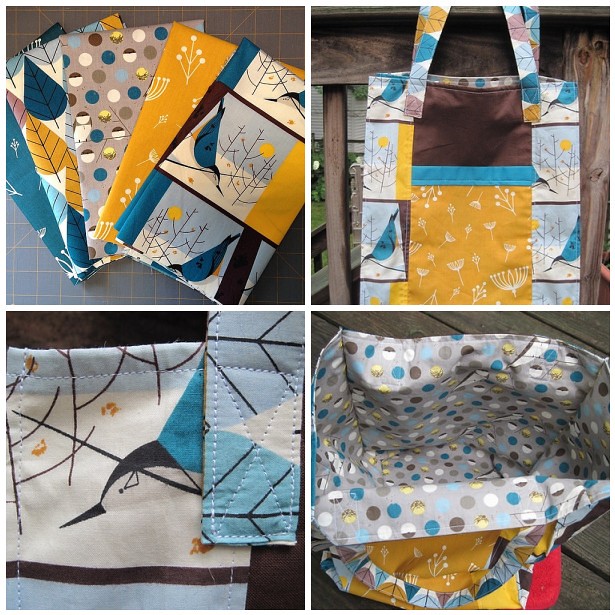
I have a dear aunt & uncle who are so special to me and they enjoy birding. So, b
ack in January I bought this sweet bundle of Charley Harper organic cotton fabric thinking these prints would make a super fun Jane Market Bag. One of my favorite "happy accidents" is the little Nuthatch peaking out from under the strap :o) If you've never made one of these bags I absolutely give it high scores for a well written, great pattern. There are a lot of options for adding custom touches, too. I like to top stitch the seams and add a strip of trim fabric across the top of the pockets. I also added featherweight interfacing to both the straps and the lining. The pattern does not call for interfacing, but I like the bit of structure it adds. On a previous bag I used a heavyweight (Pellon 809) interfacing which made the bag stand on it's own. 

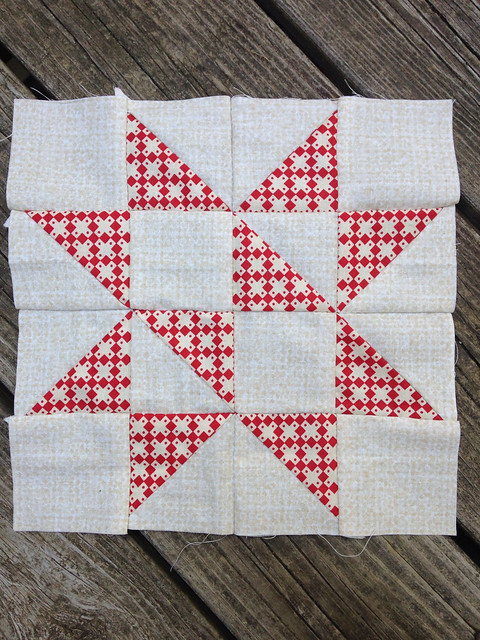
Before leaving on my trip to New England I prepped a couple of hand work projects to take along for quiet moments here and there. I've made some progress on the hand stitched Flickering Stars pillow. 


image
2010 Issue of Sew Scrappy, Volume 1

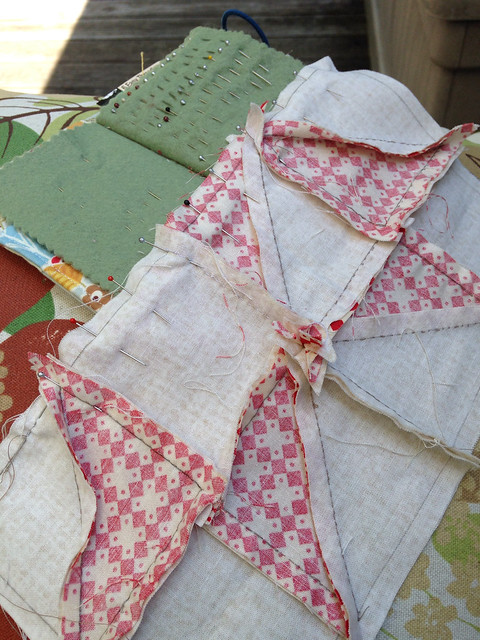
This is the first of four stars. Again, I think it is so informative to see what the back looks like so here's a picture of this block being sewn together.


image

I grow to love hand sewing more with each new project. It is so relaxing and not at all hard to be precise in matching up star points and seams. In this picture you can see the pencil lines used to mark the stitching lines. Accurate pinning on these lines is the key. I learned a lot about hand piecing from one of my students at school ;o) She was in 7th grade and had a lot of experience with hand piecing. She explained how to stitch all the way around the seam allowances when joining rows together - it works beautifully!

June was a productive month in the sewing room. I'd love to hear about what you've been working on :o) 

Saturday, June 14, 2014

Summer handwork {sewing & crochet}

Something about summer just makes me want to do handwork. Whether it's sewing or crochet it's just so relaxing to have a portable project to take outside. Last week I reached into my unfinished projects and pulled out my English paper pieced Lone Star and got started with adding the background fabric. I knew it wouldn't take me very long to get it done, and in fact it's almost finished. I'm getting ready to take a trip and have been searching for something to take with me for some down time. So...I guess I'll just have to start a new hand piecing project to take along...darn :o)

IMG_2617

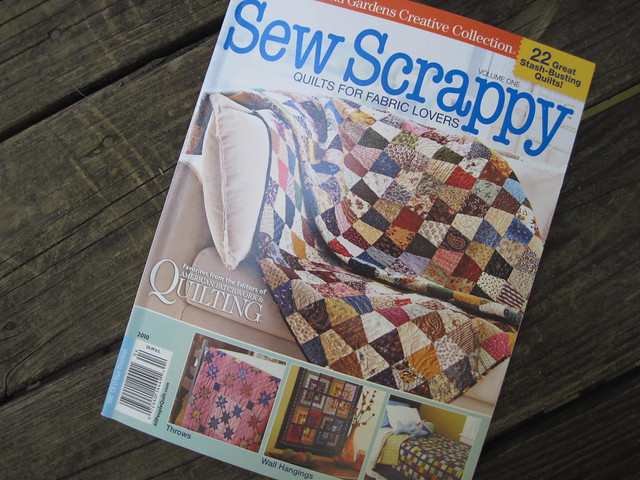
A couple years ago I bought this magazine, Sew Scrappy, by Better Homes & Gardens. I've looked through it many times - there are some really great scrap quilts in it. I've had my eye on a few of them...just waiting for the right "need" to come along :o)

IMG_2615

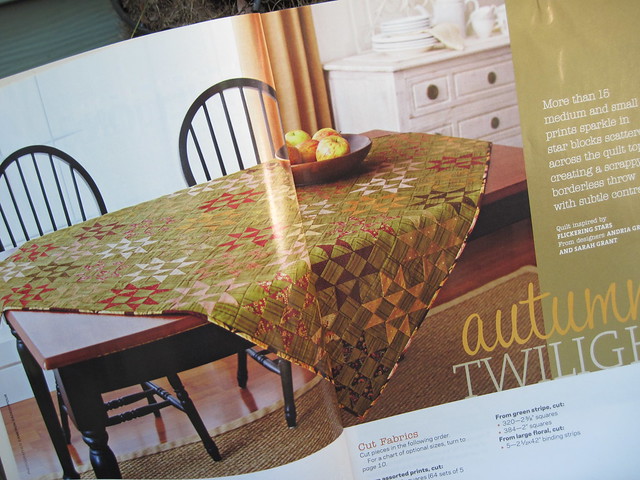
This quilt, Autumn Twilight, really caught my eye! I've always been drawn to stars. I don't need a quilt, but I do need new covers for the pillows on our couch. The current covers fell victim to a teething puppy quite a while ago...we've just been living with them. I'm thinking four stars per side will do nicely for new covers. 

IMG_2612

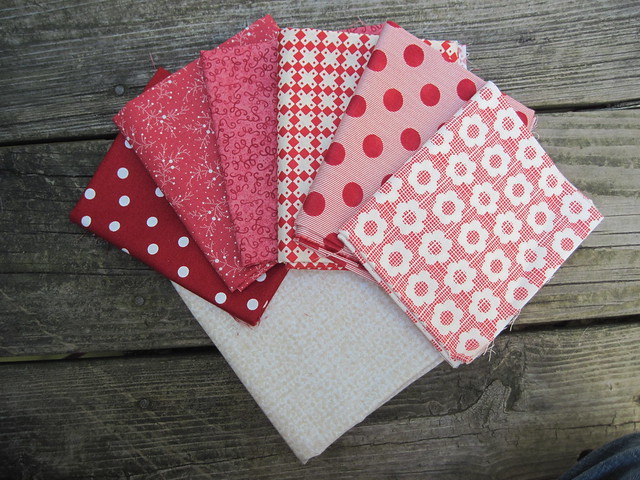
Temptation is always there to go out and buy new supplies, but I've got more than enough fabric to meet the needs of most any small project so I've reaching into my stash instead. My plan is to go with an assortment of red stars {the center one with the curling ribbons may not make the cut} and use the low volume cream for the background fabric. 

IMG_2616

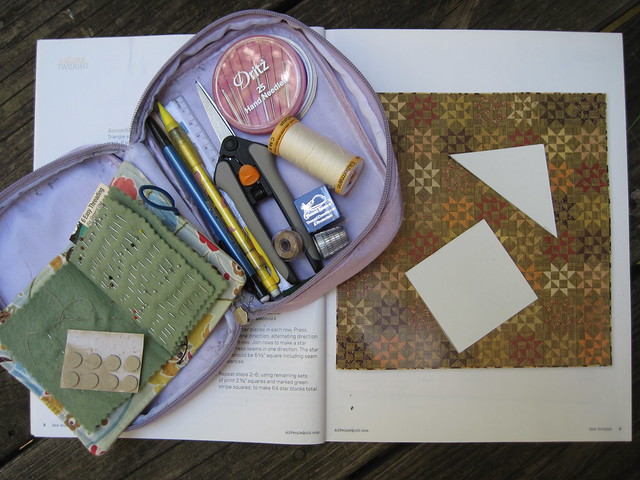
This is my little hand sewing kit. It's all stocked up ready to begin the pillow covers. I made the square and triangle templates from scraps of cardboard I keep on hand. The pattern in the magazine calls for 6" finished blocks, but I resized my hand stitched blocks to finish at 10" in order to fit the 20" couch pillows. 


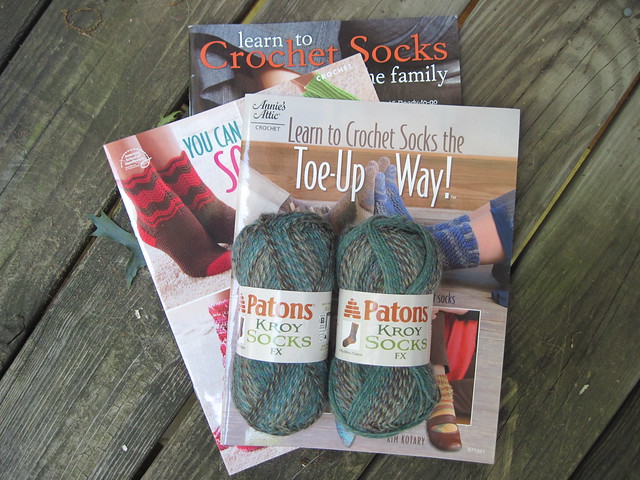
Getting ready for some sock crocheting

I believe I'll also take along some sock yarn to get started with a new pair of socks. Ever since I made these mean-green hunting socks for my brother-in-law I've been wanting to make a pair like them for myself. I like the toe section from one pattern, and the heel section from another pattern. For the foot and ankle I'll probably follow what I made up for my brother-in-law's socks. 

I do believe that between these two projects I'll have enough handwork to last me through a summer of enjoying time outside on the deck. How about you? Do you like to fill your summer with any handwork projects? If so, I'd love to hear about them :o)

Tuesday, March 25, 2014

March Finish - A Lovely Year of Finishes

Well March certainly breezed right on by! I'm happy to say that as quickly as it went by I was still able to complete my March goal for ALYoF. My mini was No. 104 in the link-up party :o)


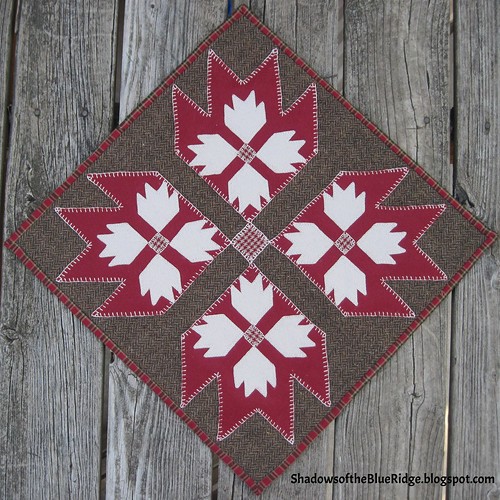
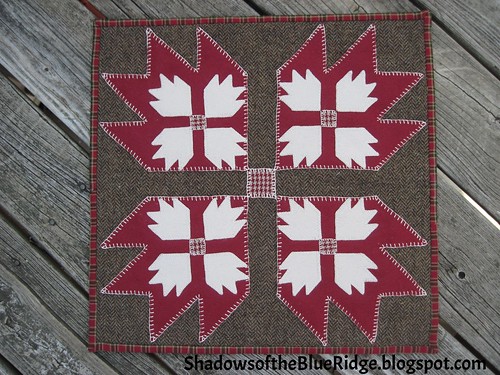
Nested Bear Paws
Nested Bear Paws ~ Wool Felt Wall Hanging
I just love how this turned out...the colors, the rich texture, the warm vibe it gives off. As I mentioned in my March goal post this is a special little wall hanging: About three years ago we fulfilled one of my husband's life dreams and purchased land on the side of a mountain...Bear Garden Mountain. This Nested Bear Paws wall hanging is intended to hang in the home we build there. 


Nested Bear Paws


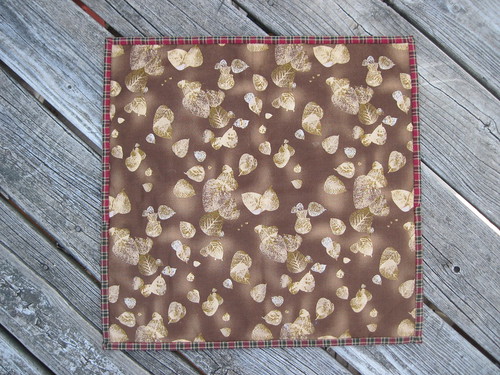
The back is a simple leaf print to match the natural, earthy feel of the front. The binding is one of my favorite homespuns..a red plaid. I machine attached it to the front and hand sewed the back. 


Nested Bear Paws

All in all this is one I am so happy to say is now finished! I love how my participation in A Lovely Year of Finishes is helping me to focus in on completing some of the special projects I've started, but never put the time into finishing. 

I am linking up to the March Finishes Party!  Mine is Entry No. 17!

Happy end of March to you :o)

Tuesday, March 4, 2014

March Goal - A Lovely Year of Finishes

It's time to set my March goal for A Lovely Year of Finishes (ALYoF). Ha! What I really need to set as my goal is completion of our state and federal tax returns...but somehow I don't think it would be very interesting, or wise, to post pictures of that on line :o)

Following my pattern for both January and February my goal this month comes from my work-in-process pile. This is another one I am super excited to get finished!

Nested Bear Paw
I don't really know that this has an official name, but I'm going to call it Nested Bear Paws.
About three years ago we fulfilled one of my husband's life dreams and purchased land on the side of a mountain...Bear Garden Mountain. I thought it would be really great to have a bear paw wall hanging to put in our home...once we build it. When we came home from our real estate closing I started doing a Google search for bear paw quilts. 


Nested Bear Paws

In addition to machine quilting I love to do hand work. Several years ago I started making wool felt penny mats (sometimes called rugs). I dug though my supply of wool and selected the berry and cream felt for the paws and a herringbone weave for the background. I used old file folders to draft a pattern and got out my perle No. 8 cotton to begin blanket stitching. After that first initial burst of excitement it got pushed aside for more pressing projects. 

This seems like the perfect time to pull this out and get it finished. It will actually serve another purpose, as well. In Handworks Club (at school) we told all the girls they now need to select a long-term project to work on for the remainder of the school year. In June we will feature all of their work in a display case by the front office. Since much of my club time is spent trouble-shooting issues for the girls I need my own project to be something that doesn't requiring a great deal of concentration. So blanket stitching bear paws to wool will be perfect!


Bear Paw Wool Wall Hanging

This is what the final layout will look like...I just love the nested bear paws! I'm not sure whether there will be additional boarders of not.  I do believe at some point in time I will tackle this design as a giant quilt block!

Linking up the the March ALYoF Goal Setting Party! Mine is Entry No. 104. Jump over there and have a look at all of the great projects going on...you're sure to find something to inspire you :o)

Happy stitching!

Sunday, September 22, 2013

The art of teaching

Teaching someone to perform a tactile skill is an interesting undertaking. You often don't realize how much is involved...such as learning how to hold fabric as you sew two pieces together...how to thread a needle and not unthread it again every time a stitch is taken...just exactly how is a knot made...and the list goes on. 

I teach in a public middle school (grades 6, 7 & 8 so students are usually between the ages of 11 and 14 years old.) Along with two other teachers I advise and teach an after school Handworks Club. Our goal is to teach a love of making things by hand to our young students. Last year was our first year and we had no idea what to expect. Most of our students had little to no experience doing handwork projects. 

IMG_2297
Class sample made by me.
One of our main projects was hand stitching and quilting 9-patch doll quilts. These little quilts only measure out at 12" square, but it took almost five months for our group of girls to make them. Wow! We learned that there is a lot involved with teaching someone to sew. Maybe making a quilt, even a doll quilt, was a bit much for our beginning sewers.

IMG_2298

This year we are working on simpler projects. The first one is a tapestry bookmark. The purpose of this project is learning how to hold fabric (or felt in this case), tie a knot at the beginning and end of a seam, and do the running stitch. The great thing about this bookmark is that it does not matter how big or small the stitches end up as variety adds to the visual interest. 

IMG_2300

Our next project will be decorating needle books. Again we are working with felt because it is so easy to hold. I went ahead and used my sewing machine to attach a page inside each book and the girls will practice stitching to decorate the front and back cover. Then, they will put the needle book to use holding their class needles.

Stuffed Owl~Handmade
Pattern and tutorial for this little owl can befound here: pinkyhiggs.blogspot.com/2012/04/free-owl-pattern.html
After the needle books we will move on to this sweet little folded owl. It is such an easy pattern with just three seams. The girls will have a lot of fun choosing cute fabrics to make their owls. We have been blessed with fabric donations from members of a local quilt guild and the local quilt shop, The Scrappy Apple. 

It should be a fun hand sewing unit!