Showing posts with label method. Show all posts

Sunday, January 24, 2016

False Starts and the Design Process

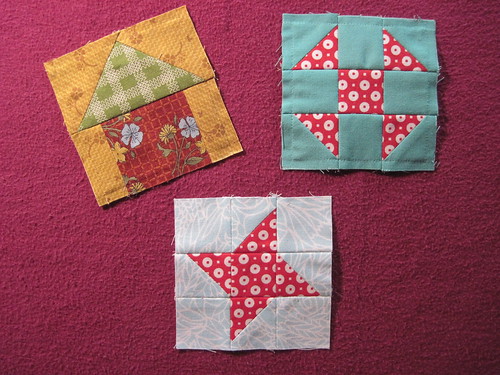
What do these little cuties have in common? They are rejects...all three of them.

IMG_3110
3" Quilt blocks

Last November when I participated in the Quiltmaker's 100 Blocks blog hop for my block, All Points North, I asked readers to leave me a comment with the name of their favorite quilt block. I thought it would be fun to use one of the suggested blocks as a jumping off point for a new design. It was fun to read the suggestions and there was a nice variety of blocks named. I'd never heard of some of them and had fun looking the blocks up online to find pictures.
IMG_3111
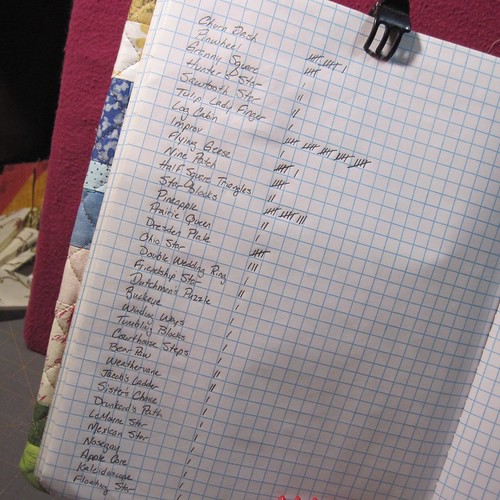
Favorite blocks from my blog readers

As you can see from the list log cabin is the clear winner followed by star blocks and churn dash. Well gosh...it was hard to ignore the fact that the log cabin is so popular. Up to this point my method for designing quilt blocks has been to take a traditional block and find some way to modify it. But really, what could I do to change up a log cabin quilt block? I've already modified a star block (All Points North), and a churn dash (Dashing Geese) so I felt like I should give the log cabin block a try.

For two months I have been sketching and mulling over what I could do. I was just about ready to admit defeat and move on to a second choice when all of a sudden inspiration hit! Funny enough I was taking a shower...what is it about showers that helps to clarify thinking? This has happened to me more than once.

I sketched out a couple different variations of my idea in my sketch book then got to sewing. In the process I made the three little reject blocks up at the top of this post. My dear friend, M, was pulled into the review process for a second set of eyes :o) On the first couple tries either the colors just were not right, or the pattern didn't look the way I thought it would in the finished block. It took a bit of ripping and replacing elements to get everything just right. I also put to good use Leanne's (She Can Quilt) post for how to replace a piece in a completed quilt block. Thank goodness I could refer to this post so I didn't have to start from scratch!

I'm so excited to say I have a block stitched up and ready to send in the mail for possible inclusion in Quiltmaker's 100 Blocks Volume 14 which will come out next November. It will be several months before I hear whether or not it is selected ~ wish me luck :o)

Saturday, January 16, 2016

Quilt as You Go: Assembling the Quilt Top - My Experience and Thoughts

Quilt as You Go (QAYG) really calls for two areas of evaluation if you are considering using it. The first area is simply quilting the individual quilt blocks. I wrote about this stage of the process in my previous blog post. Perhaps the biggest factor to consider with this method of quilt construction is how the blocks will actually be joined together to make the quilt top and how the backing fabric will be incorporated. Looking at the front of a quilt one may not even notice that it is assembled using the QAYG method.

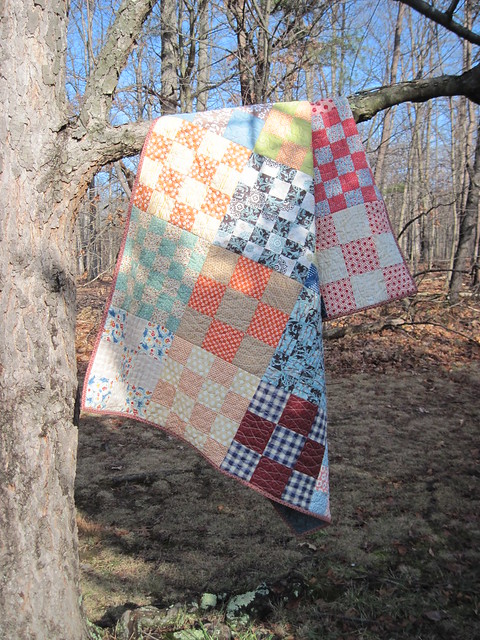
Great Grandmother's Patchwork - a Faith Circle Quilt
Great Grandmother's Quilt - a Quilt as You Go quilt

When I first contemplated using QAYG I did some searching online to see how others have used this method. There are several good tutorials out there with varying degrees of difficulty for assembling the quilt top. Because the quilt I was working on was for do. Good Stitches I also wondered if there was any prohibition against using QAYG. However, as part of my research I discovered that Rachel (Stitched in Color), the CEO of do. Good Stitches, used it for one of the quilts she made as part of the Love Circle of do. Good Stitches. Rachel's method is straightforward - not requiring any fussy sashing to cover the joining of the blocks so I opted to use her method.

Here's an overview of what I did to finish my Great Grandmother's Quilt (be sure to check out Rachel's post if you want the full tutorial).

First I used my rotary cutter to square up all the quilt blocks once they were quilted. I did loose a bit of the overall size due to the different quilt patterns on the various blocks, but having uniform size to the blocks is always a good thing. The next step was simply to sew the blocks together.

Untitled
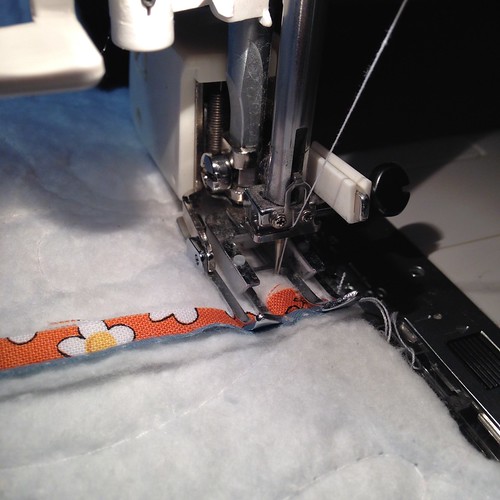
Sewing the quilted blocks together - still no backing fabric


Because the blocks were nicely squared up it was an easy process to sew them together. Next came pressing all the seams.

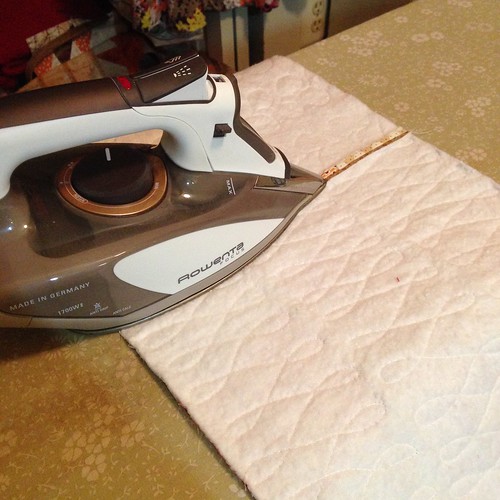
Pressing seams open
Ironing the seams open

Okay, I will admit this was one of my least favorite stages of the assembly process. Generally I enjoy ironing and almost always choose to iron my seams open. I will just come out and say that an iron does not glide enjoyably across batting - there is a certain amount of drag. Also, since I was ironing both fabric and batting it was harder to get a 1/4" seam to want to stay open, but due to the bulk involved it was not an option to press the seams to the side. As a side note: It is very important to use natural (cotton or wool) batting because of the iron directly on the batting when pressing seams open.

Once the top is complete the back is simply added on and you stitch in the ditch along the horizontal and vertical seams to attach it. If you look carefully in the picture below you can see the grid pattern used to attach the quilt backing fabric.


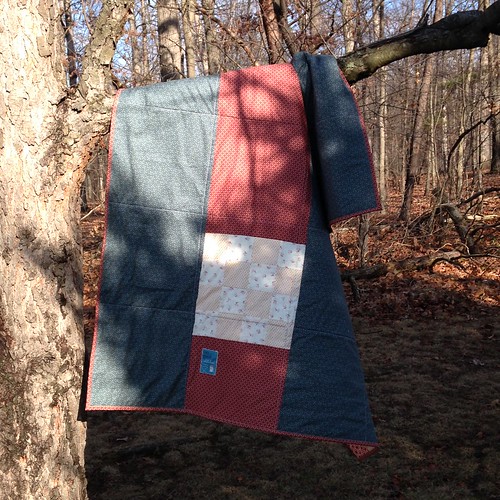
Great Grandmother's Patchwork - a Faith Circle Quilt
This picture shows the stitching that attaches the backing fabric

As you can see it creates a grid that is almost 12" square. Since the batting is securely quilted to the quilt top you don't have to be concerned about this large unquilted area on the quilt back. In her blog post Rachel suggests using zigzag stitching for this stitching in the ditch. I tried that for about one block length and then ripped it out. I could not imagine zigzagging all over this quilt and instead chose to just use straight line stitching. Edited to add: Surprisingly, you really don't notice any bulk from the quilted seams-not on the front or the back of the quilt. This was one area I was concerned about.

Okay, here's my final thoughts. Did I like using the Quilt as You Go method? For the actual quilting of the blocks I loved it! It was so very easy to quilt an individual block instead of wrestling with an entire quilt top. For the attaching of the back? Well, it certainly could not be much easier than this process, but to be honest I am just okay with the way it looks. Often the back of a quilt will show off the pretty quilting better than a busy quilt front. The back also does not get that yummy just-out-of-the-dryer crinkled look without dense quilting. That being said, would I use this method again? Yes, I think so, but it will really depend on who the recipient of the quilt is.

All in all this was a great opportunity to build up my free motion quilting confidence and give a new construction method a try. Next time I may try using one of the sashing methods to join blocks - but we'll see :o)